

No-Knead bread recipes are so easy to make you just don't have a good excuse not to bake homemade bread anymore.
Homemade Bread Recipe
I love making homemade bread. This No-Knead Bread recipe is my Garlic Rosemary Bread recipe converted into a no-knead bread recipe.
In fact, the very first recipe I ever shared when I started this blog back in October of 2009 was for a 30 Minute White Bread recipe.
Looking back at that post I can see that I have come a long way in many ways.
From the photography to the writing and everything in between.
Let's get back to this easy bread recipe because those old pictures are depressing me!
So a few years ago I reworked a bread recipe and came up with the best Rosemary & Garlic Bread recipe.
I love that bread recipe and have made it many times over the years.
I decided that I would try to convert that rosemary and garlic bread recipe into a No-Knead Bread recipe.
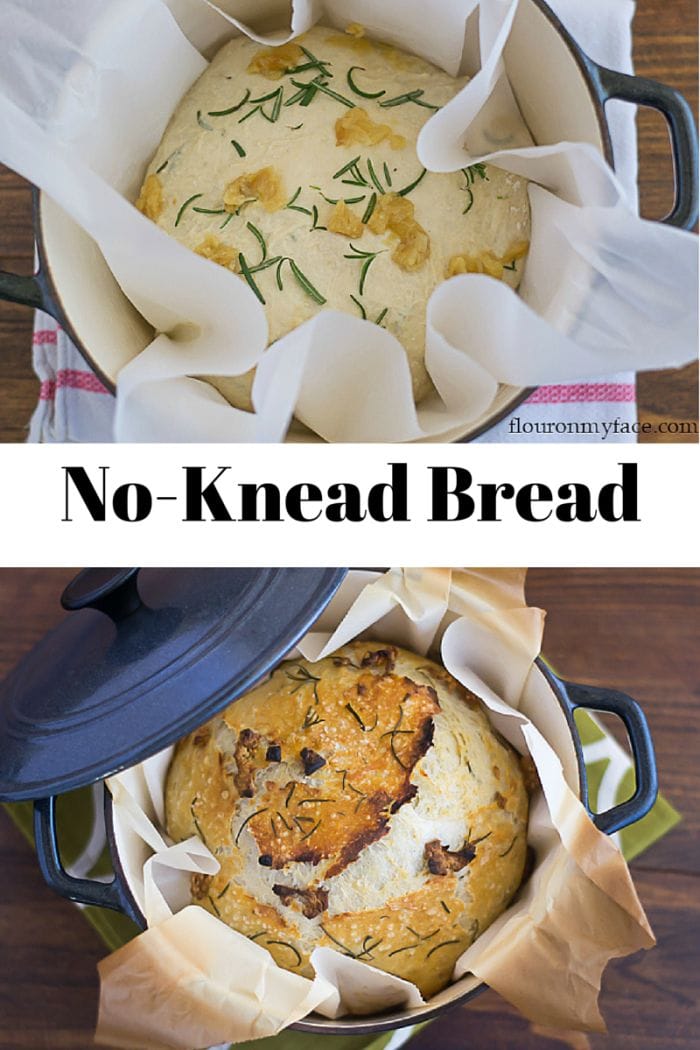
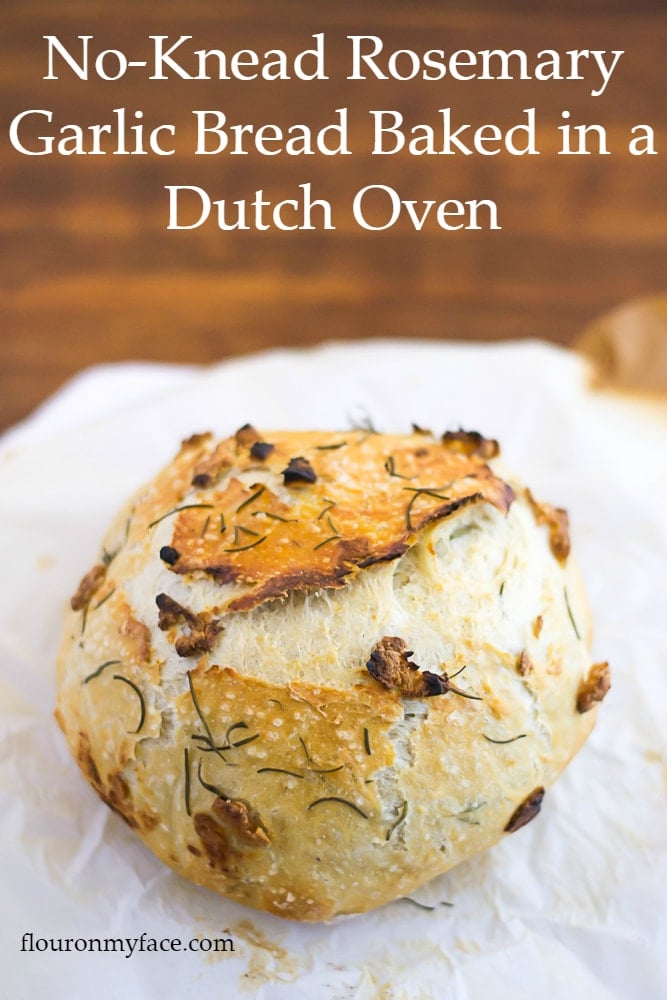
With just a few adjustments to the original recipe, I converted it to this No-Knead Garlic and Rosemary Bread baked in an (affiliate) dutch oven.

This was the first time I've ever baked bread in a dutch oven. I loved it.
The bread has a beautiful golden crust and the crumb is perfect.
I think this is my new favorite bread recipe.
It is so easy to make that anyone....even a first-time bread baker could make this recipe and end up with the best tasting homemade bread they ever dreamed of making.
Before you get started you will need to roast some fresh garlic.
You can see how I do it in my How to Make Perfect Roasted Garlic directions.
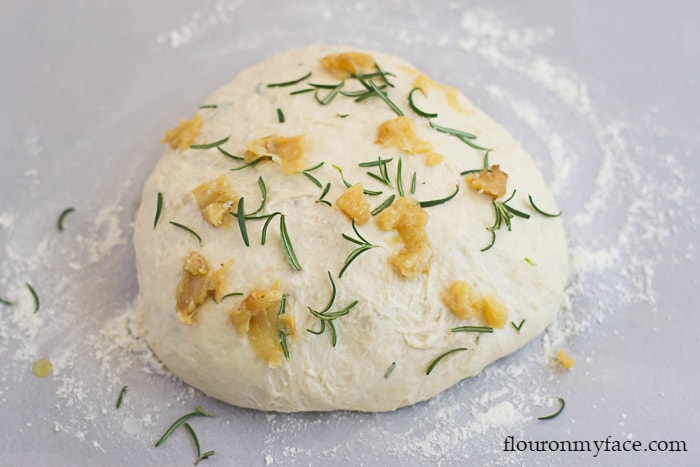
We are going to be adding some roasted garlic and fresh rosemary to the bread dough.
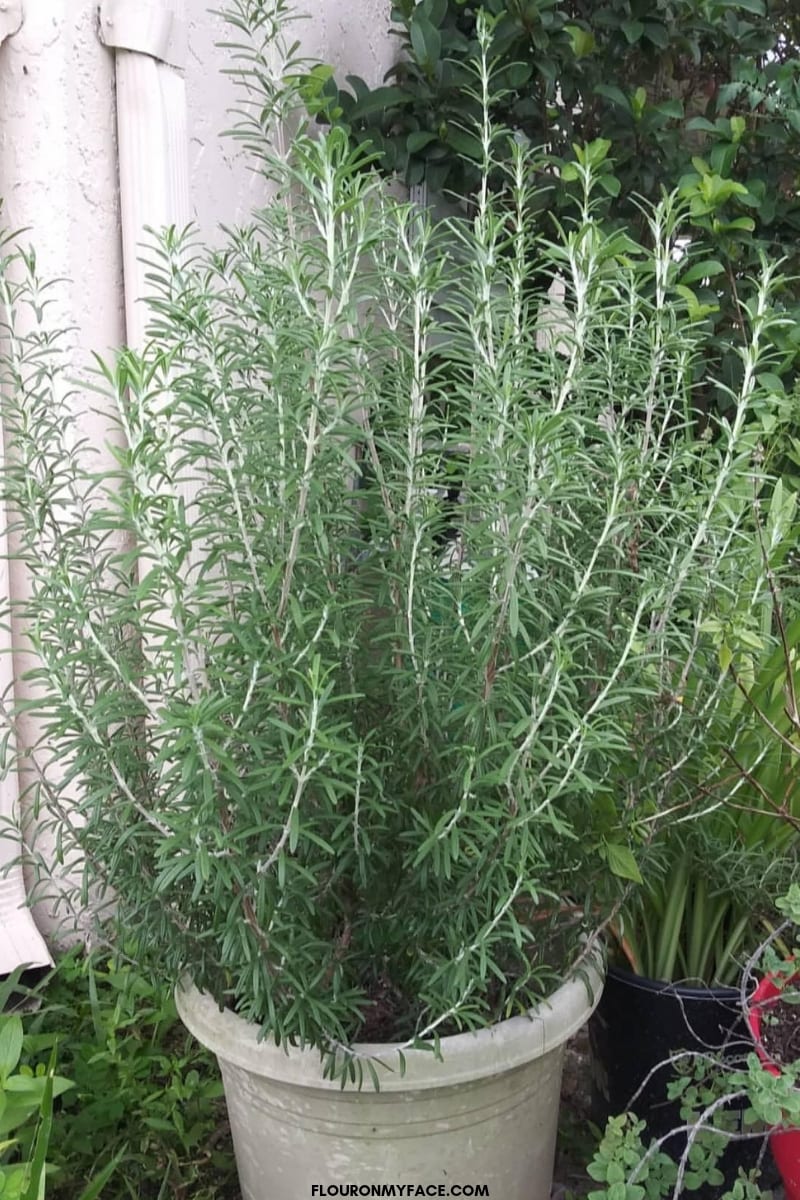
Growing Fresh Rosemary
I am using fresh rosemary from my rosemary plant. I love growing fresh rosemary and using it in my cooking.
I am lucky that I live in Florida and can harvest fresh rosemary all year long to use in my cooking.
If I had to choose only one herb to grow it would be rosemary.
If you do not have any fresh rosemary growing in your garden to use you can soak dried rosemary in a little bit of olive oil to bring it back to life.
I don't like using dried rosemary for recipes like this because I feel like I am chewing on dried foliage when I eat it.
But if that is what you have you can soak the dried rosemary in olive oil and it will soften it. You'll need to soak it an hour or more so do that as soon as possible and just leave the rosemary in the olive oil until you need to use it for the recipe.
We will also be sprinkling the top of the no-knead bread with more fresh rosemary and some of the roasted garlic.
Once the beautiful loaf of No-Knead bread is ready to bake we will be putting it into a hot Dutch Oven to bake.
How long should you let bread cool before slicing?
And when the freshly baked bread comes out of the oven you will have to restrain yourself.
Even though you may be dreaming about a thick slice of this crazy delicious Rosemary Garlic No-Knead Bread spread with butter you must wait at least an hour for it to cool before you slice into it.
This is when the homemade bread magic to happens.
The cooling is a very critical stage when the gluten is relaxing. If cut too soon, you could end up with a very gooey tasting loaf of bread.
Believe me, it makes a huge difference in the way the bread slices, appearance, and taste.
Campfire Recipes
No-Knead Bread recipes like this Rosemary Garlic Bread make a perfect campfire recipe.
If you are looking for gourmet campfire recipes this is an amazing bread recipe to bake on your next camping trip.
Helpful Tips to Make No-Knead Bread
- You will need a dutch oven or cast iron pot to bake this no-knead bread recipe in the oven or over a campfire.
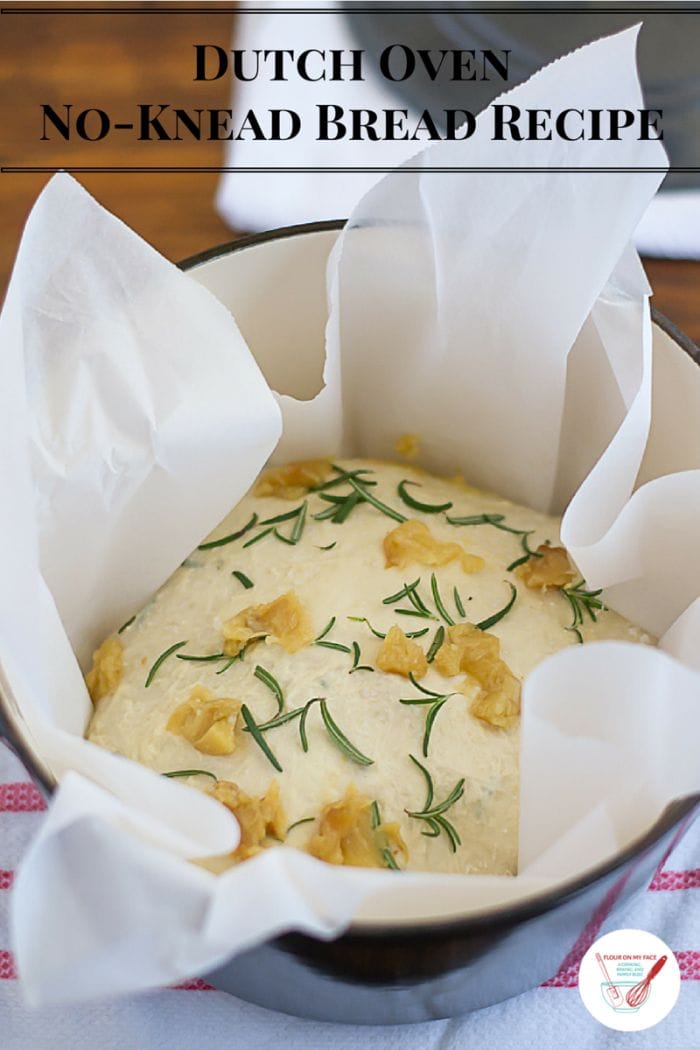
- Lining the dutch oven or cast iron pot with parchment paper makes it easy to remove from the pan and keeps the bottom from over browning.
- If you don't have fresh rosemary available you can use dried rosemary that has been soaked in olive oil to rehydrate it.
Helpful Products to Make No-Knead Bread
(affiliate links)
- Dutch Oven: Must have for baking No-Knead Bread
- Lodge Camp Dutch Oven: The best brand of cast iron out there unless you own some vintage cast iron.
- Original Danish Dough Hook: Makes quick work of mixing dry bread ingredients.
- Parchment Paper: Prevents over browning and makes removing the bread from the hot dutch oven or cast iron pot easy and safe.
Garlic & Rosemary Bread Recipe Ingredients
- 3 ½ cups all-purpose flour
- 1 envelope of rapid rise yeast
- 1 teaspoon coarse sea salt
- 1 tablespoon fresh rosemary chopped finely
- A half cup of roasted garlic, divided
- 1 ½ cups warm water
Directions to make bread
- Before mixing the dough prepare the roasted garlic by easy step by step recipe for how to make roasted garlic.
- In a large bowl mix the all-purpose flour, yeast, sea salt, rosemary and half of the roasted garlic to combine. Add the warm water to the bowl and mix until all of the flour has been moistened and the rosemary and garlic are evenly distributed throughout the dough.
- Cover with plastic wrap and set on the counter overnight to rise. (see notes)
- The dough can be placed in the refrigerator to slowly rise for 12 - 18 hours before baking if needed.
To Bake No Knead Bread
- Preheat the oven to 450 degrees. Place your dutch oven with the lid on inside the preheated oven for at least 15 minutes while preparing the bread for baking.
- Sprinkle some flour on a piece of parchment paper that is just a few inches wider than the bowl you have the dough rising in.
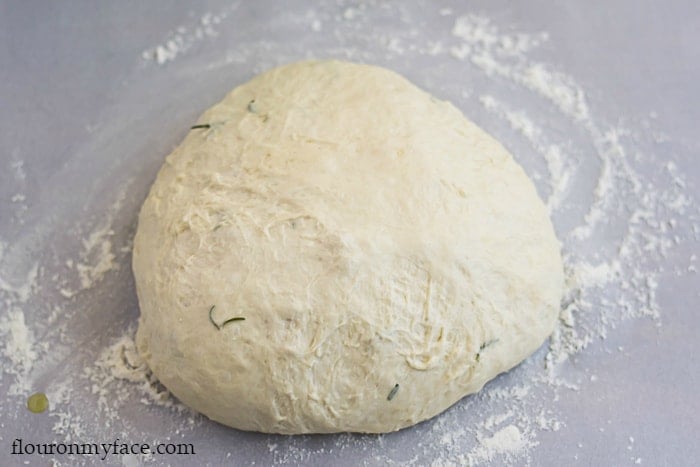
- Coat your hands with olive oil and punch the dough down.
- Pick the dough up and pull outer edges of dough around to the bottom, pulling it tightly to form a ball.
- Place the dough onto the floured parchment paper.
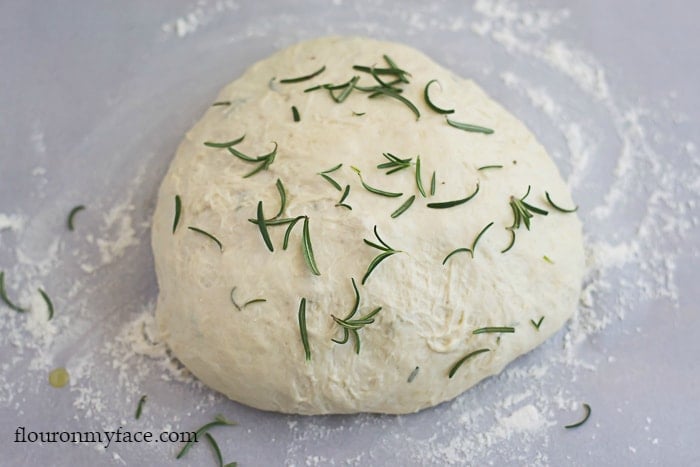
- Sprinkle the top of the dough with more fresh rosemary if desired.
- Roughly chop the remaining roasted garlic and dot the top of the dough with it.
- Carefully remove the hot dutch oven from the oven placing it on a hot pad or towel. Using a pot holder remove the lid placing it onto a hot pad or towel.
- Pick the bread dough up by the corners of the parchment paper and place it into the hot dutch oven.
- Carefully pull the corners of the parchment paper down around the outside of the hot dutch oven and place the hot lid back on.
- Carefully pick up the hot dutch oven and return it into the oven.
- Bake for 35 minutes and remove the lid and continue baking for 10 minutes until golden brown.
- Carefully remove the dutch oven from the oven and remove the lid.
- Carefully lift the baked bread out of the dutch oven by the corners of the parchment paper with pot holders.
- Place the bread on a cooling rack.
- Cool, at least, one hour before cutting.
More Recipes you'll love

If you are an adventurous type and have dreamed about making sourdough bread check out my How To Make Sourdough Starter post.
Email questions or recipe requests to flouronmyface@gmail.com. Follow me on Pinterest, YouTube, Instagram and Facebook.
No Knead Bread Recipe
Equipment
- 1 Dutch Oven
Ingredients
- 3 ½ cups all-purpose unbleached flour
- 1 envelope rapid rise yeast
- 1 teaspoon coarse sea salt
- 1 ½ cups warm water
- 1 tablespoon fresh rosemary
- ½ cup roasted garlic (divided)
Instructions
- Before mixing the dough make the roasted garlic.
Mix the dough
- In a large bowl mix all of the ingredients and half of the roasted garlic.
- Cover with plastic wrap and set on the counter overnight to rise.
- The dough can be placed in the refrigerator to rise for 12 - 18 hours before baking if needed.
To Bake No Knead Bread
- Preheat the oven to 450 degrees. Place your dutch oven with the lid on inside the preheated oven for at least 15 minutes while preparing the bread for baking.
- Sprinkle some flour on a piece of parchment paper that is just a few inches wider than the bowl you have the dough rising in.
- Coat your hands with olive oil and punch the dough down.
- Pick the dough up and pull outer edges of dough around to the bottom, pulling it tightly to form a ball.
- Place the dough onto the floured parchment paper.
- Sprinkle the top of the dough with more fresh rosemary if desired.
- Roughly chop the remaining roasted garlic and dot the top of the dough with it.
- Carefully remove the hot dutch oven from the oven placing it on a hot pad or towel. Using a pot holder remove the lid placing it onto a hot pad or towel.
- Pick the bread dough up by the corners of the parchment paper and place it into the hot dutch oven.
- Carefully pull the corners of the parchment paper down around the outside of the hot dutch oven and place the hot lid back on.
- Carefully pick up the hot dutch oven and return it into the oven.
- Bake for 35 minutes and remove the lid and continue baking for 10 minutes until golden brown.
- Carefully remove the dutch oven from the oven and remove the lid.
- Carefully lift the baked bread out of the dutch oven by the corners of the parchment paper with pot holders.
- Place the bread on a cooling rack.
- Cool, at least, one hour before cutting.
Recipe Expert Tips
You have a couple of options when rising the dough
- You can mix the no-knead dough the night before baking and allow it to rise on the counter to bake first thing in the morning.
- You can allow the dough to rise slowly in the refrigerator for 12 to 18 hours before baking. This will give a sourdough flavor to the bread.
- In the case of campfire cooking you can allow the dough to rise on the counter or in the refrigerator. Punch the dough down and form into a ball. Place the dough ball in a container or plastic bag. Keep the bread dough chilled in a cooler before baking. The dough will need to be punched down and reshaped into a ball before placing in the dutch oven and cooked over the fire.


Judy Doan
This bread sounds delicious! I am curious about the "1 envelope of yeast". When I make no-knead bread most recipes call for 1 tsp or a tad more. One envelope (8g) seems like a lot for 3.5c of flour. I want to make it but just checking.
Arlene Mobley
Hi Judy
The yeast amount is correct. Thanks, and enjoy!
SHARYN
Can I use this recipe to make regular white bread baked in a loaf pan?
Arlene Mobley
Hi Sharyn
This type of bread can be baked on a pizza stone or a cookie sheet. I'm not sure how it would turn out baked in a bread pan. This amount of ingredients for this loaf size would be too much for a regular size loaf pan and not enough for 2 loaves of bread.
You can form the loaf into a round and let it rise on a cookie sheet. Then bake it in the oven. You would need extra rising time when you bake it on a sheet because the heated dutch oven causes the bread to rise. Here is the link to a similar recipe baked on a sheet pan. https://flouronmyface.com/garlic-rosemary-bread-ii/
Dawn
I have a ton of sage that grows in my garden and decided to substitute the rosemary for sage last fall. Let’s just say it was a major hit with friends and family. Thank you SO much for this easy, delicious recipe! ?
Arlene Mobley
Dawn
I bet the sage tasted amazing with this bread recipe. So glad you enjoyed the recipe!
Sarah
I just made this and OMG! So freaking delicious! I had to add an extra 1/2 cup of water because it was really dry but other than I followed the directions to the T and it turned out perfectly! This was my first attempt at bread and it turned out so well. Really easy and delicious!
Arlene Mobley
Sarah I am so happy you loved the recipe. It is one of my favorite bread recipes!
Noor
This might be the first Dutch-oven-style-receipe I am going to try in one of my cast-iron pots. I want to take them with me on our camping trips (to cook on charcoal), but first I will practice in the oven...
However, I can't make out how much space the dough needs for rising in the oven; does it gets much biggert?
Can you explain how to pick the right size (nearly a ful pot of doug, just halfful, etc)?
Kind regards
Noor
Arlene Mobley
Noor
The dough recipe for this No-Knead Bread recipe makes one loaf of bread. It was baked in a 4 quart dutch oven. You could probably make 2 smaller loaves of bread if your cooking in over a camping fire if you need to. The dough fit perfectly and had no problem rising.
Margo Karda
I now have baked this bread a number of times adding different seeds it is fantastic. So easy and I love using the Dutch Oven
Thank you.
Arlene Mobley
Margo
So glad to hear you enjoy the recipe and are making it your own!
Amanda
Hello, how many hours should it sit in the counter before you can start the baking process? Is it faster to put it in the refrigerator? Thank you!
Arlene Mobley
Amanda
The temperature of your home will play a big part in how long it takes the pizza dough to rise. If your house is very cold it could take 4-5 hours. You can speed the process up by turning the light on in your oven and putting the bowl of dough in the oven to rise. It can take about 2 hours in the oven this way. Do not turn the oven on for this process.
Amanda
Thank you so much!! It was a huge success and it was beyond delicious!! You were right, it took everything in me not to slice into it earlier during the cooling process. I paired the bread with The Pioneer Woman's Braised Short Ribs and Parmesan Polenta. A slice just scooped up the goodness. Thank you again for your quick response, I sincerely appreciate it.
Arlene Mobley
Amanda
I'm so happy to hear you enjoyed the recipe! It is one of my favorites.
Irene Lim
Hi Arlene,
I will like to try out this recipe in my frenh oven, do you need to oil the oven before preheating it?
Thanks.
Arlene Mobley
Irene
When I cooked the bread in my dutch oven I lined it with parchment paper so no oil was used. If you don't have parchment paper you can oil the french oven with olive oil. Olive oil with give the loaf a nice crunchy bottom.
Marie
Omgosh, this looks incredible! I love bread! Now I just need to invest in a dutch oven! Thanks for sharing at Merry Monday this week!
Arlene Mobley
Hi Marie
Thank you. Dutch ovens can be pricey. I picked mine up at a thrift store.
Morgan @ Morgan Manages Mommyhood
This looks AMAZING. Roasted garlic is one of my favorite things ever, and I love that this is no knead!
Arlene Mobley
Morgan
Thank you. I love roasted garlic and usually make double whenever I make it just so I can snack on it!