

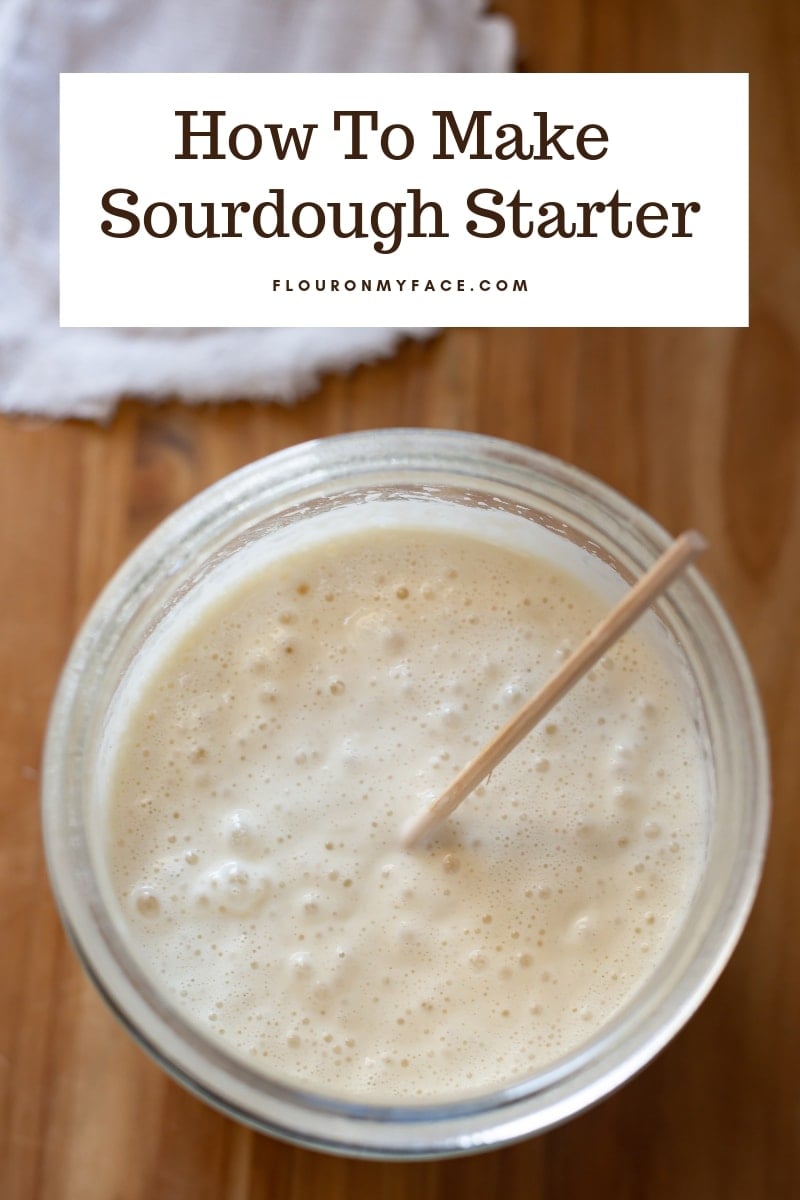
Learning How To Make a Sourdough starter might be a bit scary to some people. But there is no need to be frightened of a little flour and water. You can bake some of the best bread recipes once you have an active sourdough starter.
That's right all you need is flour and water to make a sourdough starter that you can keep going for years and years. You'll be able to bake your favorite sourdough bread recipes any time you like.
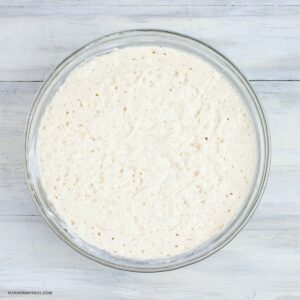
At the time of this writing, my sourdough starter is 2 years old.

Sourdough Starter
I set out to write this blog post on making a sourdough starter about three weeks ago. I sent out a tweet mentioning sourdough starter. Some of my twitter followers responded.
They were very interested in learning how to make a starter. I wasn't surprised. Sourdough bread is very popular. Some people have great success. Others do not.
Sourdough baking can be a lot of trial and error.
To start with some people never get past getting a decent sourdough starter going.
Others have no problem at all. They get their starter going and they bake perfectly risen sourdough bread.
Then they post beautiful pictures of those perfect loaves and along comes someone like me or even you.
You and I want to bake some of those perfectly risen, beautifully formed loaves of bread also.
But our first attempt at a starter is a total failure. Maybe you or I try again. I know I did. It actually took me 3 or 4 attempts to get my sourdough starter going.
If it happened to me I figured it probably happened to plenty of you also.
So I decided to just give you the how-to version of starting a sourdough starter.
So here we go. I wish you luck in your sourdough starter adventure should you decided to take it.
FREE Sourdough Starter Feeding Tracker
For enthusiasts eager to delve into the world of sourdough breads, keeping a sourdough starter alive and active is fundamental.
To help maintain your starter's health and track its feeding schedule, our FREE Sourdough Starter Feeding Tracker is an essential tool.
How to Make Sourdough Starter
What you will need:
There are only three things that you will need to grow your own sourdough starter.
- Flour
- Water, distilled or untreated
- Patience
The first two ingredients are fairly easy to come by.
The third is a little harder to have but it will only take 3 days to get a sourdough starter going.
Once it is going you're good to go. It will live for a very long time as long as you occasionally feed it. Whether you're going to be baking with it or not it will need to be fed at least once a month.
I bake with mine about once a month. The rest of the time it lives in the refrigerator. Sometimes I pull the container out and give it a feeding. Other times I only feed it right before I plan to bake with it.
I've gone a month or two without a feeding and it always comes back to life the minute I stir a bit of flour and water in. Sourdough starter is very forgiving.
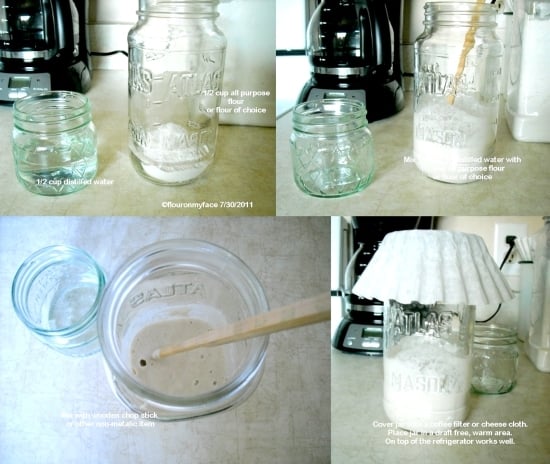
Sourdough Starter Day One
Photo 1 & 2: Add a ½ cup of distilled or non-chlorinated water to a ½ cup of flour.
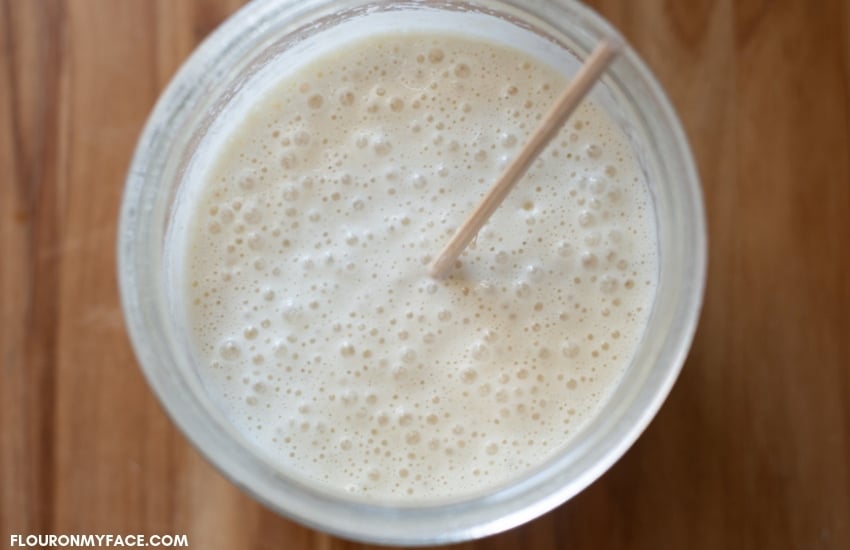
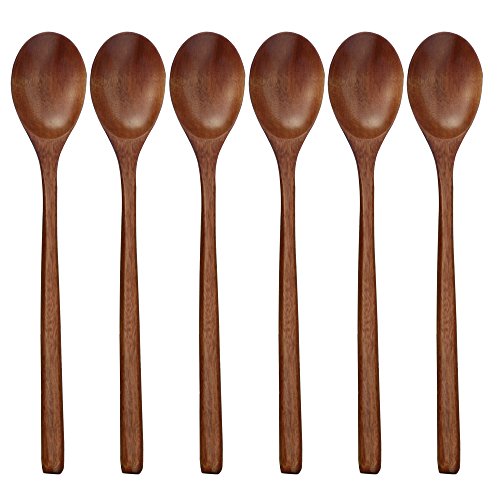
Photo 3: Stir with a wooden chopstick or other non-metallic items.
Photo 4: Cover the jar with a coffee filter or a piece of cheesecloth. You do not want to cover your starter with an airtight cover. You may also leave it uncovered all day then cover it overnight.
Keep your container in a warm area of your home. You don't want cool air from an air conditioner duct to blowing down on it. You can put it on top of a warm appliance like the refrigerator.
Sourdough Starter Day Two

First thing in the morning feed your starter 1 tablespoon of flour and 1 tablespoon of water. 4 or 5 times throughout the day feed your starter with the tablespoon ratio.
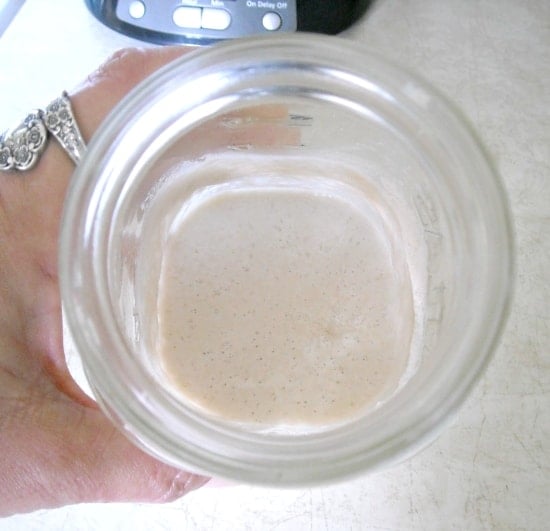
This is about 2 hours after the first feeding on the 2nd day. See the bubbles forming? Already this sourdough starter is living and breathing.
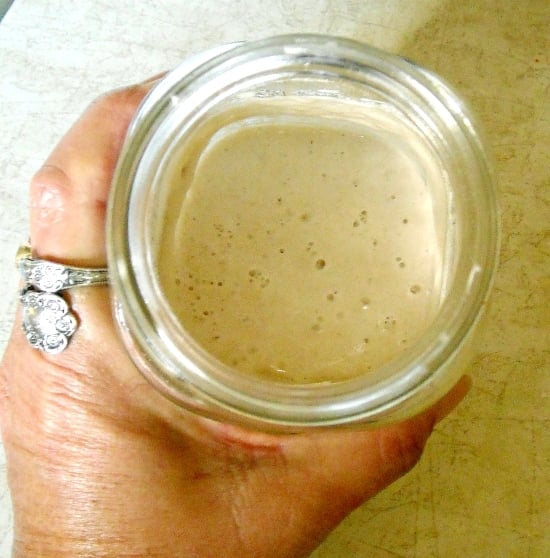
Sourdough Starter Day 3
Feed it ¼ or ⅓ cup of flour and the same amount of water so you have a good amount of sourdough.
Most sourdough recipes call for 1 - 2 cups of starter. You want to have some starter left over.
On the third day continue to feed it throughout the day. If you plan to bake with your sourdough starter right away increase the amount of flour per feeding so you will have about 2 cups of starter.
After using the amount for your recipe feed the remaining starter ½ cup of flour and a ½ cup of water to start building the amount of starter back up.
You can put it in the refrigerator about an hour after that feeding.
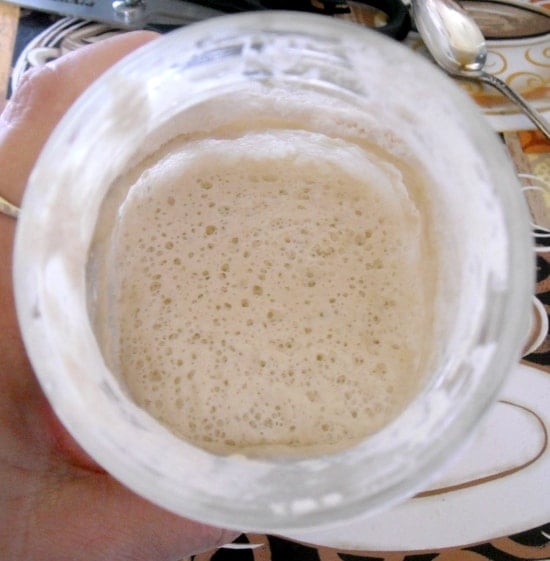
Three days of feeding a new sourdough starter. Sourdough starter success!
The type of flour you use will make a difference in how fast your starter develops.
I was using King Arthur unbleached all-purpose flour.
If you're using a rye or whole wheat flour your starter may look different and will smell different then a starter using all-purpose flour.
If a layer of liquid develops overnight in your container of starter this is what's know as hooch. Some people stir it in but I pour it off. It doesn't matter either way.
Sourdough Starter Recipes
One of my favorite recipes to use with my starter is a recipe for a Sourdough Focaccia I found a few years ago.
It is so good that I will forever keep a batch of starter going just so I can bake this focaccia.
Another great sourdough recipe is this recipe for Sourdough Waffles from King Arthur
Helpful Sourdough Starter Tools
Using the right tools is just as important as using the right ingredients. Make sure your recipes turn out perfect every time.


Print the How To Make Sourdough Starter recipe below

Email questions or recipe requests to flouronmyface@gmail.com. Follow me on Pinterest, YouTube, Instagram and Facebook.
How to Make A Sourdough Starter
Ingredients
- 2 cups all-purpose flour (divided)
- 2 cups unchlorinated water
Instructions
How To Make Sourdough Starter Day One
- In a clean glass jar place ½ cup of all-purpose flour.
- Pour ½ cup of room temperature unchlorinated water into the jar.
- Stir until combined with a plastic or wooden chopstick.
- Place the coffee filter over the top and secure with a rubber band. Place the jar in a warm spot away from cold air.
- After 4 hours remove the coffee filter and add 2 tablespoons of flour and 1 or 2 tablespoons of water. Add just enough water so you can stir the mixture well.
- Repeat adding the 2 tablespoons of flour and water one more time before going to bed.
How To Make Sourdough Starter Day Two
- In the morning add 2 more tablespoons of flour and enough water to stir well.
- Repeat this step three or four times over the course of day two.
How To Make Sourdough Starter Day Three to Day Seven
- Repeat adding 2 tablespoons of flour and water for the next two days. By the third or fourth day you might see a small amount of liquid form on the top. This is called houch. You can mix the houch in or carefully pour it off.
- You will also begin to see foamy bubbles form on the top of the sourdough starter. Congratulations your sourdough starter is coming to life.
- But wait. Your sourdough starter is not active enough to bake with just yet. Continue to feed the sourdough starter for another 2 to 3 days. You can increase the amount of flour and water ratio if you are in a hurry to bake. The more bubbles you see the more active your sourdough starter is becoming.
- The warmer you keep your growing sourdough starter the faster it will become active.
- Once you see a large number of active bubbles form on the top and in the sourdough starter you can bake. It can take from 3 days to 7 days to grow an active sourdough starter.
How To Store Sourdough Starter
- Once you have an active sourdough starter you can keep it in the refrigerator when you are not baking. Keep a clean coffee filter or piece of cheesecloth over the top of the jar and place it in the refrigerator.
- You can also keep your starter on the counter in a safe place. Keep it covered and feed it once a week.
How To Feed and Activate a Refrigerated Sourdough Starter
- While your starter is in the refrigerator it will go dormant. You can easily bring it back to life by taking the sourdough starter out of the refrigerator and begin feeding it before you plan to bake.
- Feed a refrigerated sourdough starter at least once a month. Take it out of the refrigerator and feed it once or twice throughout the day. Once it shows active bubble return it to the refrigerator.
- Sourdough starter can last years as long as you keep feeding it occasionally.
Baking with a Refrigerated Sourdough Starter
- To bake with a refrigerated sourdough starter take the jar of inactive sourdough starter out of the refrigerator 24 to 48 hours before baking. Begin feeding the dormant sourdough starter 3 or 4 times in a 24 hour period to reactivate it.
- Do not feed the sourdough starter right before using it. Feed it for the last time the night before you plan to bake. A newly fed sourdough starter will need at least 4 hours but can take up to 8 hours to become active enough to back with. The more active and alive to sourdough starter is the less time that can take.
Video
Recipe Expert Tips
Other Supplies Needed
- plastic or wooden chopstick
- cheesecloth or paper coffee filter
- rubberband
How To Make Sourdough Starter Tips
- If you are in a hurry to bake you may increase the amount of flour and water ration to ¼ a cup of flour for each feeding. You will accumulate a large amount of sourdough starter this way.
- You can transfer the starter to a larger container or just pour off the excess starter when your jar starts to get too full.
- The warmer it is the faster your sourdough starter will become active.
- The first few times you bake with your new sourdough starter you may not get much of a rise. Continue to add flour and water to your starter to keep it alive. The older you sourdough starter is the more active it will become.


Penny
Hi - I am a little late to the game, so not sure anyone will see this. I would like to know what kind/size container to use. Thank you.
Arlene Mobley
Hi Penny I use a quart canning jar.
Crystal
I did it! I've always wanted to do this but it seemed complicated, but day 2 and mines bubbling after its feeding. Thank you! 🙂
Arlene Mobley
Crystal
YEAH! I am doing the sourdough starter happy dance!
Angela
I have a starter in the fridge, but have been unsuccessful using it outside of the fridge for baking. Do you have a how to on that? Help this sourdough newbie. Please.
Arlene Mobley
Angela
You need to pull the starter out the day before using it and feed it until it is active. Good luck!
Fiona Rhodes
Thanks for an excellent guide
Cathy
Hi , I'm on day 3 , now what ? Looks good smells sour in a good way. I just feed it 1/2 cup flour, and 1/2 cup water. Is it ready to use ? It said keep feeding through the day. So how many times a day , do i feed it now ? And what amounts now ? Thank you.
Cathy
Arlene Mobley
Cathy
If your sourdough starter is nice and bubbly you can use it on the third day. By the third day I would still be feeding it at least 3 times per day. If you remove a cup of starter to bake with you would replace the same amount of flour and then enough water to mix it in so you can stir it. You don't want it too watery.
Everyone likes their starter a consistency that they prefer. You'll figure out what you like the more you bake with it and take care of it. Keeping your sourdough starter nice and active is the most important thing.
Jodie
I found you on Pinterest. I think this is a 'recipe' I can understand and follow with ease. Thank you. I am now a follower.
Arlene Mobley
Jodie
So glad you found me. Enjoy baking with your sourdough starter!
Tammy
Can I use AP flour?
Arlene Mobley
Yes you can use all purpose flour.