

Easy Personalized Party Favor Ideas
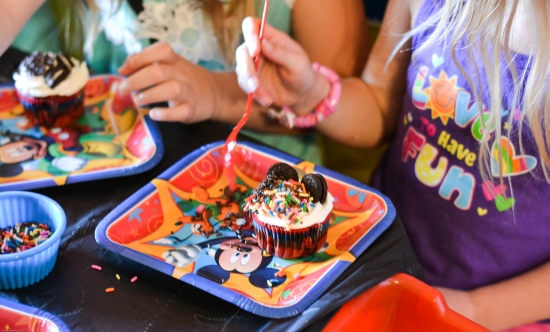
If you are looking for easy party favor ideas I have a couple for you. I made these DIY easy party favors bubbles for a #DisneySide party I hosted over the weekend.
Disclaimer this post is in no way sponsored by Disney or BMS Media who did sponsor the party. I will be sharing our fun #DisneySide party in another post.
Buying party favors can be so expensive and can really add to the cost of a party. Whether it be a Disney themed birthday party or any birthday party you are planning. I like to try to make things myself to cut down on the cost.
Cheap & Easy DIY Party Favor Ideas

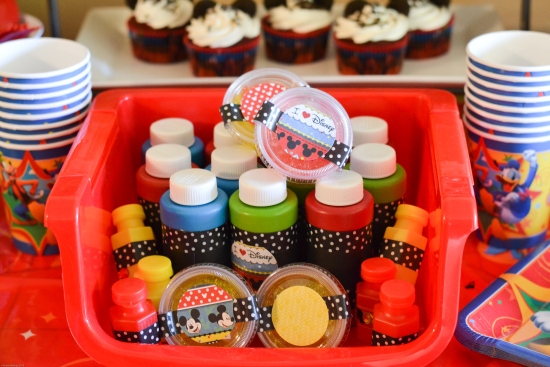
I made two different party favors for the #DisneySide party I hosted.
I wanted some cute goodie bag favors that I knew the kids would love.
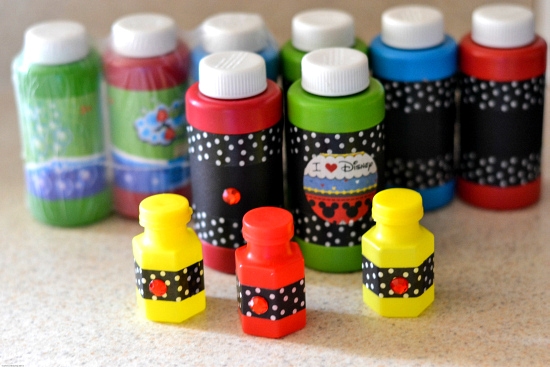
I personalized bubbles that I bought at the dollar tree and party store to match the theme of my party.
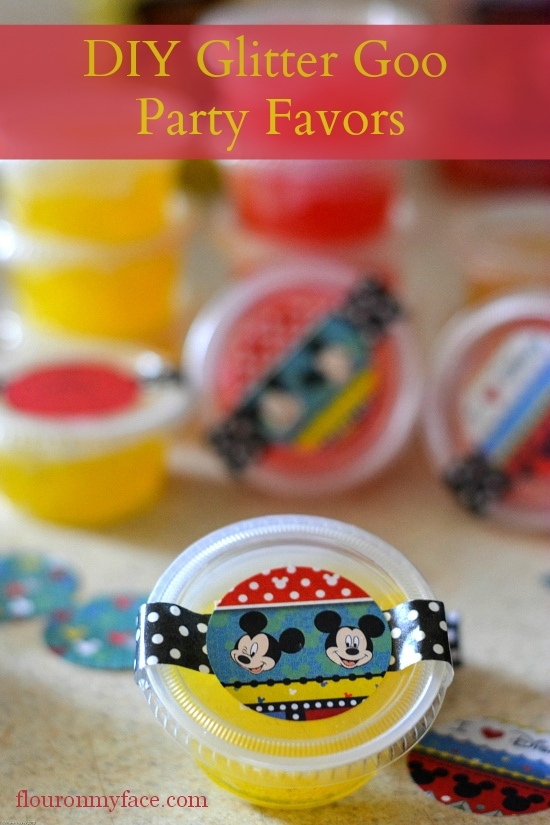
I also made DIY Glitter Goo to go in the goody bags. The kids loved both of the party favors.
Both of these party favors can be made for any party theme you might be hosting just by changing up the colors and design of card stock and washi tape.
12 DIY Personalized Party Favor Bubbles
Why did I make two different types of bubbles for the party? Well.... I started out with the large bottles of bubbles from the Dollar Tree. Originally I planned to have my party at a local park but the weather was iffy with a 30 percent chance of rain so I canceled that idea.
The large bottles of bubbles would have been so much fun for the kids at the park.
To decorate the bubble bottles for my Disney Micky Mouse party theme I planned to peel off the label and then cover the bottle with the card stock.
Normally these labels would peel off no problem and in some cases, they are glued on so badly that they fall off while the kids are playing with them.
Well, the labels on these bubbles are glued on with cement glue I swear! When they didn't come right off I soaked one in hot water and washed the label off one bottle.
It took a good hour just to get the label off. But there was a sticky layer of glue I just couldn't get off no matter how hard I scrubbed. I even tried using a magic eraser.
So I said to myself forget it. It's too much trouble to get these labels off. So I headed out to Party City to find some of those cute little bottles of bubbles in colors to match my party theme.
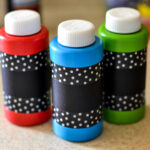
For the smaller bubbles, I just wrapped a piece of black and white polka dot washi tape around the bottle and stuck a gem sticker on it. They are cute but I was really disappointed that I couldn't decorate the large bubble bottles the way I wanted to.
I got the idea from Money Wise Moms who made these Washi Tape Bubble Valentines as a way of celebrating Valentine's Day with a non-candy treat.
So while I was complaining to my daughter Megan that I had to go buy the little bottles of bubbles because I couldn't get the label off the Dollar Tree bubble bottles my daughter says to me. Mom just wrap the card stock over the label. Why are you trying to remove the label?
Yes. I had one of those duh moments. Sometimes I get stuck trying to make my idea come to light and can't see around the issue at hand. Have you done that also? I hope so because if not I may just be ready for the nursing home the way my kids keep threatening saying!
At this point, you have a couple of options. You can do as I did and punch out a circle of coordinating scrapbook paper and glue the circle in the center of the washi tape bands.
This looks very nice and gives the bubbles a very finished look. Or you could get some gem stickers and decorate the band of card stock with the gems.
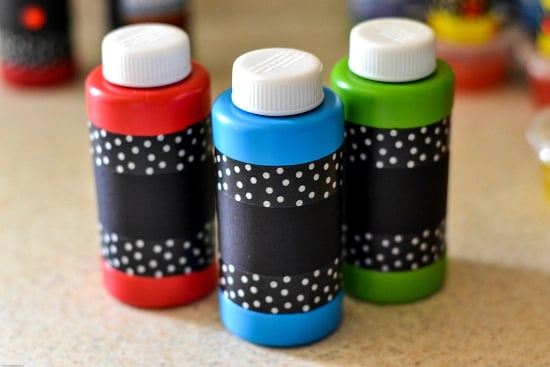
Or you could just leave the bubbles as they are with the color-coordinated card stock and washi tape. I liked the way all three types of decorations looked so I made a few of each style.
These personalized party favors can be decorated to match any type of party theme.
Cheap and Easy Party Favor Ideas
Supplies Need
- 12 Dollar Tree bottles of Bubbles (they come in 3 packs) or mini Party Store bubbles
- 2 sheets of 12 x 12 cardstock
- Washi Tape in coordinating colors
- 1-inch circle punch
- double-sided tape or a tape roller
- scrapbook paper to match your theme
- gem stickers (optional)
- scissor or paper cutter
Directions
- Measure the width of the area on the bubble bottle that the label covers and cut out a strip of cardstock down one edge of the 12 x 12 sheet of cardstock.
- Fold the strip of cardstock in half along the length and cut in half. Each strip of cardstock will cover two bottles of bubbles with an overlap.
- Cut the rest of the cardstock into strips and then cut those in half. One sheet of cardstock will cover 9 bubble bottles. Cut two strips off the second piece of 12 x 12 cardstock. Don't worry if the edges aren't cut perfectly. The washi tape will hide it.
- I used a scrapbook tape roller but you can use any double-sided tape you have. I wouldn't suggest using any type of glue for this project because any lumps from the dry glue will be visible.
- Working with one strip of cardstock at a time run one or two strips of double-sided tape down the center of the card stock paper. Then run a short strip of double-sided tape one each short edge of the cardstock as close to the edge as possible.
- Center the strip of paper on a bubble bottle and wrap the card stock around the bottle making sure one edge overlaps the other. Apply pressure along the area on the bottle where the tape is on the back end to make sure the tape has adhered to the bottle.
- Take the washi tape and starting on one edge of the cardstock adhere to tape to the edge of the card stock. On the bubbles, I bought the area for the label was sunken so I just used the edge of the plastic bottle as a guide. If your bubble bottles are not like this use the edge of the cardstock as a guide. Overlap the edge of the washi tape. Repeat with the other side of the bottle.
- Repeat with the remaining bottles of bubbles.
Looking for more easy DIY party favors to make?
Then check out the DIY Glitter Goo Party Favors I also made.
Want to check out how our 2014 #DisneySide Party turned out?
Bubbles Party Favors
Materials
- 12 small Dollar Tree bottles of Bubbles or mini Party Store bubbles
- 2 sheets sheets of 12 x 12 cardstock
- 3 rolls Washi Tape in coordinating colors
- 1 inch circle punch
- 1 roll double-sided tape or a tape roller
- 2 sheets scrapbook paper to match your theme
- 1 package gem stickers optional
- 1 scissor or paper cutter
Instructions
- Measure the width of the area on the bubble bottle that the label covers and cut out a strip of cardstock down one edge of the 12 x 12 sheet of cardstock.
- Fold the strip of cardstock in half along the length and cut in half. Each strip of cardstock will cover two bottles of bubbles with an overlap.
- Cut the rest of the cardstock into strips and then cut those in half. One sheet of cardstock will cover 9 bubble bottles. Cut two strips off the second piece of 12 x 12 cardstock. Don't worry if the edges aren't cut perfectly. The washi tape will hide it.
- I used a scrapbook tape roller but you can use any double-sided tape you have. I wouldn't suggest using any type of glue for this project because any lumps from the dry glue will be visible.
- Working with one strip of cardstock at a time run one or two strips of double-sided tape down the center of the card stock paper. Then run a short strip of double-sided tape one each short edge of the cardstock as close to the edge as possible.
- Center the strip of paper on a bubble bottle and wrap the card stock around the bottle making sure one edge overlaps the other. Apply pressure along the area on the bottle where the tape is on the back end to make sure the tape has adhered to the bottle.
- Take the washi tape and starting on one edge of the cardstock adhere to tape to the edge of the card stock. On the bubbles, I bought the area for the label was sunken so I just used the edge of the plastic bottle as a guide. If your bubble bottles are not like this use the edge of the cardstock as a guide. Overlap the edge of the washi tape. Repeat with the other side of the bottle.
- Repeat with the remaining bottles of bubbles.
Courtney @ Crafts by Courtney
I really love this idea, it's so clever!! You could do this to match any party theme, I will be doing this for sure at my next party and linking back to you!!
Arlene Mobley
Courtney Thanks so much. It's such an easy way to customize party favors. I'll be using it for a baby shower in the summer also.