

Are you in love with the idea of baking fresh artisan quality bread for your family but don't know how and think it takes way too much time to do and you could never fit making homemade bread into your busy schedule?
Well, have I got a surprise for you! You can make delicious Artisan quality bread at home in just five minutes a day.
Didn't know you could bake a crispy tender loaf of artisan bread at home in minutes? With a little prep work you can make this No-Knead Five Minute Artisan Bread- that tastes just like any artisan style loaf of bread you have ever bought. And it will cost you a fraction of the cost.

Bet you also didn't know my love of making homemade bread was the inspiration behind the name of my website. It was and the very first post I shared was a homemade white bread I had made.
A few years later, after I had been tweaking the recipe I share this Perfect Homemade White Sandwich Bread recipe. This time I included the recipe but the pictures aren't much better. The recipe is awesome though!
Last year I converted one of my favorite bread recipes - Garlic Rosemary Bread recipe into a Dutch oven No-Knead Bread Recipe. Dutch Ovens bake the finest bread.
As much as I love baking bread I also like saving time in the kitchen. So when I spotted a copy of Artisan Bread in 5 Minutes a Day I bought it.
As soon as I got home I flipped through the book and checked out the recipes. I couldn't wait to try one of the recipes!
The Artisan Bread in Five Minutes cookbook came out years ago and there is an updated version available now.
How To Make No-Knead Artisan Bread in Five Minutes?
You might be wondering how it is possible to make a artisan loaf of bread in five minutes. Once you have the base dough made it really does only take five minutes to make a loaf of bread.
The trick to it is to make up a big batch of dough then store it in the refrigerator until your ready to bake. The basic recipe yields enough dough to make four 1 pound loaves of artisan bread like you see in my photos.
You also don't knead (pun intended) a bunch of fancy ingredients and you don't knead the dough at all. The dough is a very wet dough that will taste better as you work your way through the batch of dough.
The longer the dough is in the refrigerator the better the bread flavor will be.
The first loaf of bread can be made in just a few hours after mixing the dough and letting it rise on the counter. From what the book says you can keep the dough for two weeks in the fridge.
By the last loaf of bread you will have a delicious and tangy sourdough like loaf of bread. You can double the recipe if you want to bake a bigger loaf or more than one loaf of bread at a time.
The Artisan Bread in Five Minutes a Day cookbook walks you step by step with a full explanation of the why and how to make artisan bread in five minutes a day. It is perfect for all levels of bread baking experience.
If you have never before baked a loaf of homemade bread you will be amazing your family in a matter of hours after you bake the first of what I am sure will be come many artisan bread recipes.
Ingredients and tools to make 5 Minute Artisan Bread
- all-purpose flour, bread flour or wheat flour- depending on which recipe from the book you plan to make
- yeast
- warm water
- salt
- a food grade container to store the dough in the refrigerator
- a wooden spoon or dough whisk to mix the ingredients
To bake Artisan bread
- a pizza stone or dutch oven
- a shallow pan for steam
- a pizza peel or cookie sheet
- save a few bucks and buy this pizza stone and pizza peel set
- pastry brush
- sharp knife or bread lame to score the bread dough
No-Knead Five Minute Artisan Bread recipe to make a loaf of basic artisan Boule bread
Note: The original recipe from the book calls for 6 ½ cups of all purpose flour. I didn't have 6 ½ cups of all purpose flour so I used 4 ½ cups of all-purpose and 2 cups of bread flour. The recipe turned out so good. I'll be sharing a recipe or two soon with a loaf of french bread that I made the same day.
Ingredients
- 3 cups warm water
- 1 ½ tablespoons yeast or 2 packages of rapid rise yeast
- 4 ½ cups all-purpose flour
- 2 cups bread flour
- cornmeal or flour
Directions
- In a food grade 3 ½ quart dough bucket or a non air tight container mix the water, salt and yeast.
- Add the flour and with a dough whisk or wooden spoon mix the dough for a few minutes - just until the flour is incorporated.
- Dough will be very wet and sticky. Mix until all the flour is absorbed and a wet dough forms.
- Loosely cover the container with a lid and allow to rise on the counter for a couple of hours until the dough doubles in volume.
- Once the dough has risen you can cut off a ball of dough and bake your first loaf of artisan bread. Or you can place the lid on the dough container and refrigerate it over night or up to two weeks and allow the dough to ferment slightly and create a delicious tangy sourdough flavor.
- Baking day on a pizza stone or in a dutch oven- If using a pizza stone sprinkle some cornmeal or flour on the pizza stone and place in the oven on the middle rack. Place the shallow pan on the rack below the pizza stone. Preheat the stone, shallow pan and the oven to 450 F.
- If using a dutch oven see the instructions below.
- Remove the container of dough from the refrigerator. Sprinkle the pizza stone or the back side of a cookie sheet with flour or cornmeal so the prepared bread loaf will slide off easily when you transfer it to the hot pizza stone in the oven.
- Sprinkle the top of the wet dough with flour, coat your hands with flour. Without kneading the dough cut off a 1 pound piece of dough (¼ of the entire amount of dough is about 1 pounds).
- With your floured hands form a ball of dough by pulling the outside edges around to the bottom of the dough ball, stretching the dough as necessary. Place the dough on the floured pizza stone or backside of the floured/cornmealed cookie sheet. Allow the dough to rest for about 20 minutes.
- Brush the top of the dough with a pastry brush dipped in water. With a sharp knife slash across the top of the bread loaf.
- Slide the prepared bread dough onto the preheated pizza stone.
- Pour ½ cup of water into the shallow pan in the bottom of the oven and quickly close the oven door.
- Bake for 30 minutes or until the crust is golden and the loaf is firm to the touch.
- Remove from the oven and allow to cool completely on a cooling rack.
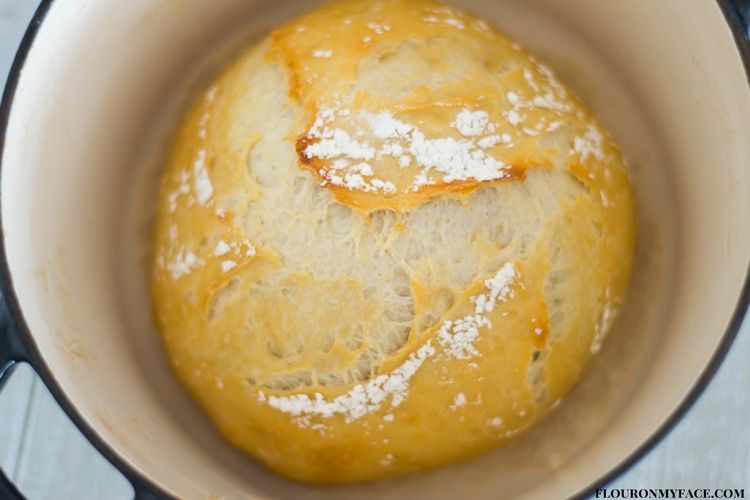
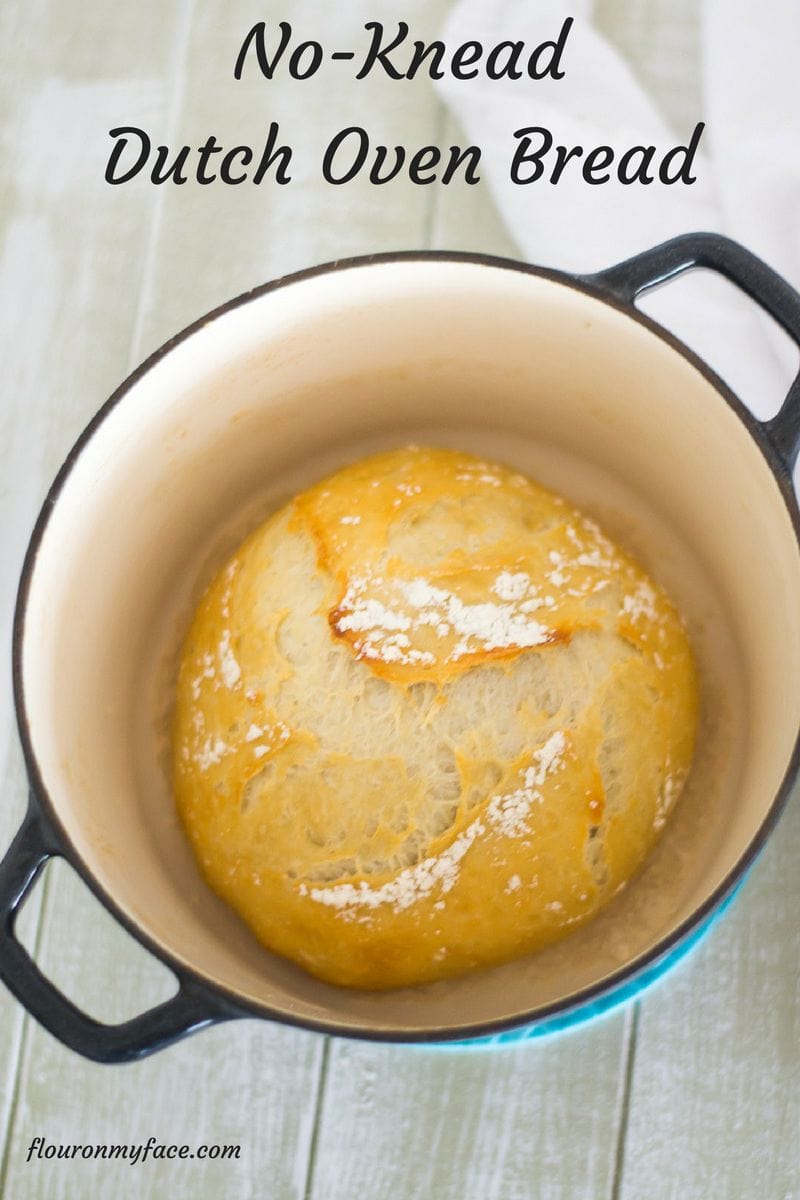
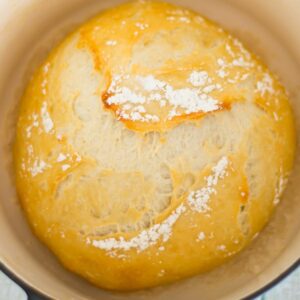
How to bake Artisan Bread in a Dutch Oven
If using a Dutch oven to bake your bread measure a square of parchment paper that will fit inside the Dutch oven with a couple of inches overhang. Set the parchment paper aside near the oven and sprinkle with flour. Place the pot into the cold oven, place the shallow pan on the rack below in the preheated 450 F. degree oven.
Place the parchment paper near by and sprinkle with flour. Prepare and shape your bread dough using the same instructions as above for baking on a pizza stone but place the dough ball into the center of the parchment paper to rest while the oven is preheating.
After the 20 minutes is up open the oven door, using a thick pot holder pick up and place the hot lid carefully down on a dish towel nearby.
Carefully but quickly pick up each corner of the paper so it cradles the dough. Place the parchment wrapped dough down into the hot Dutch oven. Using the pot holder move the edges of the parchment paper so they hang over the sides. Carefully place the lid back on trapping the parchment under the lid.
Bake for 20 minutes with the lid on. Carefully remove the lid and continue to bake for 5 to 10 minutes until the crust is golden.
Remove from oven. Carefully lift the baked bread up by the parchment paper and transfer to a wire rack to cool.
Cool completely before slicing, about an hour.
Email questions or recipe requests to flouronmyface@gmail.com. Follow me on Pinterest, YouTube, Instagram and Facebook.
No-Knead Five Minute Artisan Bread
Ingredients
- 3 cups warm water
- 1 ½ tablespoons yeast or 2 packages of rapid rise yeast
- 4 ½ cups all-purpose flour
- 2 cups bread flour
- 2 tablespoons cornmeal or flour (for dusting)
Instructions
Make bread dough
- In a food grade 3 ½ quart dough bucket or a non air tight container mix the water, salt and yeast.
- Add the flour and with a dough whisk or wooden spoon mix the dough for a few minutes - just until the flour is incorporated. Dough will be very wet and sticky. Mix until all the flour is absorbed and a wet dough forms.
- Loosely cover the container with a lid and allow to rise on the counter for a couple of hours until the dough doubles in volume.
- Once the dough has risen you can cut off a ball of dough and bake your first loaf of artisan bread. Or you can place the lid on the dough container and refrigerate it over night or up to two weeks and allow the dough to ferment slightly and create a delicious tangy sourdough flavor.
Bake the bread
- Baking day on a pizza stone or in a dutch oven- If using a pizza stone sprinkle some cornmeal or flour on the pizza stone and place in the oven on the middle rack. Place the shallow pan on the rack below the pizza stone. Preheat the stone, shallow pan and the oven to 450 F.
- Remove the container of dough from the refrigerator. Sprinkle the pizza stone or the back side of a cookie sheet with flour or cornmeal so the prepared bread loaf will slide off easily when you transfer it to the hot pizza stone in the oven.
- Sprinkle the top of the wet dough with flour, coat your hands with flour. Without kneading the dough cut off a 1 pound piece of dough (¼ of the entire amount of dough is about 1 pounds).
- With your floured hands form a ball of dough by pulling the outside edges around to the bottom of the dough ball, stretching the dough as necessary. Place the dough on the floured pizza stone or backside of the floured/cornmealed cookie sheet. Allow the dough to rest for about 20 minutes.
- Brush the top of the dough with a pastry brush dipped in water. With a sharp knife slash across the top of the bread loaf.
- Slide the prepared bread dough onto the preheated pizza stone.
- Pour ½ cup of water into the shallow pan in the bottom of the oven and quickly close the oven door.
- Bake for 30 minutes or until the crust is golden and the loaf is firm to the touch.
- Remove from the oven and allow to cool completely on a cooling rack.
Recipe Expert Tips
- Dutch Oven Directions:


Angie ~ ambient wares
Wow, this looks gorgeous! I've never made bread before outside of a bread machine and that was years ago. I actually have a dutch oven and would love to give this a try. Thanks for sharing at Funtastic Friday. Pinning!
Arlene Mobley
Thanks for stopping by Angie. Hope you enjoy this very easy homemade bread recipe!
Jeannee Taylor
what a great recipe! I love fresh baked bread.......the taste....the aroma.......just not all the work! Thanks for making it possible to have fresh baked bread easily! I'll definitely be adding this recipe to my collection! #HomeMattersParty
Jeannee
Arlene Mobley
I love homemade bread but not all the work! Enjoy the recipe!
Erlene Amat
Ooo...I'll have to try this. My kids eat bread like it's going out of style and fresh bread never last long at our house. Thanks for sharing your recipe on Merry Monday.
Heidi
I love baking easy breads. This one fits the bill! Thanks for sharing. it look delicious.
Arlene Mobley
Heidi
You're welcome. It is delicious!
Sarah @ The Fit Cookie
Even though I don't eat a lot of bread, I love making it and my family loves eating it. It's so much healthier to make it at home, too. It can be quite a production, though, so I love the idea of skipping the kneading!
Veena Azmanov
I make a no knead bread but never baked in a dutch oven... just on a cookie try or pan in the regular fashion. I cannot wait to try this version. Looks so pretty too!
Arlene Mobley
Veena I love the way bread turns out in a dutch oven.
Julia
I made no knead breads a few times but not this version. I also didn't know about keeping the doughnuts in the fridge for so long - good to know. Thank you!
Arlene Mobley
Julia
Your welcome. This recipe turns out perfect.
Gloria @ Homemade & Yummy
WOW...I need to give this a try. I love making homemade bread, but sometimes time is a factor. I love my dutch oven....so this is going to be a fun (and totally delicious) little project.