


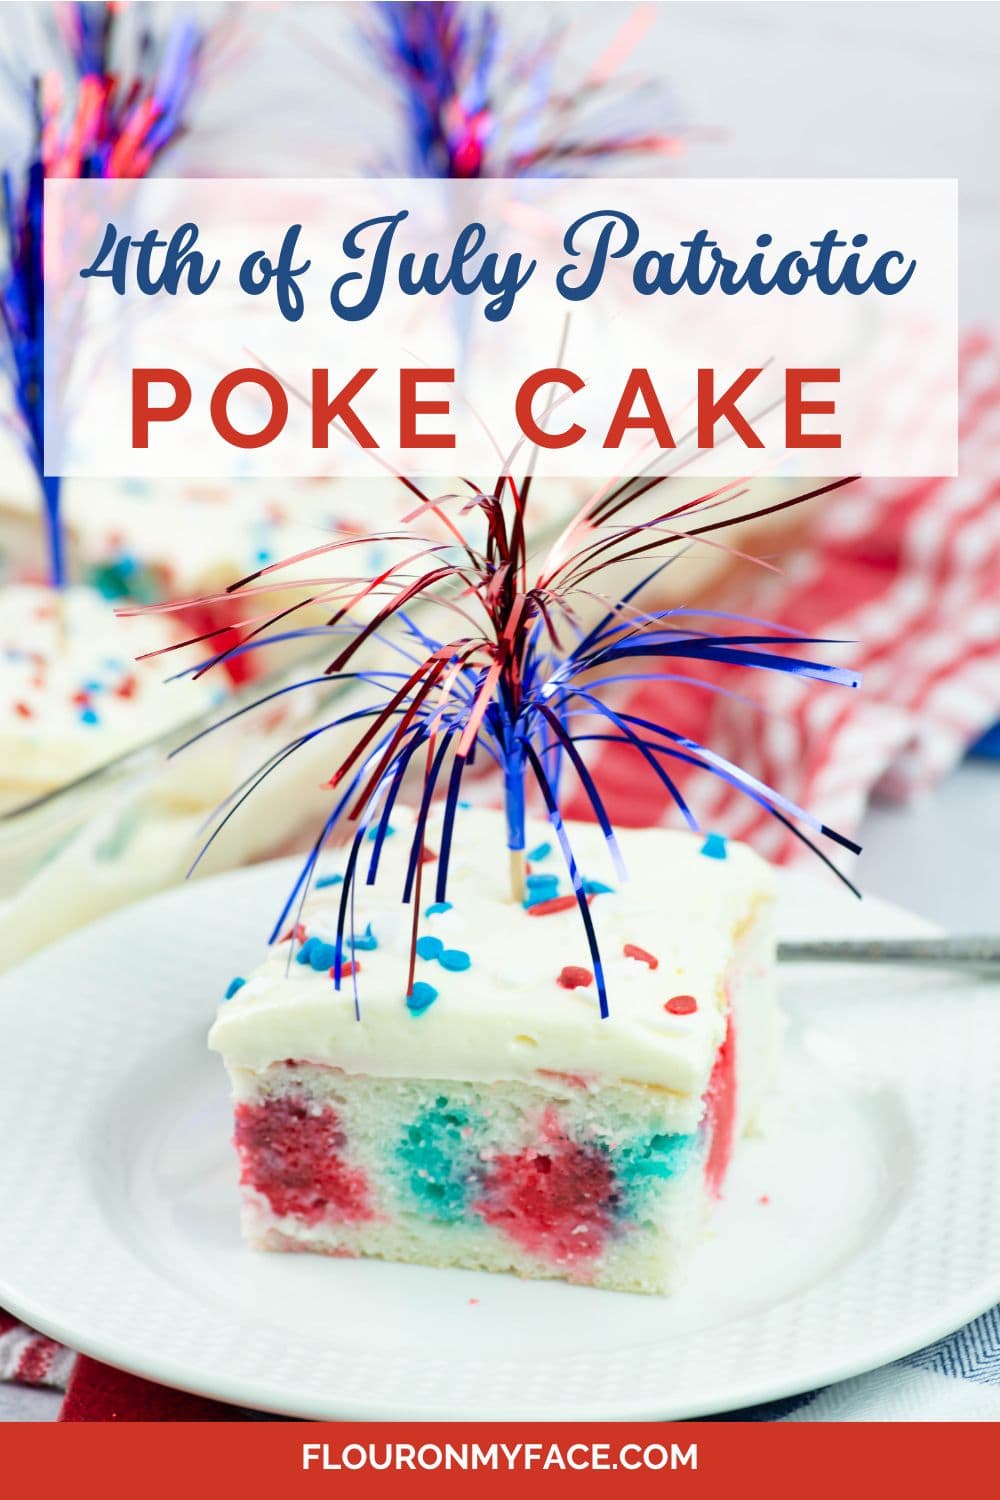
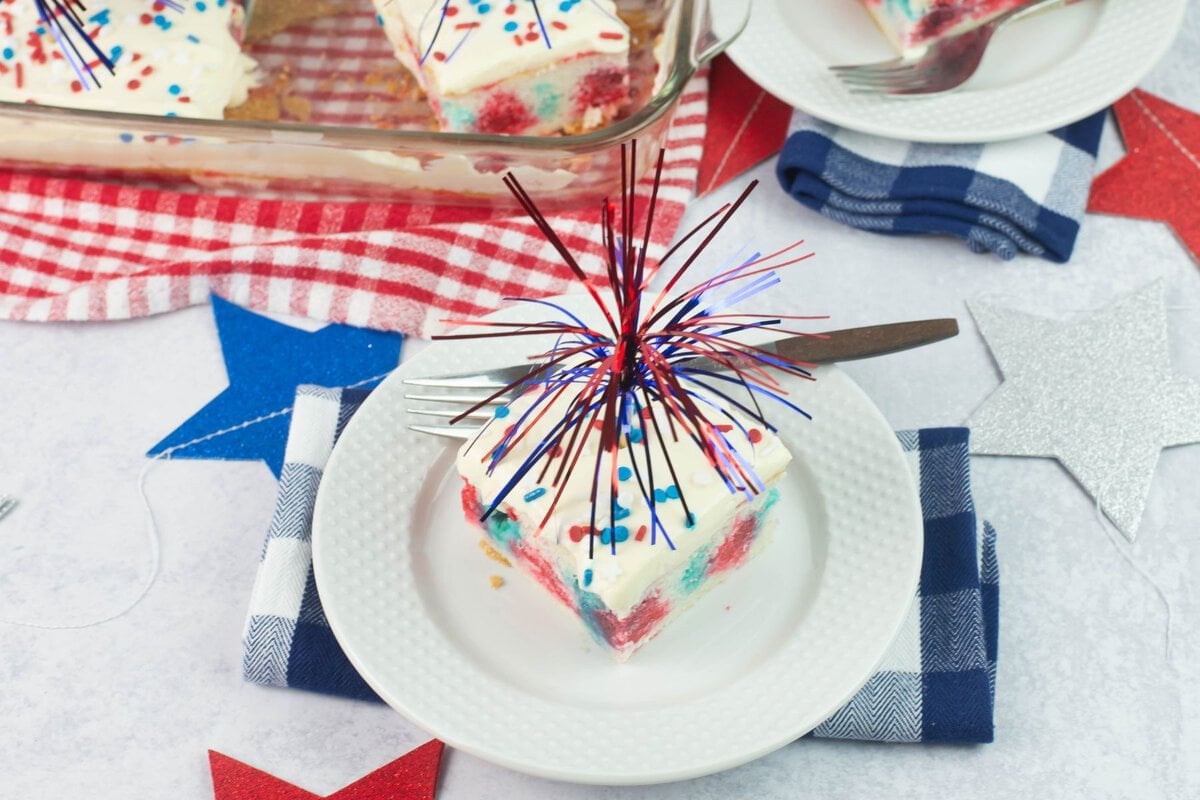
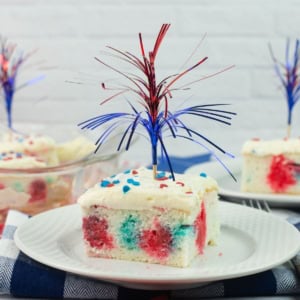
This Red, White and Blue Poke Cake is an easy patriotic dessert that is perfect for the Fourth of July, Memorial Day, or any summer party. Made with a simple boxed cake mix, bright red and blue gelatin, and a fluffy whipped topping, it is a fun make ahead dessert that looks festive on the dessert table and tastes just as good as it looks.

If you love old fashioned classic desserts, a JELL-O poke cake is one of those vintage recipes that has stood the test of time.
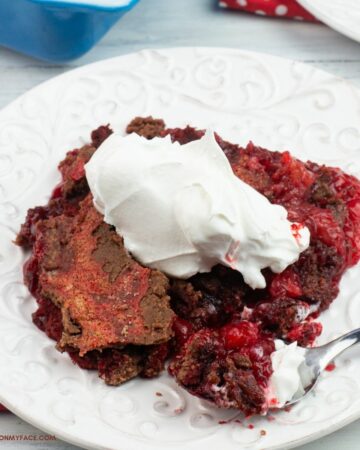
Be sure to check out my other Old Fashioned Recipes and my Strawberry poke cake recipe. The strawberry flavor is one of the most popular flavors.
Jump to:
- Why This Retro Dessert Is Perfect for Summer Parties
- Kitchen Tools You'll Need
- Recipe Prep Tips
- Ingredient Notes
- Poke Cake Frosting Ingredients
- What frosting is best for a poke cake?
- How to Make the Red, White and Blue Poke Cake
- Make Ahead Tips
- Poke Cake Storage Tips
- ⭐Leave a Star Rating
- Red White and Blue Poke Cake Recipe
- Poke Cake Recipe FAQs
Why This Retro Dessert Is Perfect for Summer Parties
This moist white cake is a beautiful dessert for a summer celebration, each piece of moist and fluffy treat is filled with sweet blue berry and cherry JELL-O that add a fun burst of fruity flavor in every bite. This classic retro dessert is topped with a light and fluffy cheesecake pudding flavored frosting, it is cool, creamy, and full of nostalgic charm that makes it hard to resist.
Adults and kids alike will love this festive patriotic dessert, with its colorful layers, fruity flavor, and creamy frosting making it a standout at any summer gathering.
Kitchen Tools You'll Need
Most of the kitchen tools needed to make this recipe are probably already in your kitchen. These are the tools I used to make this red, white and blue patriotic dessert, so while some are optional, using them will help you recreate the recipe the same way I did.
Disclosure: I'm a #WalmartPartner. If you make a purchase through the affiliate links below, I may earn a small commission at no extra cost to you. Thank you for supporting my work.
- 9x13 inch baking pan: I used a glass Pyrex baking pan but you can use any sheet pan you have.
- Mixing bowls: I have a set of these nesting Pyrex Glass Mixing Bowls with lids and a set of these Pioneer Woman Nesting Bowls that cover all my mixing needs.
- Handheld mixer: Handheld mixers are inexspensive. If you bake a lot you should invest in a sturdier brand of mixer.
- 2 plastic squeeze bottles: Thesesqueeze bottles come in handy very handy when filling the holes with JELL-O and can be found in the kitchen accessory section of most stores.
- Measuring cups: Use liquid measuring cups to get an accurate measurement.
- Wooden spoon with a rounded handle.
- Silicone spatulas: This handy kitchen gadget helps scrape the bowl and spread the frosting.
- Optional: 16 inch frosting bag and star decorating tip if you want to get fancy.
Recipe Prep Tips
- Preheat the oven to 350 degrees F.
- Grease a 9 x 13 inch baking pan with butter, Crisco shortening or spray with a cooķing spray, and dust with flour.
- Make the frosting while the JELL-O is setting up and is chilling in the refrigerator so the frosting has time to firm up and will be ready to spread on before serving.
Ingredient Notes
Below you will find some helpful notes on the most important ingredients you'll need to make this recipe.
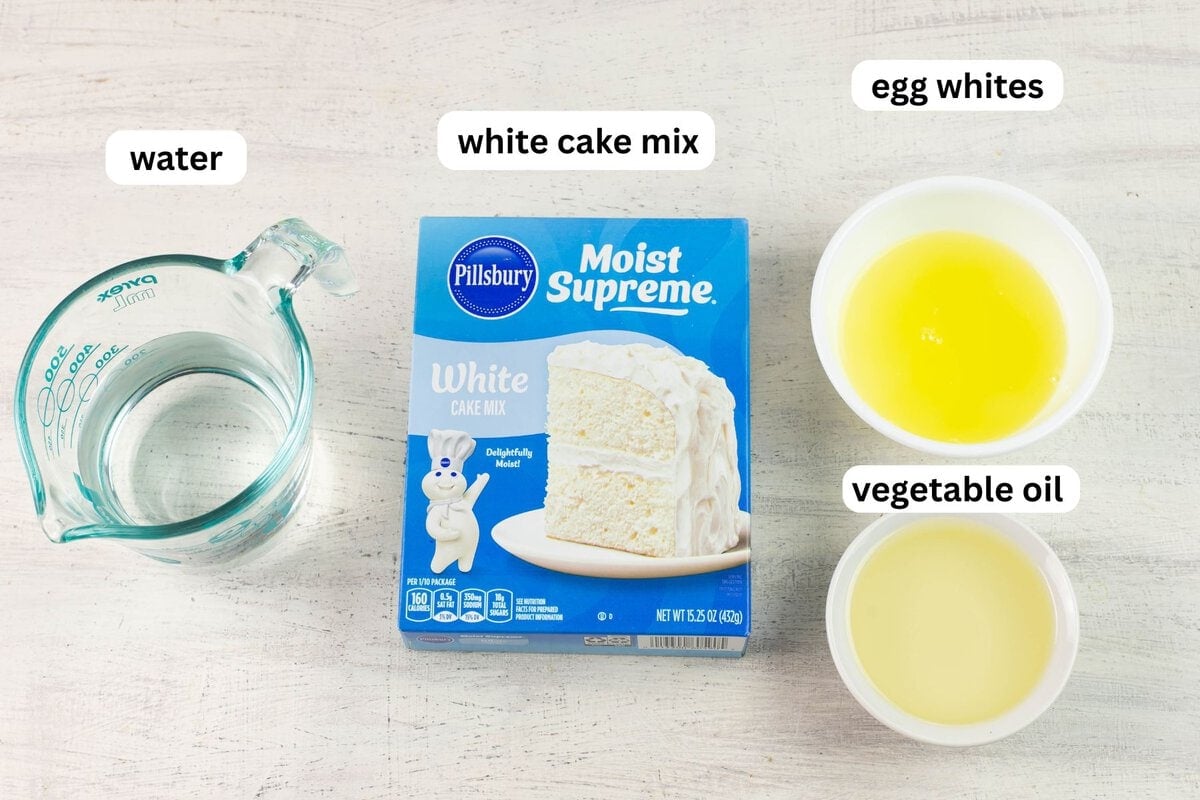
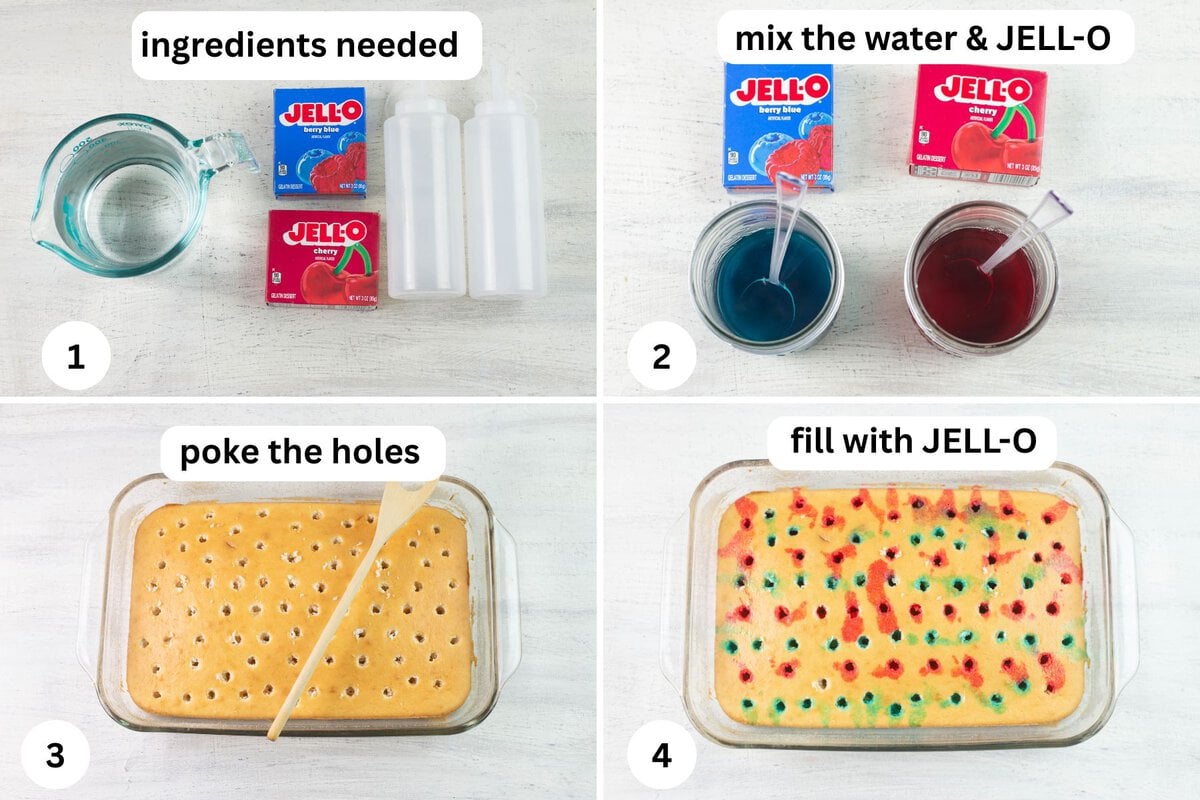
- White Cake Mix plus the ingredients to make it: To get the whitest white cake you need to use a boxed cake mix that has directions to make it with egg whites. I used Pillsbury Moist Supreme White Cake Mix.
- Red and Blue JELL-O: I used a small box of Berry Blue and Cherry JELL-O gelatin. You can use any blue or red colored gelatin you like.
Poke Cake Frosting Ingredients
There are a few options when it comes to the frosting. I love to stay as authentic as possible when I make nostalgic recipe. Below you'll find my short list of frosting notes. You can find the complete amounts and sizes in the recipe card below.
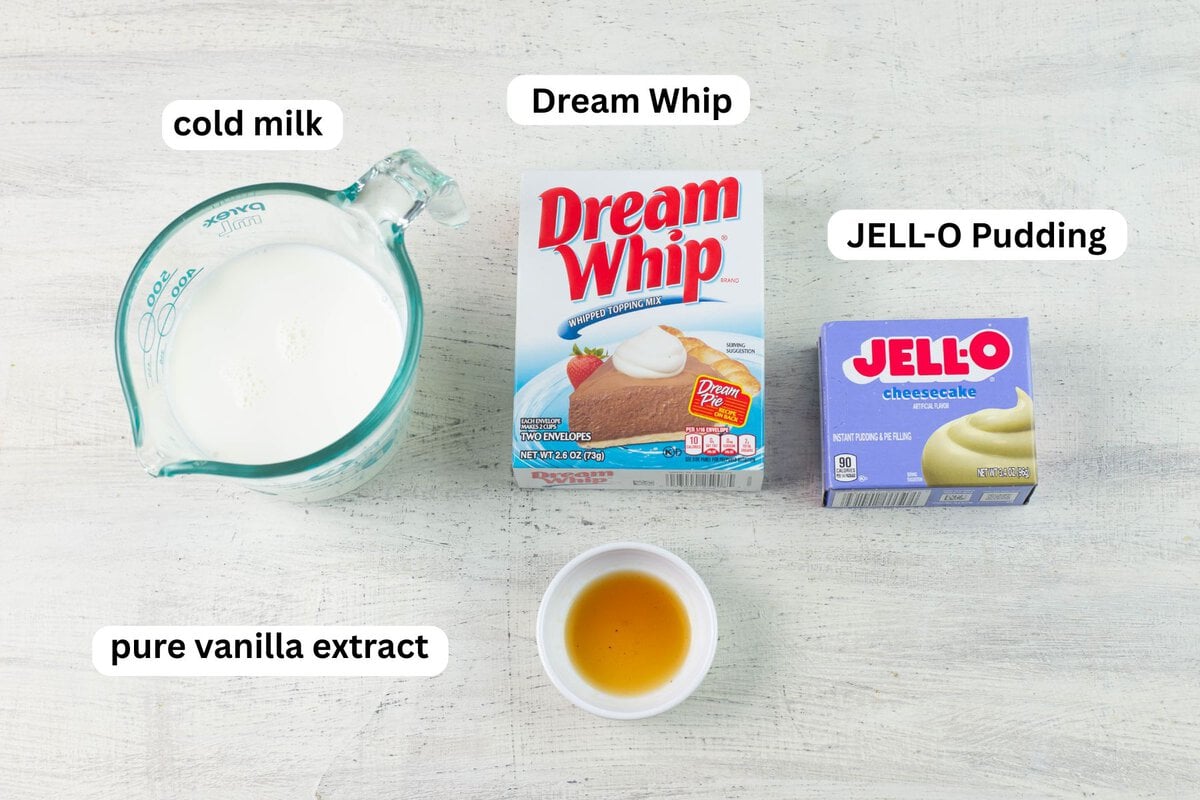
- Instant Pudding: I used cheesecake pudding mix. Another option is vanilla pudding mix.
- Dream Whip whipped topping mix which can be found on the baking aisle in most stores. You can substitute and equal amount of Cool Whip topping if you can's find the Dream Whip.
- cold milk
- pure vanilla extract: I always use my homemade vanilla extract.
What frosting is best for a poke cake?
A light and fluffy frosting is usually best for a poke cake. Classic recipes often use whipped topping, but many homemade versions use a pudding and whipped topping frosting, Dream Whip frosting, or a lightly sweetened cream cheese frosting.
When I started researching the classic frosting used on old fashioned JELL-O poke cakes, I found that it has changed quite a bit over the years. Some vintage recipes used plain Cool Whip, while others later used Dream Whip mixed with JELL-O pudding, and I've also made versions with Cool Whip and canned frosting. After trying a few different options, my family's favorite is this creamy pudding and Dream Whip frosting.
How to Make the Red, White and Blue Poke Cake
Follow these simple step-by-step directions to make this easy, colorful poke cake. Scroll to the recipe card below to print, share or save the full instructions.
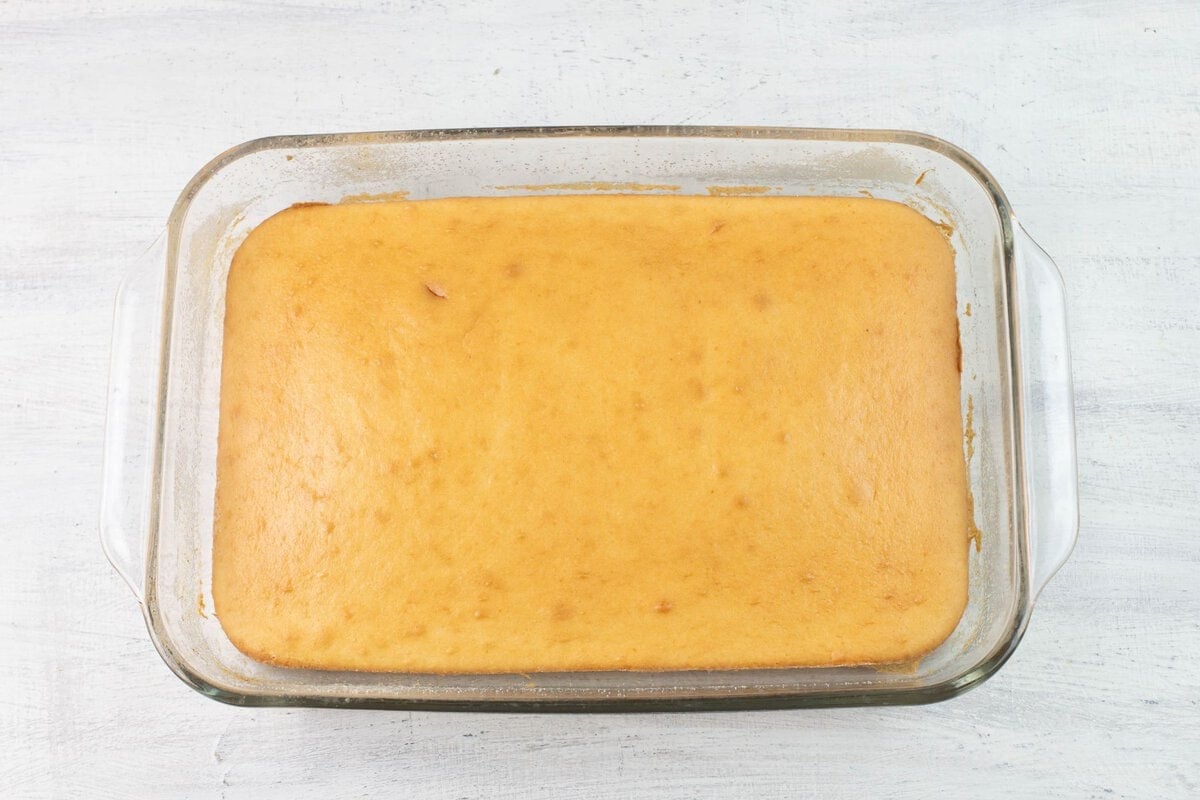
- Step 1: Bake the cake: Mix the cake mix following the directions on the box. Pour into the prepared baking pan. Bake in the preheated oven following the directions. The box directions for a 9 x 13 inch pan are 34 to 38 minutes. (SEE tips below.) Allow the cake to cool completely on a wire rack on the counter.
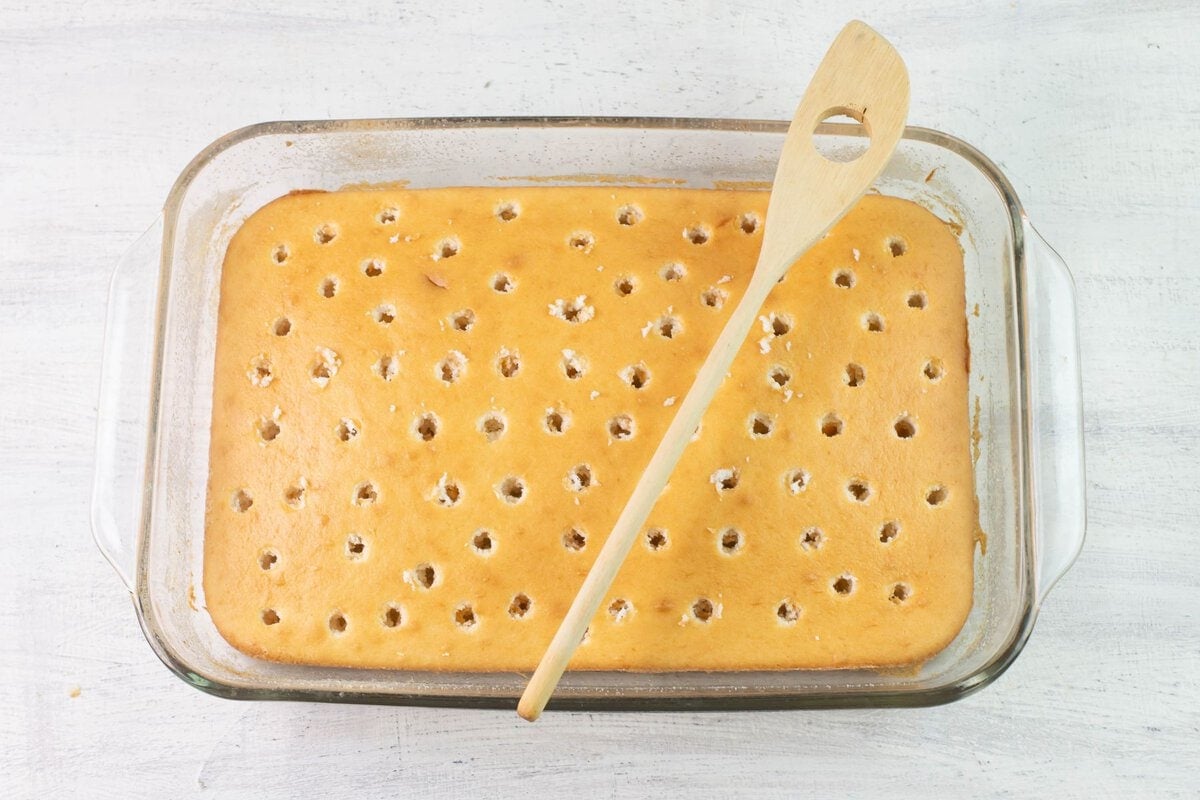
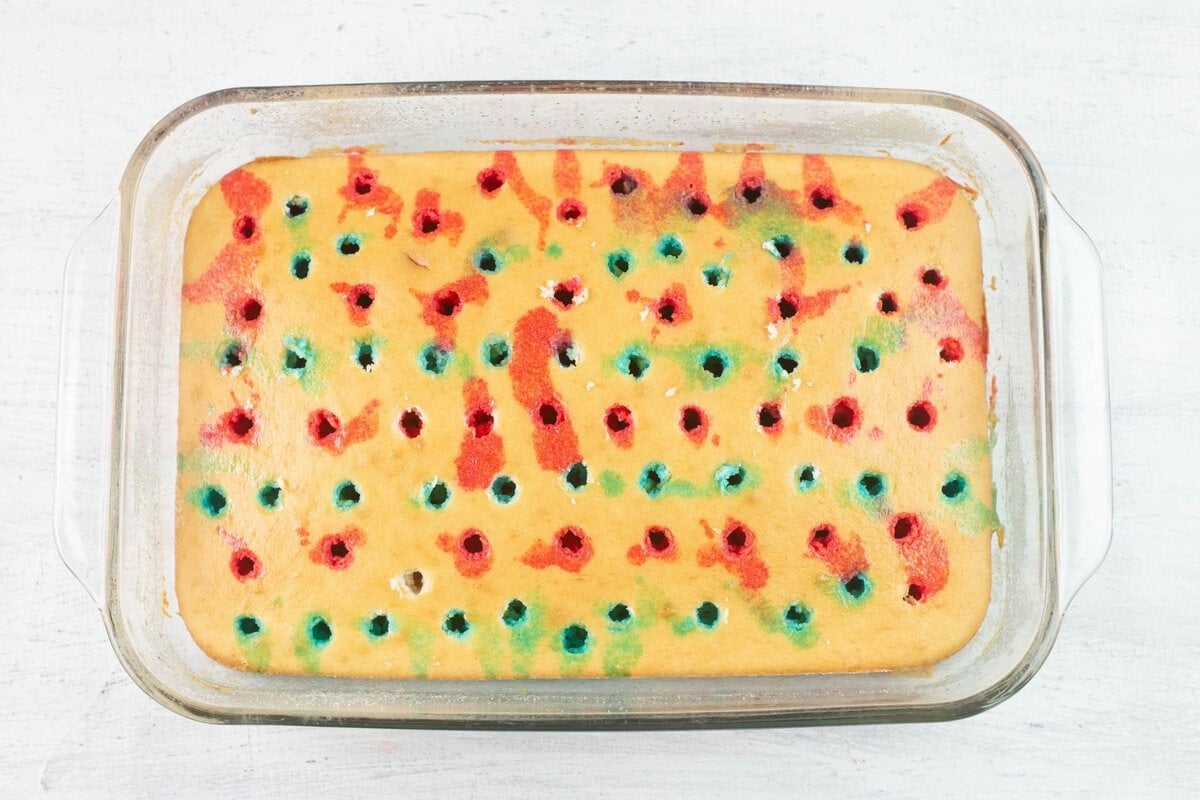
- Step 2: Poke holes across the cake and mix the JELL-O with the boiling water until dissolved completely.
- Step 3: Add the red and blue gelatin: Using one color of JELL-O gelatin at a time fill some of the holes with the red JELL-O, randomly skipping holes to leave room for the second blue flavor and color of gelatin until all holes have been filled. Do not pour the gelatin over the entire top of the cake as I have seen recommended!
- Step 4: Chill so the JELL-O firms up: Refrigerate for at least four hours to overnight to allow the gelatin to set up. Stretch plastic wrap over the top of the baking dish. Do not allow the cling wrap to touch the top of the cake. If you do when you remove it the top of the cake will stick to the plastic wrap ruining the appearance.
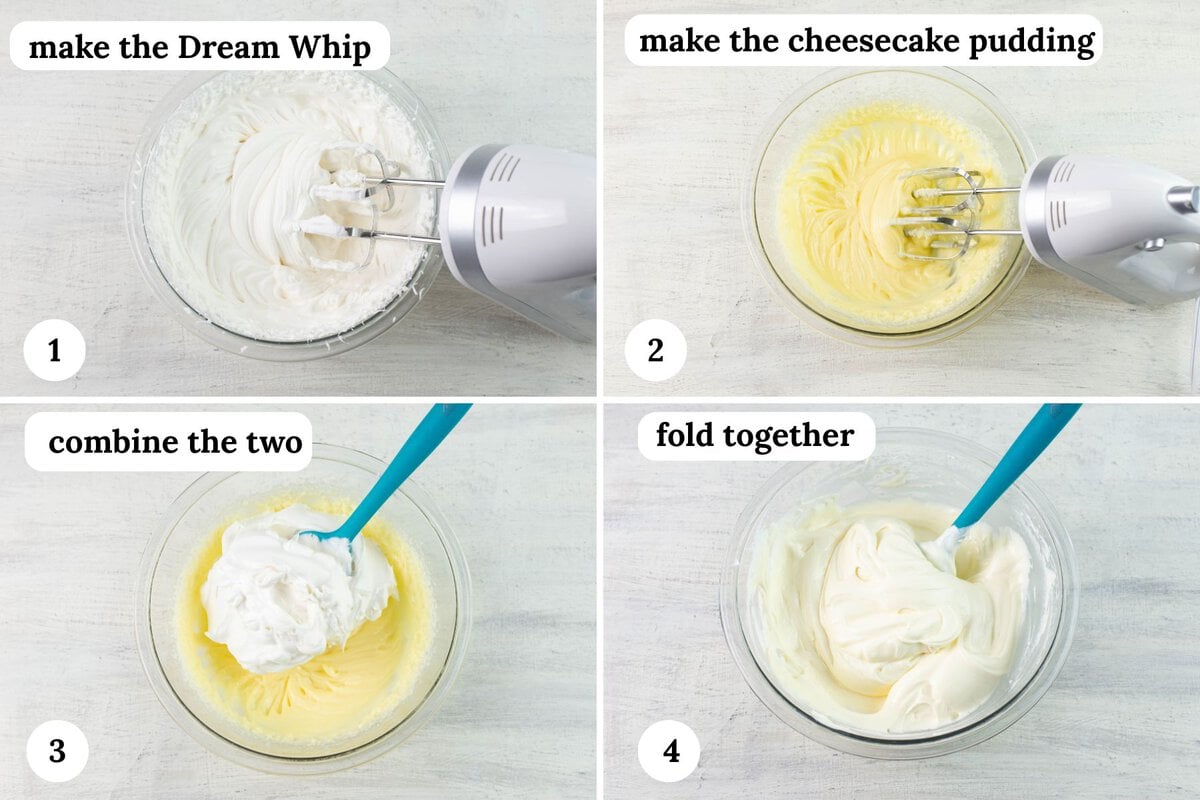
- Step 5: Make the frosting by first combining and beating the cold milk with the Dream Whip until thick and fluffy. Then in a separate bowl beat the pudding mix with the cold milk until its thickened into a soft set. Now combine the two and fold together until completely combined with no streaks. Cover and refrigerate until ready to frost the cake.
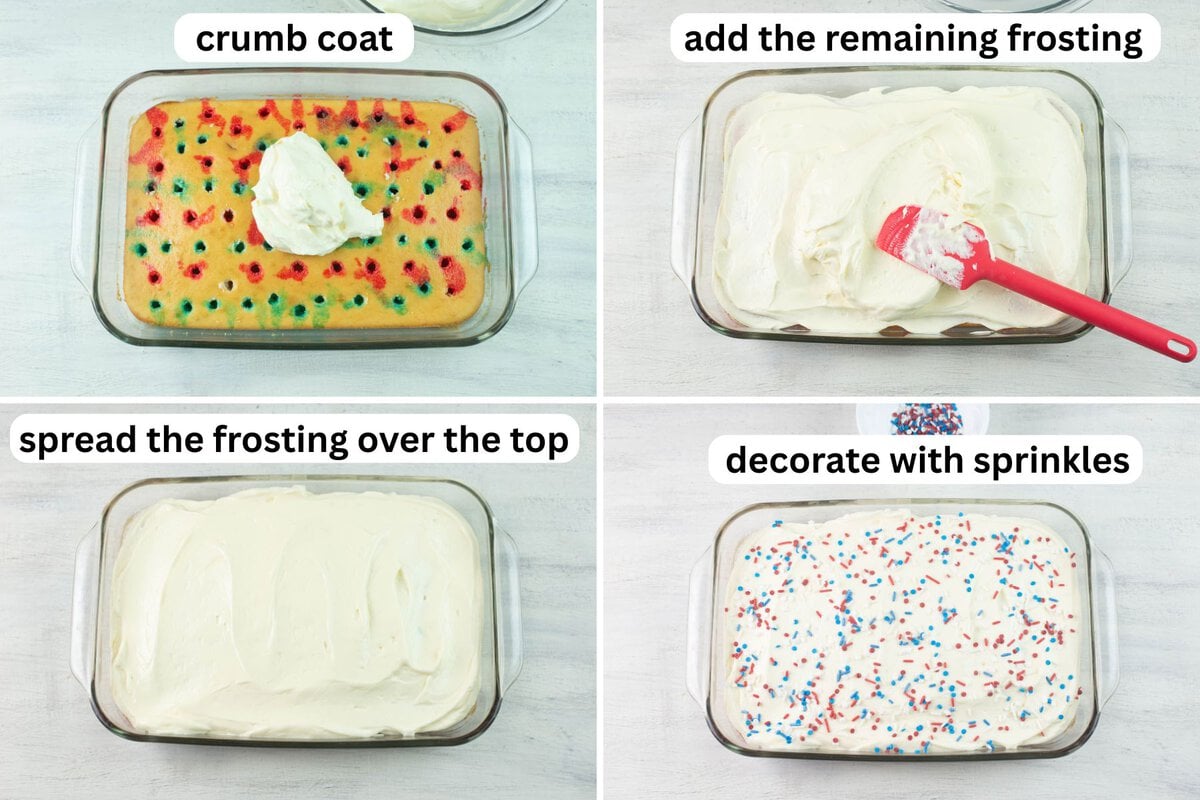
- Step 6: Frosting: Once the JELL-O has set up spread a thin crumb coat of the frosting over the top with a silicone spatula. This will prevent any cake crumbs from showing up in the frosting. Dollop the remaining frosting on and spread it to the edges of the cake. Decorate with red, white and blue sprinkles if using.
- Step 7: Cover tightly and keep refrigerated until ready to serve.
Make Ahead Tips
- The baking pan: Note I used a glass baking pan. I decreased the baking time because glass pans heat up hotter than metal pans. I baked the cake for 30 minutes to prevent over browning and to keep the cake from drying out.
- Cooling: Do not refrigerate to shorten the cooling time after baking. The top of the cake will get moist and sticky. It will make poking the holes more difficult.
- For the gelatin colors: If you want to get the same exact red, white and blue colored Poke Cake you will need to use the exact gelatin flavors that I used. I include the flavors I used so you have the option of duplicating the recipe exactly as I have made it.
- Filling the poke holes: Do not pour the gelatin over the entire top of the cake and expect to see tunnels of color separated by white areas as I have seen recommended in a few recipes. You will end up with big blobs of color it will look like a big mess.
- Make the frosting ahead: You should chill the frosting before frosting the finished cake. The pudding and whipped topping need a short cooling time to thicken.
Poke Cake Storage Tips
- Store the leftovers in the refrigerator tightly covered in an airtight container if possible. Or cover the pan tightly with plastic wrap.
- This is a very moist cake. It will stay moist and fresh for about 5 days in the refrigerator.
⭐Leave a Star Rating
If you tried this recipe, leave a star rating in the recipe card below and tell me how it turned out.
Email questions or recipe requests to flouronmyface@gmail.com. Follow me on Pinterest, YouTube, Instagram and Facebook.
Red White and Blue Poke Cake Recipe
Ingredients
Red White Blue Poke Cake Ingredients
- 1 15.25 oz. Box of Pillsbury Moist Supreme White Cake Mix
- 1 ¼ cups water
- 4 large egg whites
- ½ cup vegetable oil
- 3 oz. box Berry Blue JELL-O (or any red flavor gelatin)
- 3 oz. box Cherry JELL-O (or any red flavor gelatin)
- 2 cups boiling water divided (see directions below)
Poke Cake Frosting Ingredients
- 3.4 oz. Box of cheesecake or vanilla instant pudding mix
- 1 cup cold whole milk
- 1 envelope Dream Whip whipped topping mix
- ½ cup cold whole milk
- ½ teaspoon pure vanilla extract
- 3 tablespoons red, white and blue sprinkles
Instructions
- Prepare and bake the cake according to the package directions in a 9x13-inch pan. Let the cake cool completely.
- Poke holes all over the cooled cake. Dissolve each gelatin flavor in boiling water, stirring until fully dissolved.
- Carefully fill the holes with the red and blue gelatin, alternating colors and leaving space for each flavor. Do not pour the gelatin over the entire top of the cake.
- Cover tightly and refrigerate for at least 4 hours, or until the gelatin is fully set.
- To make the frosting, beat the Dream Whip with cold milk until thick and fluffy. In a separate bowl, beat the pudding mix with cold milk until softly set. Fold the two mixtures together until smooth and fully combined. Refrigerate until ready to use.
- Once the cake is chilled and set, spread a thin layer of frosting over the top, then add the remaining frosting and spread evenly to the edges. Top with sprinkles, if desired.
- Cover and refrigerate until ready to serve.
- Cut the cake into squares before serving.
Recipe Expert Tips
- The baking pan: Note I used a glass baking pan. I decreased the baking time because glass pans heat up hotter than metal pans. I baked the cake for 30 minutes to prevent over browning and to keep the cake from drying out.
- Cooling: Do not refrigerate to shorten the cooling time after baking. The top of the cake will get moist and sticky. It will make poking the holes more difficult.
- For the gelatin colors: If you want to get the same exact red, white and blue colored Poke Cake you will need to use the exact gelatin flavors that I used. I include the flavors I used so you have the option of duplicating the recipe exactly as I have made it.
- Filling the poke holes: Do not pour the gelatin over the entire top of the cake and expect to see tunnels of color separated by white areas as I have seen recommended in a few recipes. You will end up with big blobs of color it will look like a big mess.
- Dream Whip Substitution: In a pinch you can use and equal amount of Cool Whip instead of Dream Whip. It will have a thicker consistency.
- Make the frosting ahead: You should chill the frosting before frosting the finished cake. The pudding and whipped topping need a short cooling time to thicken.
Nutrition
Poke Cake Recipe FAQs
Yes, this moist cake can be made a day ahead of time. Keep it refrigerated.
Yes, Cool Whip is a classic frosting for poke cake. It is easy to spread, keeps the cake light, and works well when the cake needs to stay refrigerated before serving. But it will melt quicker than any other frosting.
Use the handle of a wooden spoon, a thick straw, or a similar round tool to poke holes evenly over the top of the cooled cake. Space the holes apart so the filling has room to soak in without making the cake fall apart.
No, it is best to carefully fill the holes with the gelatin instead of pouring it over the entire top of the cake. This helps keep the cake from getting soggy and gives you those pretty colorful stripes inside each slice.
A poke cake can turn soggy if too much liquid is added or if the filling is poured all over the top instead of into the holes. Letting the cake cool first and chilling it long enough will also help the texture stay just right.


Leave a Reply