


Making homemade vanilla yogurt at home is not as difficult as you might think. Learning how to make yogurt is as easy as simmering a pot of milk, stirring in a yogurt culture and setting it in a yogurt maker on the counter to culture.
Once you have learned how to make yogurt at home then you can try your hand at adding ingredients to come up with your own yogurt recipes like this easy to make Vanilla Bean Yogurt recipe that I made.
I have been making homemade yogurt for a few years now. I started out making it without a yogurt maker.
There are a number of ways that you can make yogurt at home without a yogurt maker (affiliate link).
When I first started out I read everything I could find on making homemade yogurt and found the best method that worked for me by trial and error.
How is yogurt made?
To make yogurt you only need 2 ingredients. Milk and a yogurt culture.
Most things you read about making yogurt or any cultured dairy food that starts out with milk or cream is that you can not make it with an ultra-pasteurized dairy product. All dairy products that are bought in the grocery store has been ultra-pasteurized.
I have made yogurt and homemade creme fraiche with ultra-pasteurized milk and whipping cream so many times that I can't even count the times.
If you have attempted to make homemade yogurt and it did not cultured or thickened more than likely the problem was that it did not culture under the proper temperature for the correct amount of time.
To make homemade yogurt you warm milk to about 185 degrees and bring it down to 111 F. to 113 F. degrees. You then a yogurt culture that you have bought or you use a container of store-bought yogurt with live cultures.
Most yogurt bought in the store has active live cultures. Some brands have more than others and will result in a thicker homemade yogurt more like Greek yogurt. A trick to get a thicker yogurt is to also add a little powdered milk to the pot while heating the milk.

How to make homemade yogurt
Everyone has their own method of yogurt making. This is the method I use and have used many many times. (affiliate links below)
Vanilla Yogurt Ingredients
You only need three ingredients to make homemade vanilla yogurt.
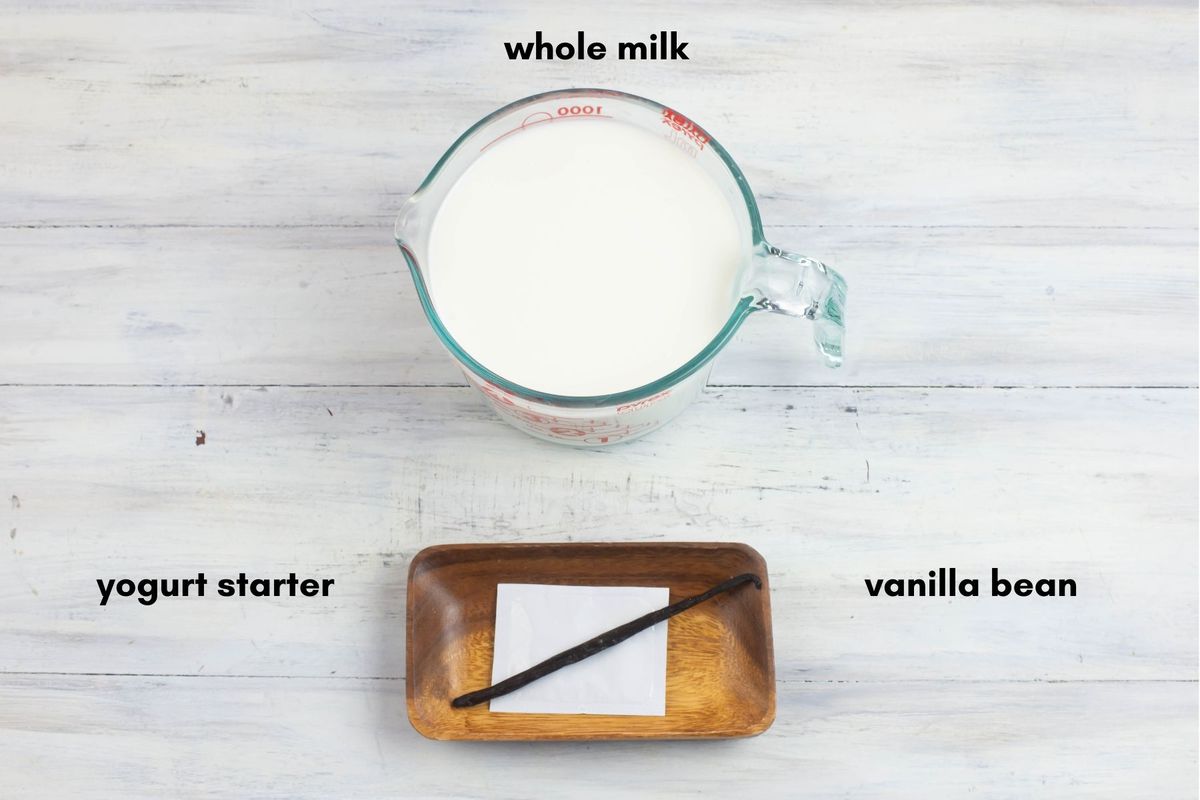
- the milk: 5 cups whole milk (pasteurized milk is fine)
- package of yogurt starter or ¼ to ½ cup plain unflavored yogurt with live cultures
- vanilla bean
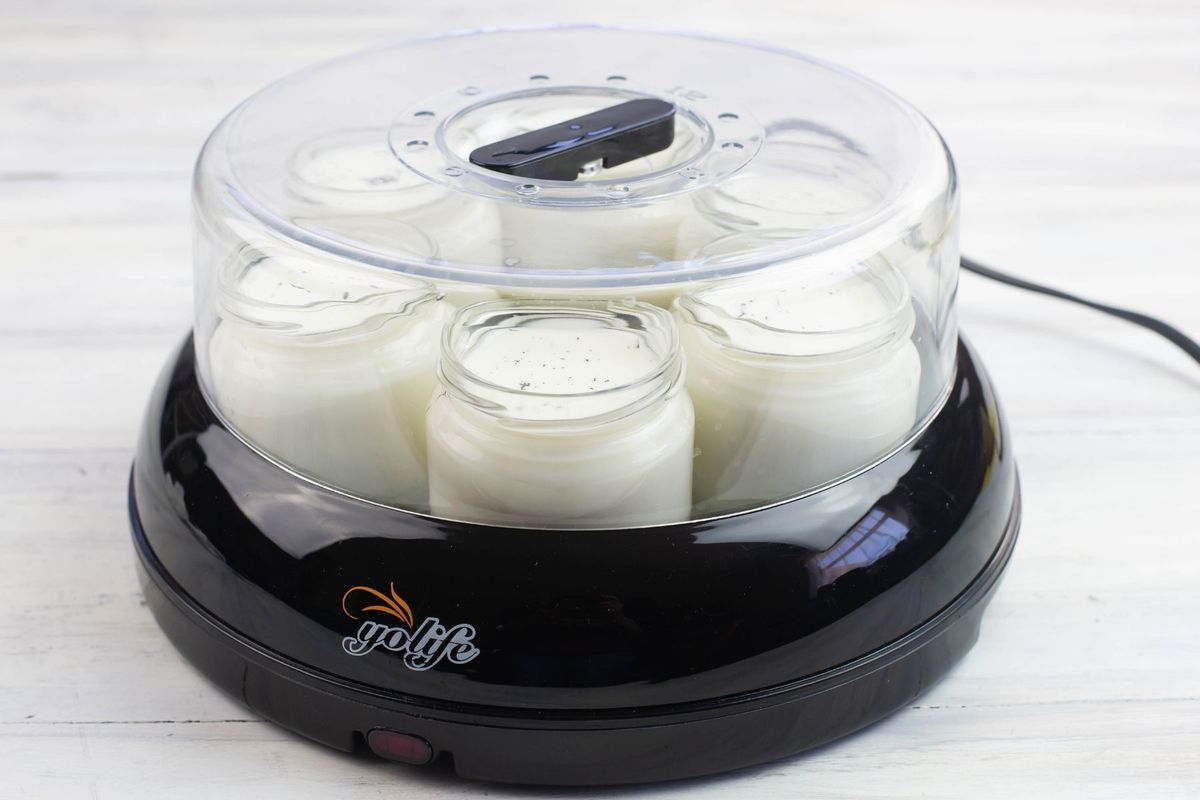
Since I am using a Yo-Life Yogurt Maker I measured the amount of milk needed to fill the yogurt cups that came with the yogurt maker.
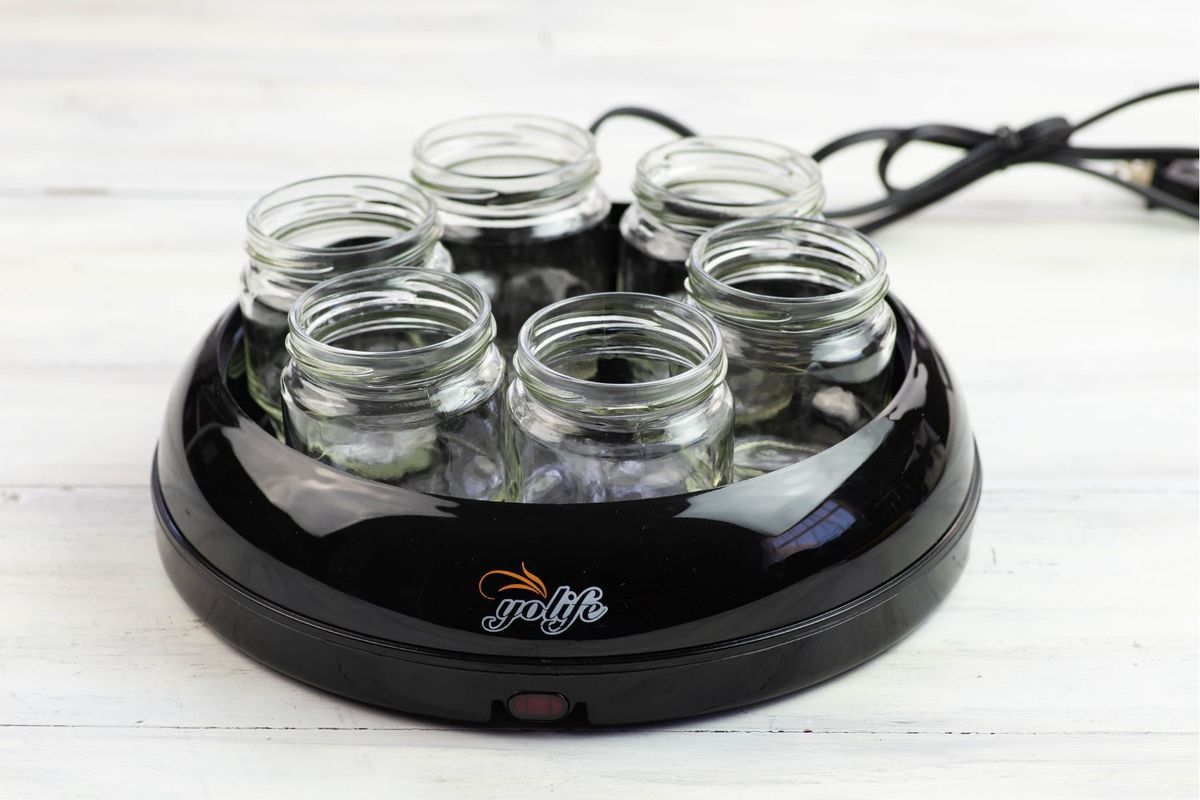
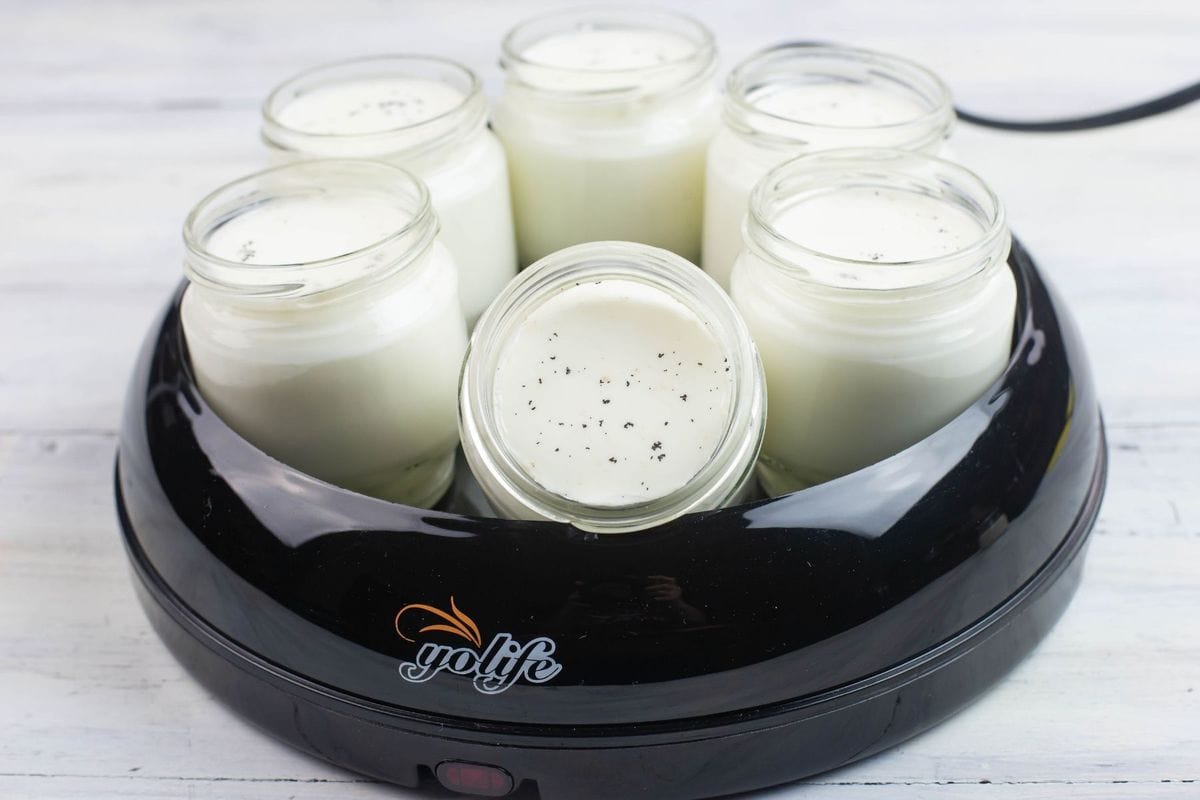
The Yo-Life Yogurt Maker comes with 7 small glass yogurt jars you pour the cultured milk into before placing them in the yogurt maker to incubate.
One of the reasons I bought the Yo-Life yogurt maker over other brands of yogurt makers was because it can be used to make both small jars or large jars of yogurt.
It comes with two sizes of lids. One lid will fits over the small yogurt jars that came with it.
Or you can use the larger lid over taller mason jars to make larger servings of yogurt.
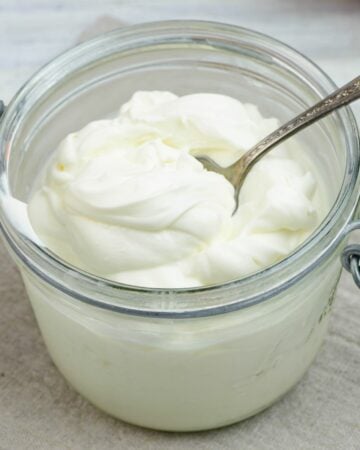
Normally it can take as long as 12 hours to properly set a batch of yogurt. After only 4 hours in the YoLife yogurt maker, I felt my yogurt was thick enough and turned it off.
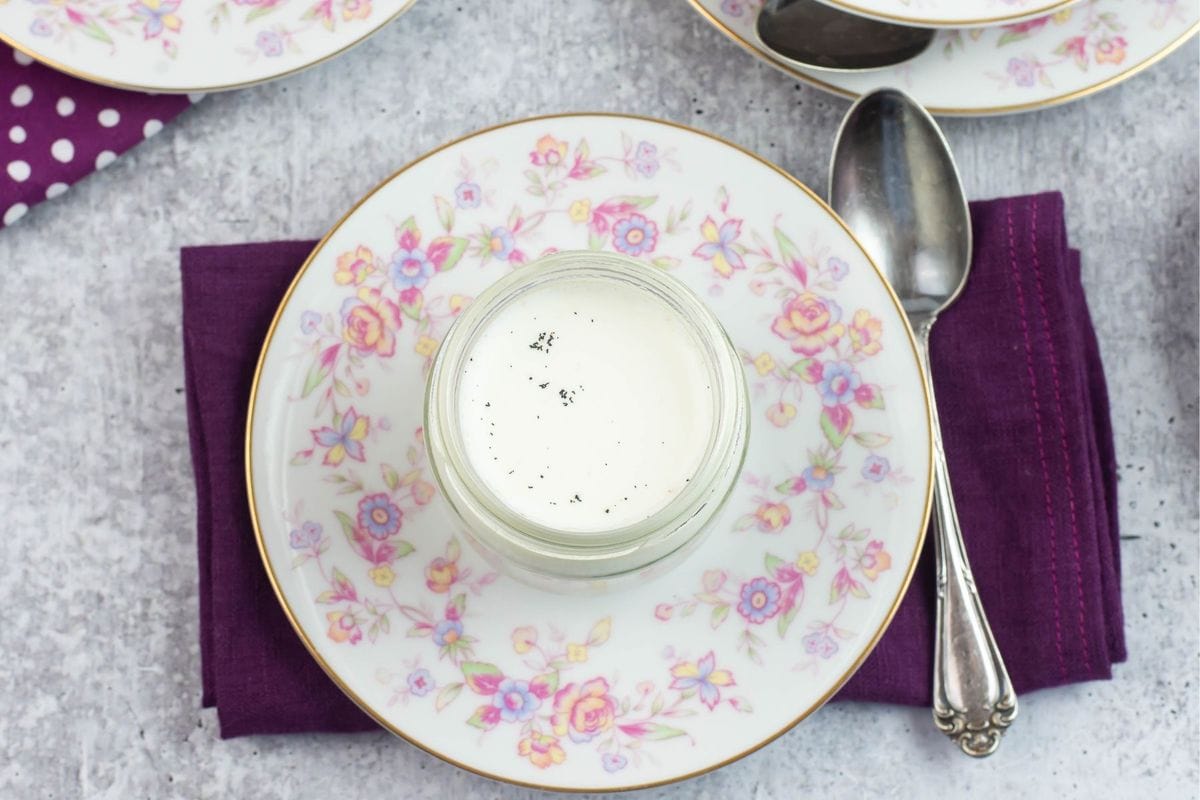
My yogurt had a light tangy flavor. Sometimes I feel like a tangier yogurt. Since I was testing out this yogurt maker for the first time I decided to stop there and chill the yogurt.
Culturing the milk
Step 1: Measure the whole fat milk into a heavy bottomed pot.
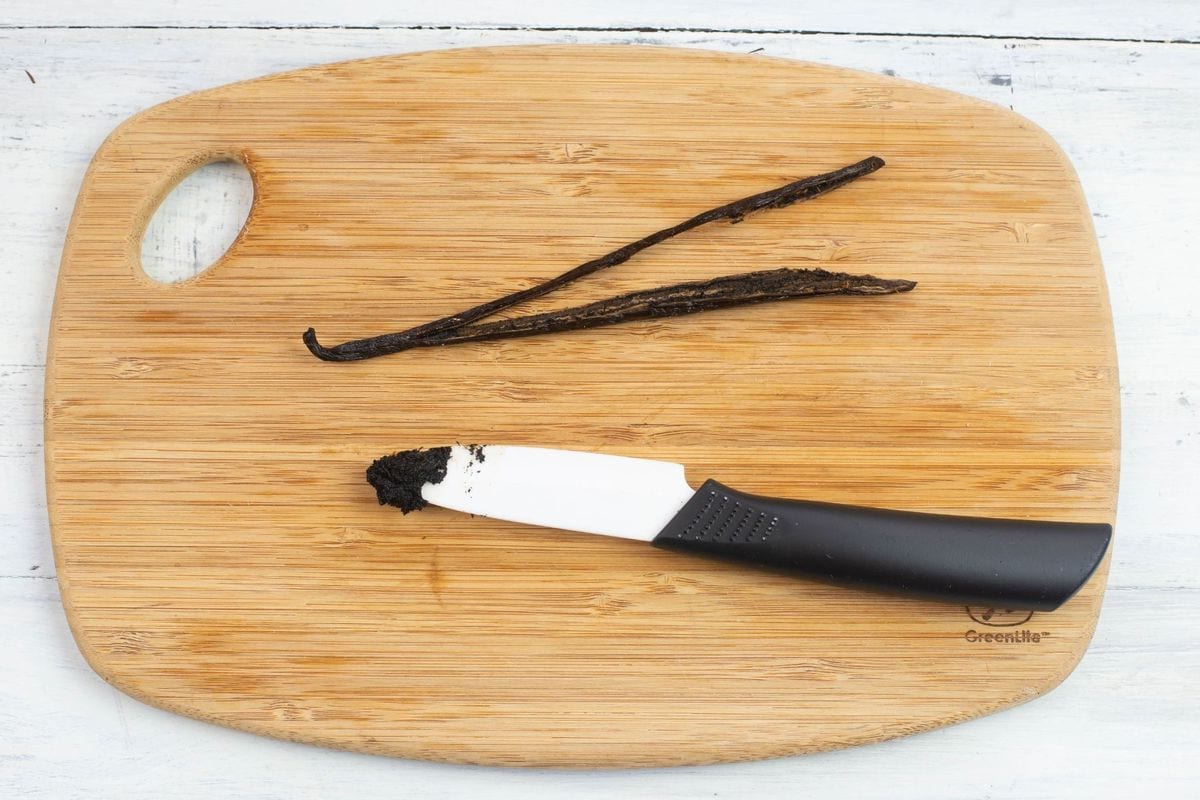
Step 2: Split and scrape the vanilla beans and add it to the pot.
Step 3: Heat over medium heat until it reaches 180 F. degrees on an instant read thermometer.

Occasionally stir the milk. without scraping the bottom of the pot so it does not scorch.
Step 4: Remove the pot from the hot burner and let it cool down to between 111 F. degrees to 113 degrees.
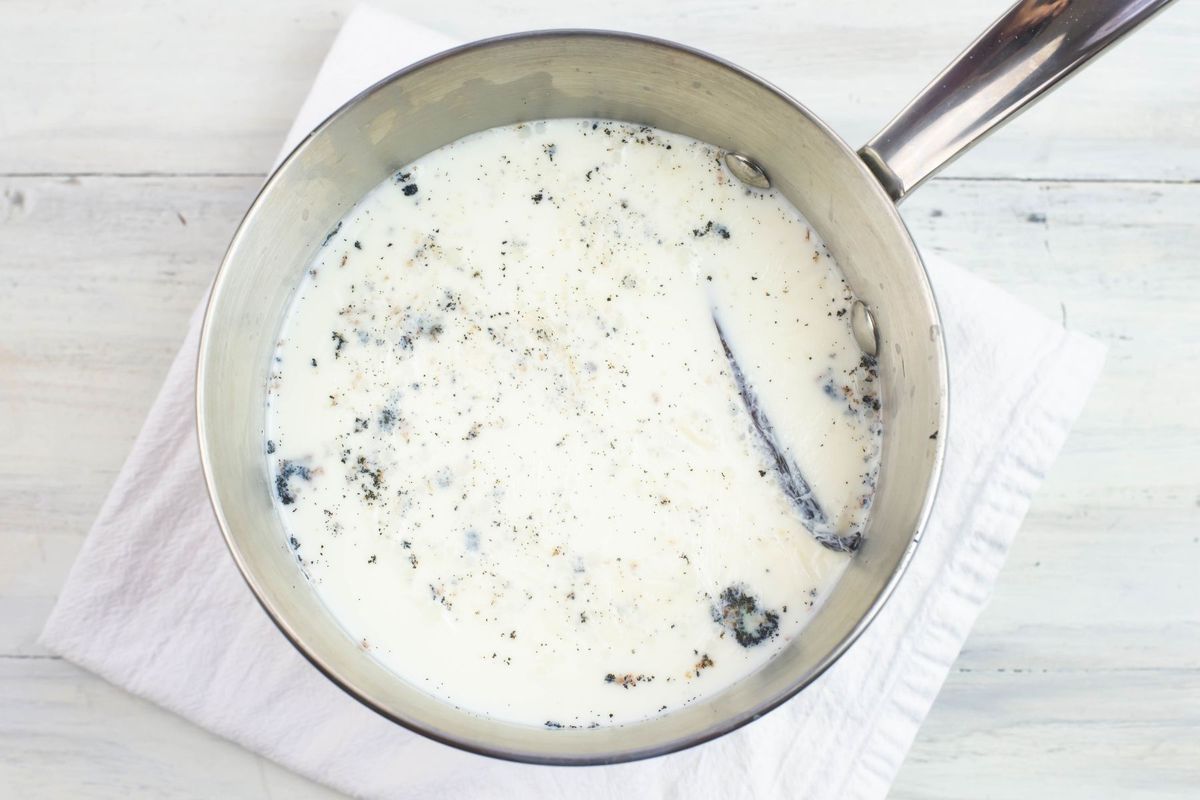
Step 5: Once the milk has cooled remove the skin that has formed on top of the warm milk and the vanilla bean and discard.
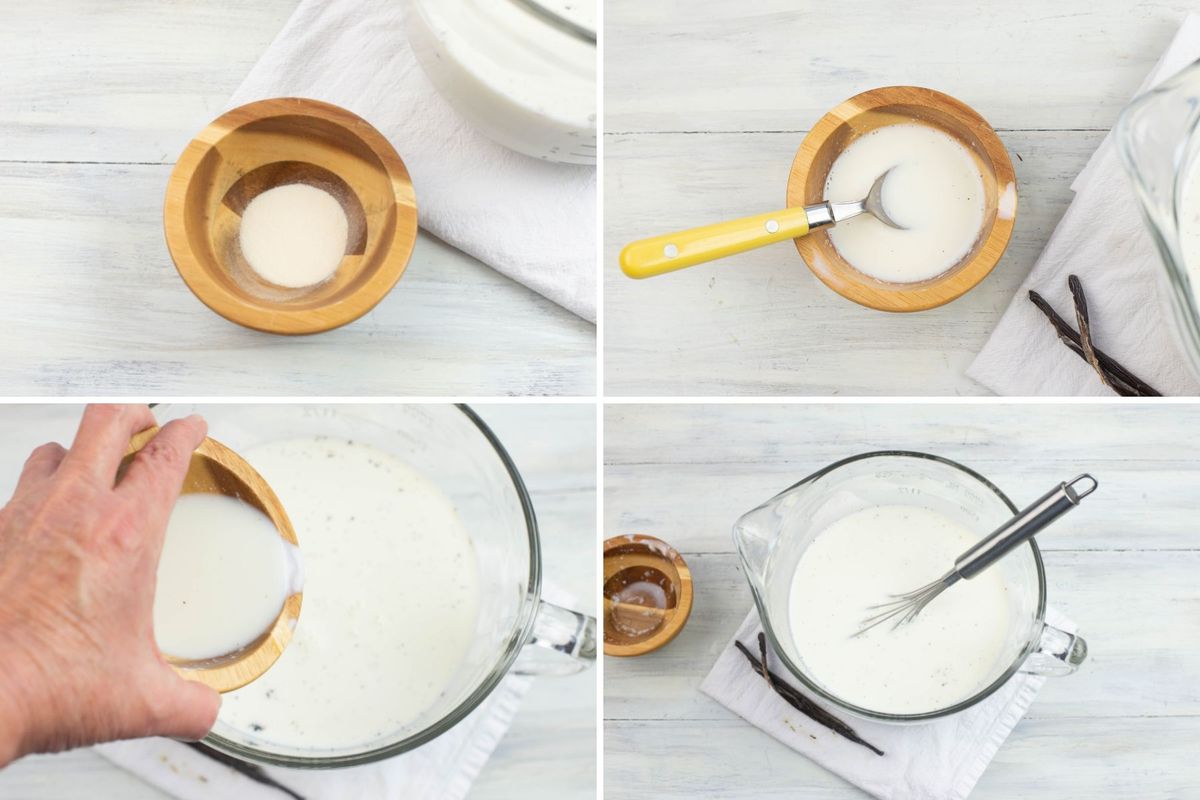
Step 6: In a small bowl mix the yogurt starter with a small amount of the warm milk until it has dissolved.
Pour it into the pot and stir the milk and yogurt gently to incorporate.
How to make vanilla yogurt with a yogurt maker
Step 7: Carefully pour the cultured milk into the yogurt jars that came with the yogurt maker. As you fill them place them on a towel or paper towels to catch any drips.
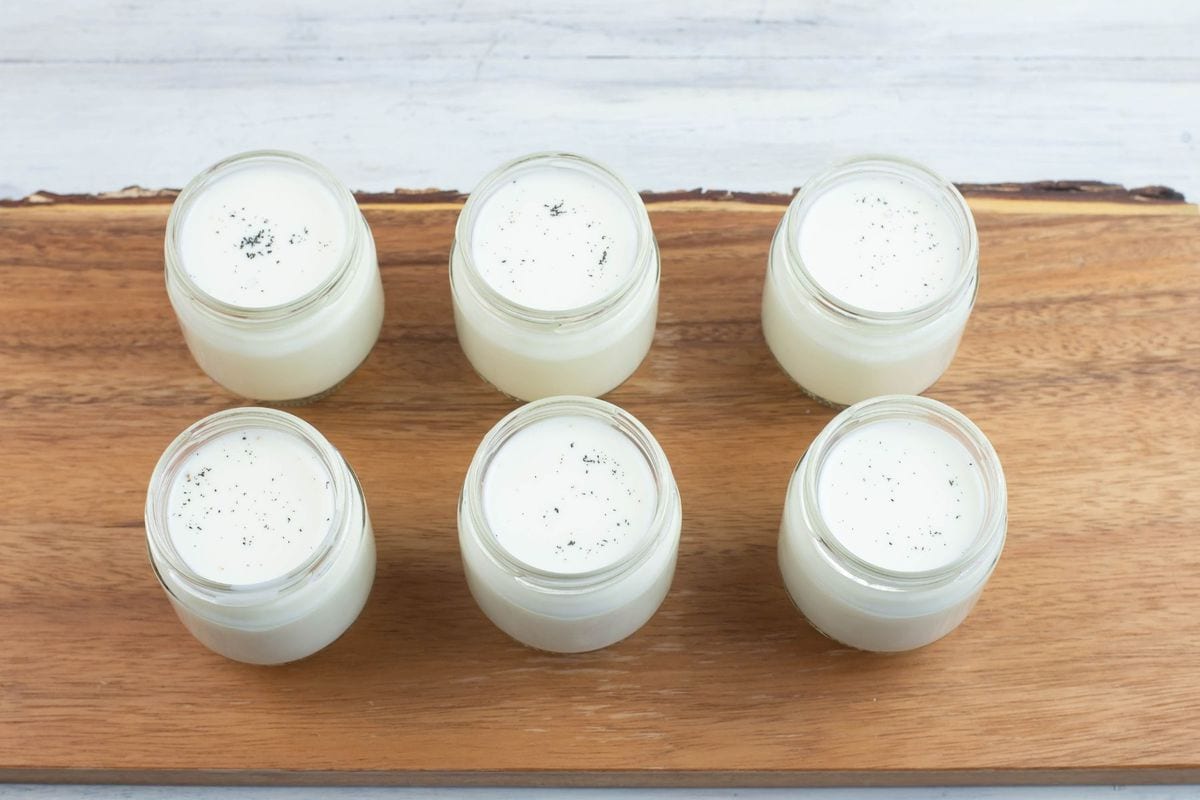
Once all the jars are full wipe them down if any milk has dripped down the sides as you were filling them.
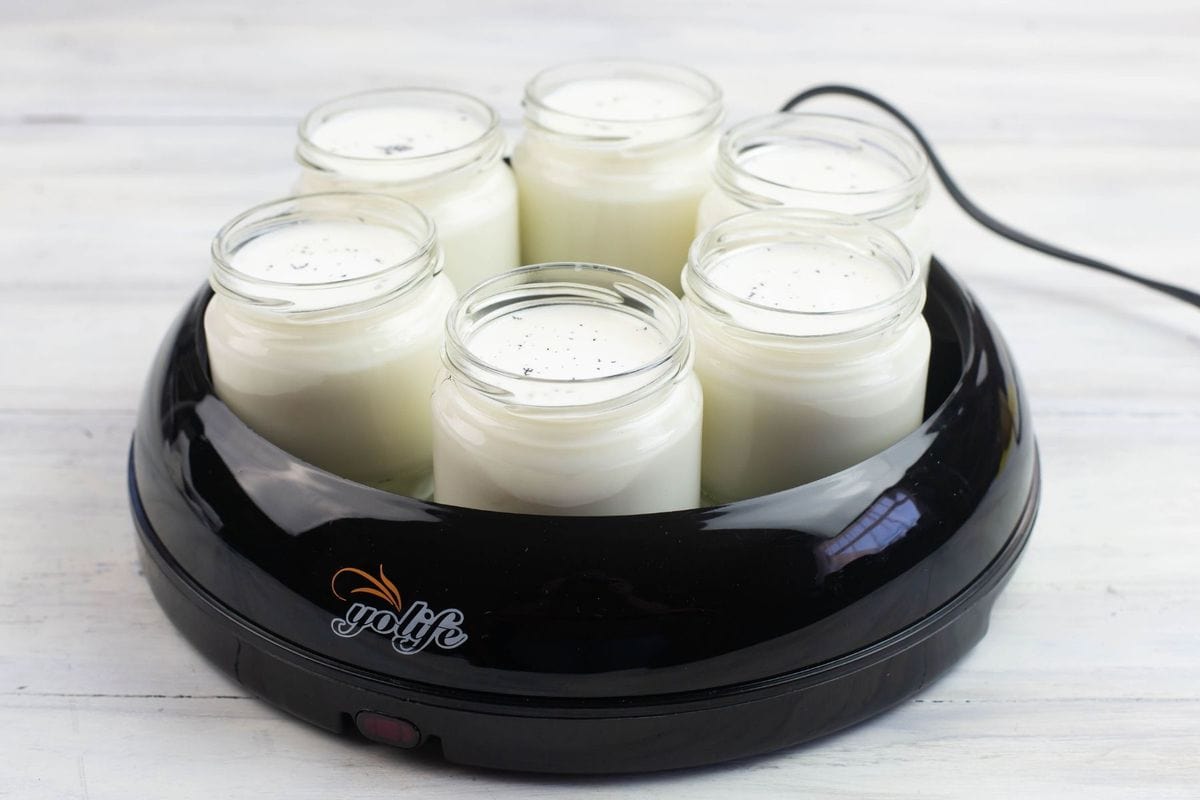
Step 8: Place all of the jars into the bottom of the yogurt maker base. Cover with the lid and plug the appliance in.
Step 9: How long you incubate the yogurt will depend on the type of yogurt culture starter you used. I used Euro Cuisine RI52 All Natural Yogurt Culture.
The directions say to incubate for 6 to 8 hours. The longer you culture the yogurt the tarter the flavor will be. I stopped culturing at six hours. The yogurt is thick, rich and creamy with a very light tart flavor.
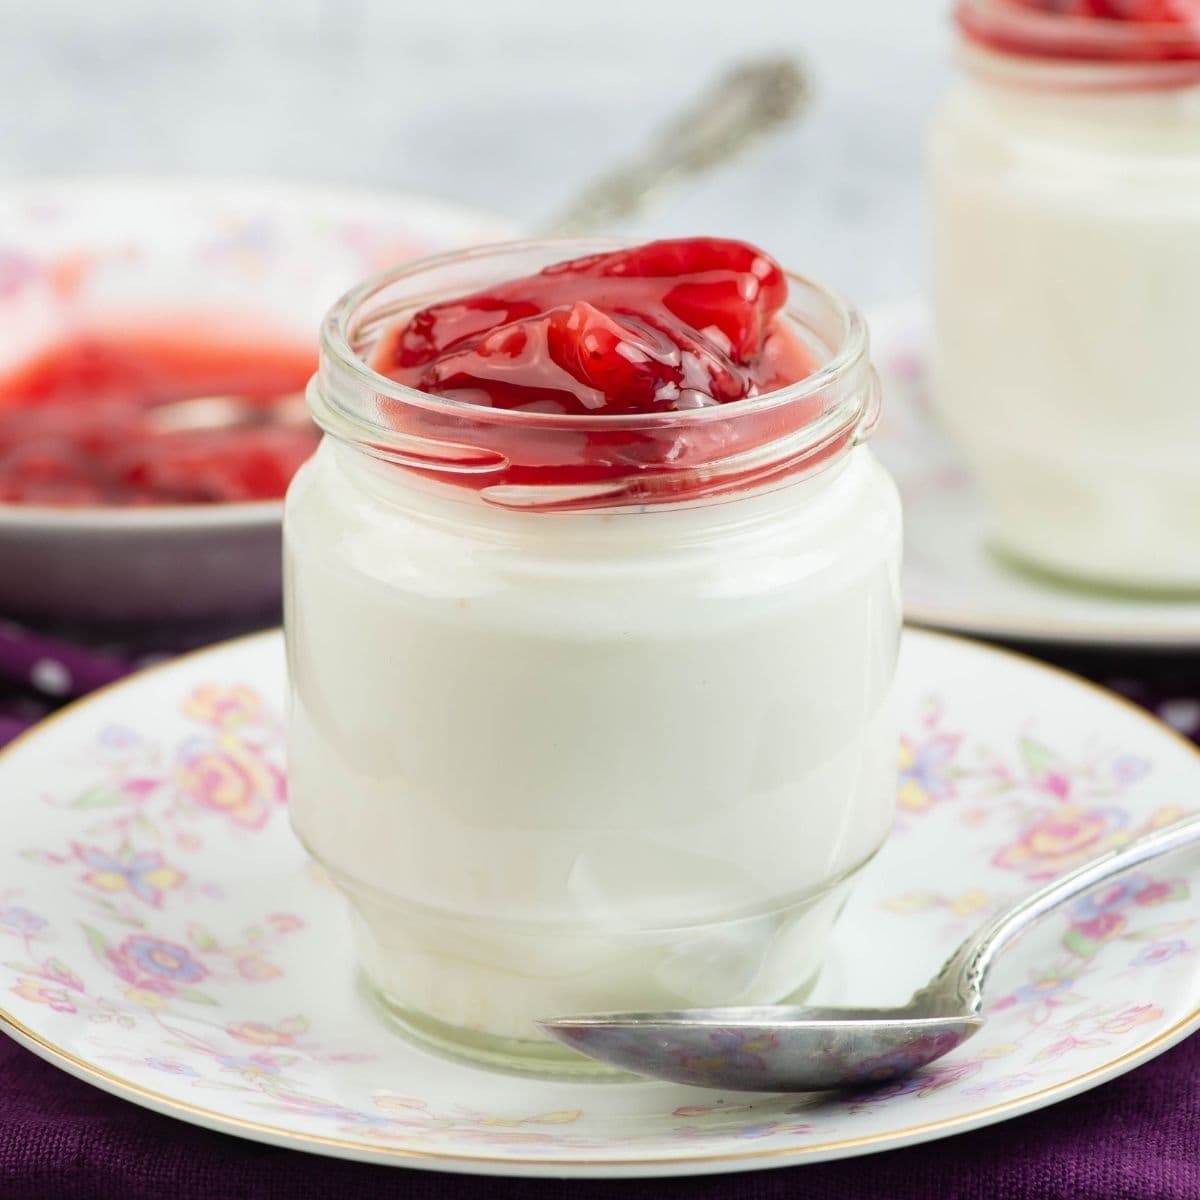
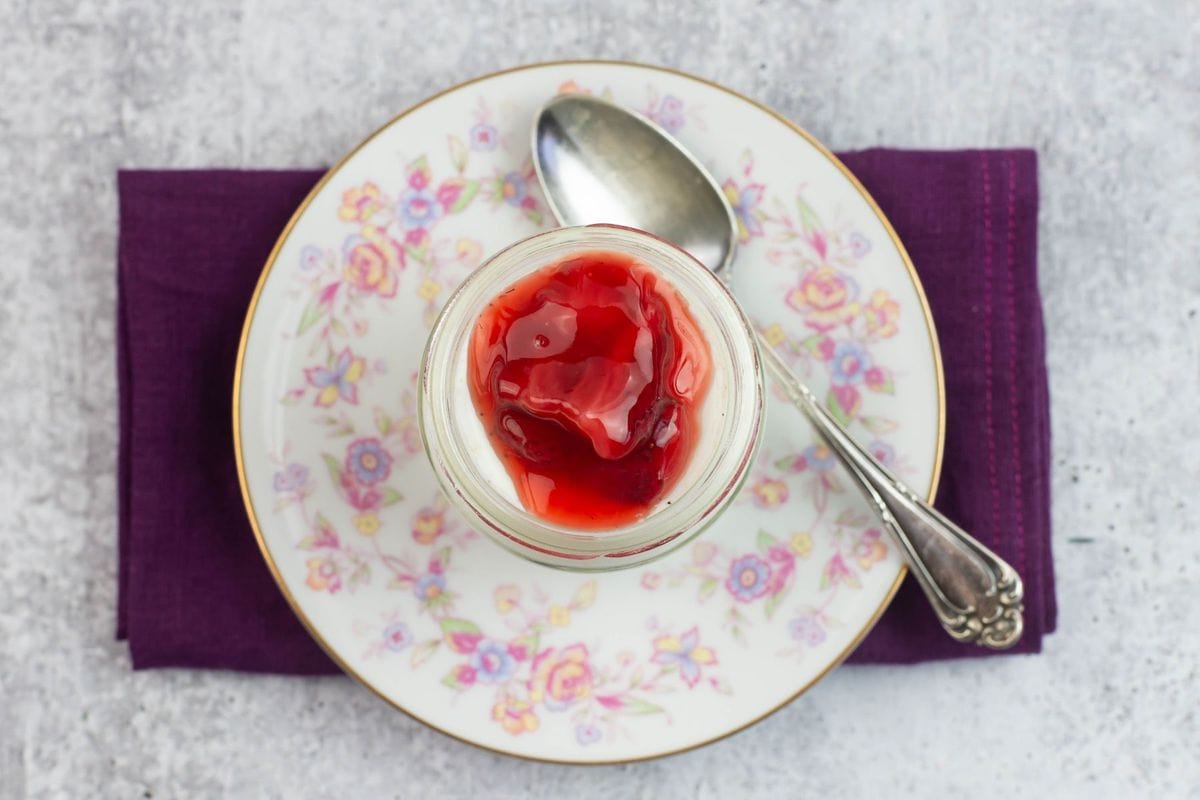
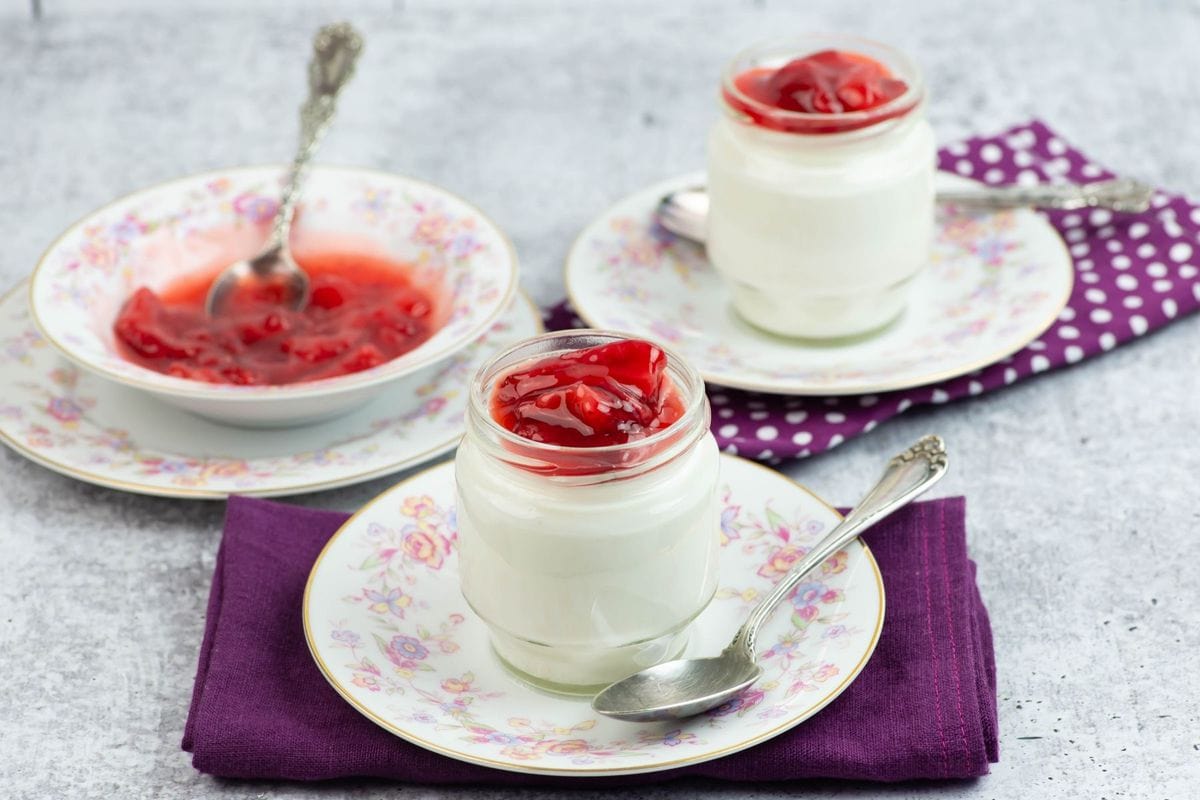
Homemade Yogurt with fruit
You can make homemade yogurt with fruit on the bottom. You must cook the fruit before adding it to the jar.
You can make a simple strawberry sauce or blueberry sauce and add a tablespoon or two of the fruit sauce to the bottom of the jar before incubating the yogurt. Or you can use it as a yogurt topping when you eat a serving.
How to make homemade yogurt without a yogurt maker
There are a few different ways to incubate homemade yogurt without a yogurt maker. I have tried two and been successful.
Oven light yogurt method: When you begin heating the milk turn your oven light on and keep the oven door closed.
- Follow the 8 steps above to culture the milk.
- Cover the pot tightly with plastic wrap or aluminum foil.
- Wrap a towel tightly around the pot and place it inside the oven. Drape another towel over the top of the pot to keep as much warmth in as possible.
- Close the oven door and do not open the door for at least 8 hours. After 8 hours remove the top towel and plastic or aluminum foil and take a peek. Check to see if the yogurt is thick and pulled away from the sides of the pot. If it is still loose and too watery re-wrap and return it to the warm oven and leave it for another 4 hours.
- Once the yogurt has cultured and is thick transfer it to containers and refrigerate. If there is a lot of whey floating on top you can carefully pour it off. Do not scrape the bottom of the pots as you are scooping it out.
This method of yogurt making has worked many times for me before I bought a yogurt maker. The inconvenience comes when and if you will need to use your oven.
For all methods of homemade yogurt making store in the refrigerator and consume within a week to 10 days.
You can use ¼ to ½ cup of your homemade yogurt to culture the next batch of yogurt you plan to make.
Instant Pot homemade Yogurt: The electric pressure cooker has only been available for a few years. Some models have a yogurt making option. I have not tried this method of yogurt making yet. Here is a very helpful link to an Instant Pot Yogurt recipe you can check out.
Homemade yogurt in Excalibur Dehydrator: You can also make homemade yogurt in an Excalibur dehydrator. to incubate homemade yogurt. There is a temperature setting on the model I own but if your appliance doesn't have it marked you can set it to 110 F, degrees and incubate the yogurt for 9 hours.
Recipe FAQs
You can make homemade yogurt at home without a yogurt culture by using store bought plain unflavored yogurt with a live and active culture. Look on the container to make sure it says the yogurt containers active and live cultures. Add ¼ to ½ cup of store bought yogurt into the warm milk and culture the yogurt as directed.
Homemade yogurt can be used multiple times to culture a new batch of homemade yogurt. After 3 or 4 times of culturing yogurt with a homemade yogurt culture it will start to weaken. When you notice a batch that doesn't get as thick as previous batches use a unflavored plain store bought yogurt or buy a yogurt starter for your next batch. Live yogurt starters will last about as twice as long as your homemade yogurt culture.
Recipe Expert Tips
- The amount of milk you need to make yogurt will depend on the yogurt maker and the yogurt starter you are using.
- Milk for yogurt: whole fat milk is best for the thickest richest yogurt. You can make low fat yogurt by using a lower fat content milk but it will yield a thinner yogurt.
- Pasteurized milk: raw milk or pasteurized milk can be used. Do not use ultra pasteurized milk.
- Yogurt starter or culture: save ¼ of a cup of your homemade yogurt to culture your next batch.
- Tangier yogurt: The longer you culture homemade yogurt the tangier it will become.
More recipes you love


Email questions or recipe requests to flouronmyface@gmail.com. Follow me on Pinterest, YouTube, Instagram and Facebook.

Homemade Vanilla Bean Yogurt
Equipment
- 1 Yogurt Maker
- 1 Instant Read Thermometer
Ingredients
- 5 cups whole milk (room temp)
- 1 package yogurt starter or 1 small container of store bought Yogurt with live cultures (room temp)
- 1 large vanilla bean (split and seeds scraped)
Instructions
- Pour the milk into a heavy bottomed sauce pan.
- Split and scrape the vanilla bean and the beans and vanilla pod to the pot.
- Heat the milk over a low to medium heat until it reaches 180 degrees. Occasionally stir, without scraping the bottom of the pot so the milk does not scorch.
- Remove the pot from the heat and slowly let the milk cool down to 111 - 113 F. degrees. Remove and discard the vanilla bean.
- If using a Yogurt Starter: Pour the envelope of yogurt culture starter into a small bowl. Add about ¼ cup of the warm milk to the bowl and stir until completely dissolved. Add to the pot of milk and gently whisk until mixed in.
- If using a live cultured Yogurt: In a small bowl mix about ¼ to ½ cup of the cultured yogurt with some of the warm milk to dissolve. Pour it into the pot and stir the milk and yogurt gently into the warm milk until dissolved.
If Using a Yogurt Maker
- Carefully ladle the cultured milk into the yogurt jars that came with your yogurt maker. As you fill them place them on a towel or paper towels. Once all the jars are full wipe them down to remove any milk that has dripped down the sides of the jars as you were filling them.
- Place all the jars in the yogurt maker and culture the yogurt following the manufacturer's instructions.
Oven Light Method
- When you begin heating the milk turn your oven light on and keep the oven door closed. Once the hot milk has cooled down to 110 degrees and you have added the yogurt culture (remove the vanilla bean if using) cover the pot with plastic wrap or aluminum foil.
- Wrap a towel around the pot and place it inside the oven. Drape another towel over the top of the pot.
- Close the oven door and do not open the door for at least 8 hours. After 8 hours remove the top towel and plastic or aluminum foil and take a peek.
- Jiggle the pot to see if the yogurt is thick and pulled away from the sides of the pot. If it is still loose and water re-wrap and return it to the warm oven and leave it for another 4 hours.
Heating Pad Method
- Again after mixing in the yogurt culture and removing the vanilla bean. Place the pot on top of a heating pad in a warm area of your kitchen. Wrap the pot in the same method used in the previous method. Let the yogurt culture for 8-12 hours. Pour off most of the whey and spoon into containers and store in the refrigerator.
- For all methods of homemade yogurt making store in the refrigerator and consume within a week to 10 days.
Video
Recipe Expert Tips
- You can use ½ cup of your homemade yogurt to culture the next batch of homemade yogurt you plan to make.


Barb
Have you ever used non sweet almond milk?
Arlene Mobley
Barb
No I have never tried making yogurt with any other milk.
April @ The 21st Century Housewife
This is a wonderful tutorial for homemade yogurt - you've made it look really do-able! It's not something I've tried myself yet but this post is really encouraging. I love the ida of a vanilla bean flavoured yogurt - it sounds delicious! Thank you for sharing this post with us at the Hearth and Soul hop, Arlene 🙂
Arlene Mobley
April
Thank you!