

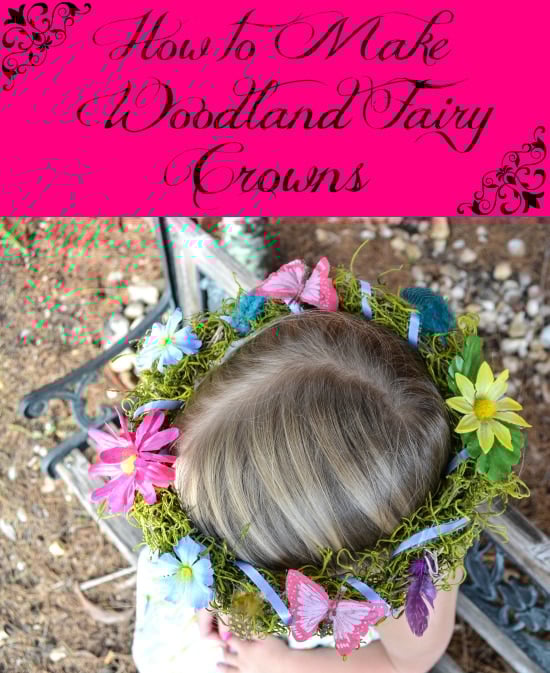
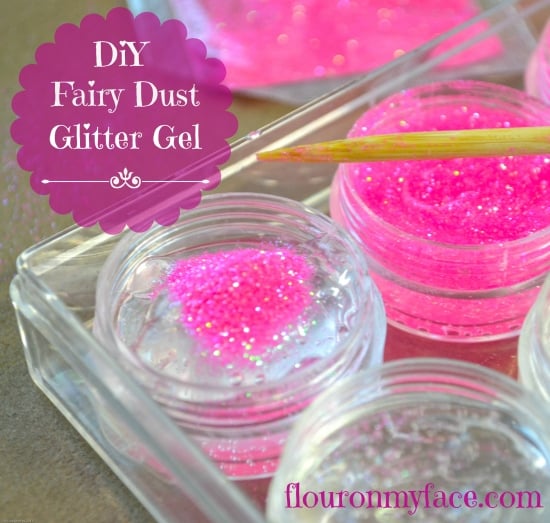
The party theme was woodland fairies and I made all the girls these DIY Woodland Fairy Crowns, Wands, and the DIY Fairy Dust Glitter Gel party favors. The How to Make Fairy Dust Gel instructions are very easy.
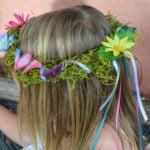
All the girls had a great time at the fairy party and loved wearing their fairy costumes with the DIY woodland fairy crowns that I made.
DIY Fairy Dust Glitter Gel was a hit with the moms as well. Everyone was sparkling at the party.
These Woodland Fairy Crowns would also perfect for a Fairy Tea Party or a Fairy themed birthday party.
I made this Woodland Fairy Crowns for the kids but you could also make them for adults just by making the wire base larger to fit an adults head.

How To Make DIY Fairy Crowns for a Woodland Fairy Themed Birthday Party
Back in July, I posted a tutorial for DIY Fairy Dust Glitter Gel that I made for my granddaughters birthday party.
The Fairy Crowns are a little harder to make then the fairy glitter gel but as long as you have some basic crafting experience you shouldn't have a problem.
I made enough woodland fairy crowns for 12 little fairies we were expecting at the party.
The number of supplies is based on the 12 crowns I made. You, of course, will need much less if you are only making one woodland fairy crown.
If you are making just one or a few fairy crowns you will only need one package of each of the supplies listed below.
If you are planning on making enough Fairy Crowns for a Fairy Birthday Party then this supply list is what I bought and used for the 12 Fairy Crowns that I made.
There were some supplies left over so you could possibly make a few more woodland fairy crowns if needed.

How To Make 12 Woodland Fairy Crowns
Basic Craft Supplies Needed:
- Wire cutters
- Scissors
- Quick Drying tacky glue or a low temp glue gun and glue sticks
Woodland Fairy Crown Supplies:
- 3 packages brown grapevine wire
- 6 bouquets artificial flower picks in an assortment of colors
- 3 bouquets butterfly picks (Dollar Store)
- 2-3 packages Spanish Moss
- 1 package colored feathers
- burlap ribbon or strips of burlap material
- ¼ inch satin ribbon in various colors
- artificial green leaf garland (optional had I seen this at the time I would have added some of this to the fairy crowns)
How to measure the correct size base for a DIY Fairy Crown
Our Fairy Birthday Party guest list consisted of various aged little girls. The youngest was 3 and the oldest 7.
To figure out the correct size I would need for the crowns I measured the heads of my granddaughters.
My granddaughter Addison would be the youngest and had the smallest head.
I used a piece of ribbon to measure her head, added a couple of inches to allow for the ends of the wire to be wrapped around to secure the ends and made a crown base for her crown so it would fit her smaller head.
For the remaining fairy crowns for the bigger children, I measured my 4-year-old granddaughters head (the birthday girl) and my 7-year-old granddaughter's head, who would be the oldest and largest fairy at the party.
The sizes were so close that I made the rest of the fairy crowns to fit the measurements of the birthday girl's 4-year-old head size because most of the guest would be in her age group.
If the majority of the kids had been around 7 years old I would have used her measurements for the crown base.
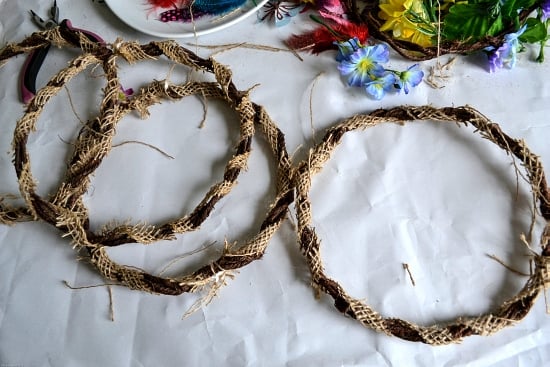
Tips on how to construct the fairy crown base
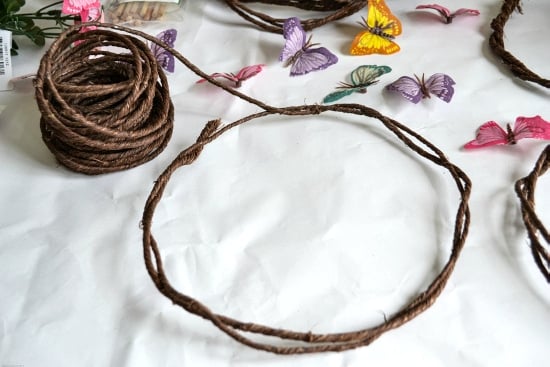
Using the length of ribbon I then took the Grape Vine Wire and unrolled a short piece and created a circle matching the size of the ribbon I used to measure the girl's heads.
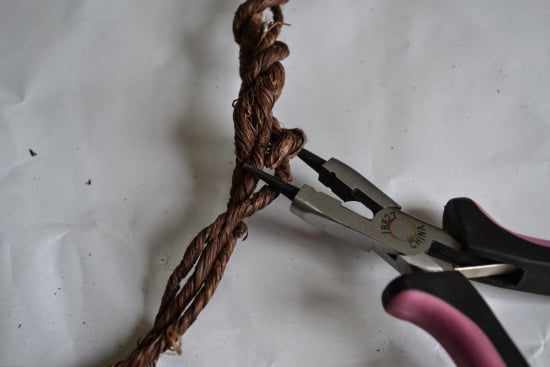
To secure the wire I twisted the end piece of the wire around the circle and tucked in the end so the sharp end would not scratch the Fairies while they wore it. You can also add a dot of hot glue to cover the sharp edges.
Next, I wrapped the wire around the circle two more times. I cut the wire off the bolt and turned the end in and tucked it into the wire of the crown to secure it in place.
Instructions
- Step 1: Loosely wrap the wire around your child's head to get the size needed and cut wire 3 times the length.
- Step 2: Wrap the length of wire around itself and trim the ends and tuck them into the wire. You could also apply a drop of glue to the cut end to keep it from scratching.
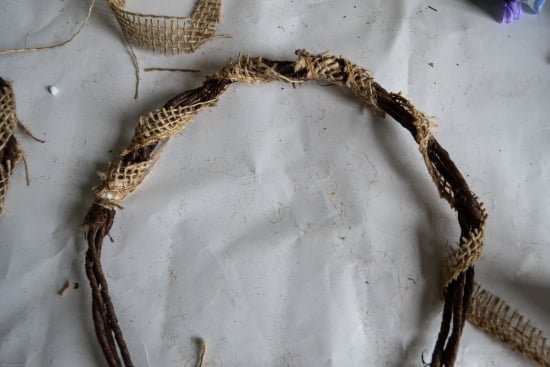
- Step 3: Wrap fabric or burlap strips around the wire and secure ends with glue.
- Step 4: Glue moss around the wire crown.
- Step 5: Wrap ribbon around the crown and leave a tail hanging.
- Step 6: Embellish with plastic flowers, feathers, plastic butterflies or anything else that suits the woodland fairy theme.
More Fairy Themed Crafts
- Whimsical Sleeping Garden Fairy: I love to display this easy Sleeping Garden Fairy every Spring.
- DIY Fairy Dust Glitter Gel: Fairy's are mystical and need those sparkles so you can see them as they flutter by. Perfect for a Fairy themed birthday party.
- DIY Mini Cupcake Stands: Paint or decorate these mini cupcake stands to look like mushrooms for your Fairy Garden Tea Party table.
How to decorate the DIY Woodland Fairy Crowns with ribbon.
Embellish the fairy crowns with ribbon, colorful feathers, and artificial flowers.
I couldn't find narrow burlap ribbon so I bought a package of wide ribbon and trimmed off strips about 1 inch wide.
Using glue secure the end of burlap ribbon to the crown base and twist it around the wire crown frame. Let the glue dry completely.
Once the glue is dry add a layer of moss wrapping it around the back of the wire frame.
Using a low temp glue gun would work better than the tacky glue at this point. And since it dries immediately it will help things go faster especially if you are making 12 of the crowns.
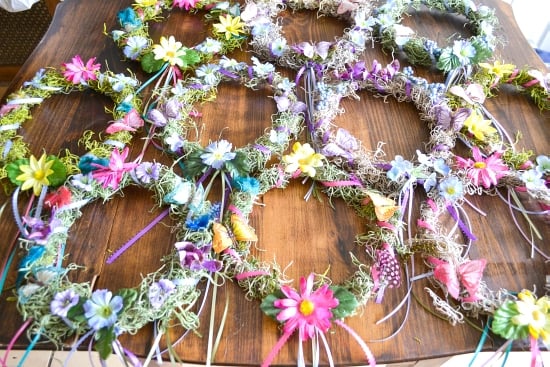
Embellishing DIY Fairy Crowns
Now the fun begins. Take three coordinating colors of ribbon and pull off about 3 feet of ribbon.
Wrap the ribbon around the crown. Be sure to leave about 6 inches hanging off the back side, at each end of the ribbon to create a tail.
The ribbon will trail down the back of the fairies head and look so pretty. Secure the ribbon by tying the ribbon in a knot at the back.
Play around with the artificial flowers, butterflies and leaves.
Arrange them around the crown before gluing to see what it will look like.
Once you are happy glue the pieces to the crown base with the low temp hot glue.

Our Fairy Birthday Party was a huge hit.

Notes
- If you can find small grape vine wreaths in sizes that will fit the girls heads you could use it instead for the crown base instead of making it with wire. I could not find any that would work for us at the time.
Email questions or recipe requests to flouronmyface@gmail.com. Follow me on Pinterest, YouTube, Instagram and Facebook.
DIY Woodland Fairy Crowns
Materials
Basic Craft Tools
- 1 pair wire cutter
- 1 pair scissors
- 1 package quick drying tacky glue or glue gun and glue sticks buy a glue gun and glue stick kit
Supplies for Woodland Fairy Crowns
- 3 packages packages brown grapevine wire
- 6 bunches bouquets artificial flowers Dollars Store
- 3 bouquets butterfly picks Dollar Store
- 3 packages artificial Spanish Moss Joanns Craft Store
- 1 package dyed feathers Joanns Craft Store
- 1 Roll burlap ribbon or strips of burlap material AC Moore
- ¼ inch satin ribbon in various colors
Instructions
- Loosely wrap the wire around your childs head to get the size needed and cut wire 3 times the length.
- Wrap the length of wire around itselfs and trim the ends and tuck them into the wire. You could also apply a drop of glue to the cut end to keep it from scratching.
- Wrap fabric or burlap strips around the wire and secure ends with glue.
- Glue moss around the wire crown.
- Wrap ribbon around the crown and leave a tail hanging.
- Embellish with plastic flowers, feathers, plastic butterflies or anything else that suits the woodland fairy theme.
Notes
- If you can find small grape vine wreaths in sizes that will fit the girls heads you could use it instead for the crown base instead of making it with wire. I could not find any that would work for us at the time.
DIY Fairy Dust Glitter Gel Recipe
Need a perfect cake recipe for your Woodland Fairy Party? How about Vintage Fairy Cakes.
Colleen
These are beautiful! The girls must have had a great time!
Arlene Mobley
Colleen The girls had a great time. The Mom's were so jealous I didn't make them crowns also.
Dee
The crowns are so adorable!!! I'm pinning them.
Arlene Mobley
Dee
Thank you!
BeBetsy - Smashingly Good Living
Arlene - these are simply lovely - I always wanted to make for myself but can't figure out where to wear it - perhaps in the backyard when I am gardening - that way I can enjoy it and no-one can see me - LOL! (Sharon)
Great share on your #simplybebesty GALLERY!
The best to you
Sharon and Denise
Arlene Mobley
Sharon thank you! I think you could have a lovely garden tea party and a fairy crown would look perfect!
Chrystal M.
These are simply beautiful!
Laura Wickham
I LOVE THESE! Waaaaaay to go!!! Thank you for sharing! =)
Flour On My Face
Thank you Laura!