

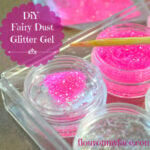
Fairies Fairies Everywhere: DIY Fairy Dust Glitter Gel
Did you ever want to be a fairy?
What little girl hasn't wanted to flutter around in a pretty fairy costume, wave her wand and cast a spell while pixie dust flies in the air? Make this DIY Fairy Dust Glitter Gel for all the little fairy princesses you know so they can sparkle like a real fairy.

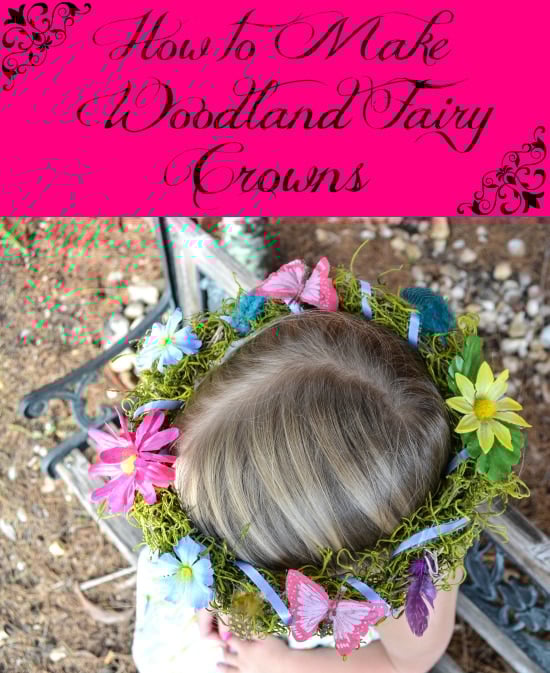
My granddaughter Emma turned four a couple of weeks ago and we celebrated with a Woodland fairy party. Grammy out did herself and created the fairy party favors.
I made woodland fairy crowns, fairy wands and fairy dust glitter gel for all the little fairies that came to the fairy party.
Are you planning a fairy party for your little girl?
The woodland fairy party theme came about because I saw a pin on Pinterest for a homemade fairy glitter gel that was posted on SouleMama's website.
I had to make a few adjustments because I couldn't find some of the supplies she used but all the little fairies loved the way mine turned out.
If you are in the planning stages of your fairy party and you have time to order from Amazon I have included affiliate links to some of the supplies that I had the hardest time finding. They are affiliate links.
Disclosure: Some links are affiliate links. If you make a purchase based on my recommendation I will earn a small commission.
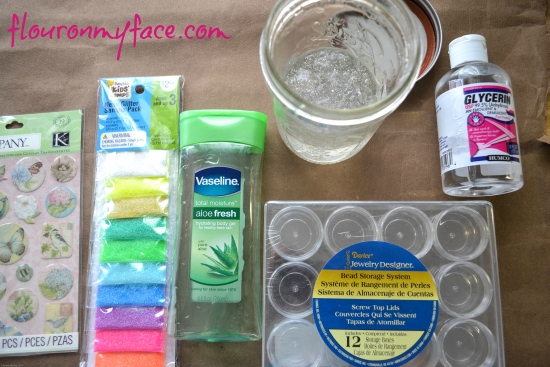
Supplies Needed to make Fairy Dust Glitter Gel
- 1 tablespoon Glycerin
- 1 cup Aloe Vera Gel or a 6.8 fluid ounce bottle of Vaseline Total Moisture Aloe Fresh
- Non-Toxic Cosmetic Grade Fine Glitter in as many colors as you would like.
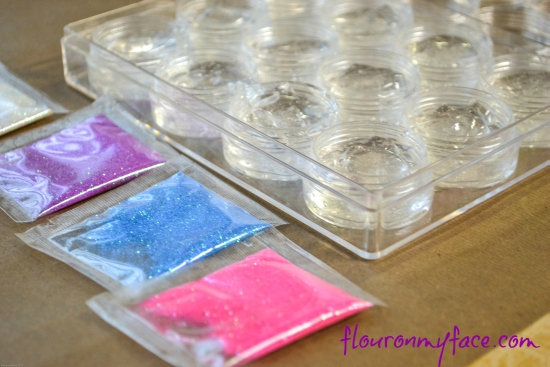
- 12 Clear Bead containers
- Lavender essential oil (optional)
- Puffy Stickers (optional)
- wooden skewer
DIY Fairy Dust Glitter Gel a great fairy party favor or fun Summer Kids Activity
Fairy Dust Glitter Gel is so easy to make and can be customized for the color scheme of your fairy party. If you are not having a fairy party then the fairy glitter gel also would make a great summer kids activity.
How to Make Fairy Dust Glitter Gel
- In a glass jar or bowl add 1 cup of aloe vera gel or the entire container of Vaseline Total Moisture Aloe Fresh.
- Add 1 tablespoon of glycerin and mix well.
- Add a few drops of Lavender essential oil and stir.
- Set aside overnight if cloudy. If you used aloe gel and it did not cloud up continue to the next step.
- Take the lids off all the bead storage containers but leave the individual containers in the plastic case they came in.
- Using a small spoon fill each tiny container with the gel. Do not fill them to the brim or they will overflow when you are mixing the glitter in. Just below the lip of the container is good.
- Snip a corner a bag of glitter.
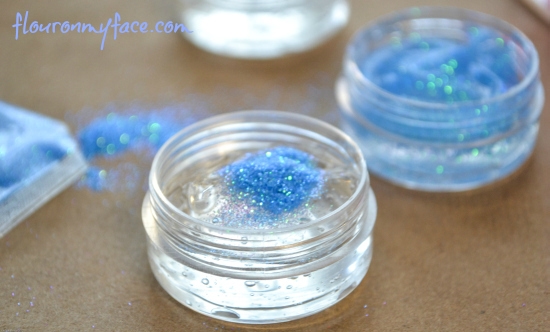
- Work with one color of glitter at a time so they don't get mixed together.Remove the number of containers for the color you are working with from the case and tap a pile of glitter on top of each one. Stir well with a wooden skewer. Add more glitter if it looks pale in color. The more glitter the bolder the color of glitter gel you will get.
- Twist the lid on each container as you're done adding the glitter and replace it in the storage container.
- Repeat with whatever other colors you plan to make until all containers of Fairy Dust Glitter Gel are made. Snap the lid on the container to store or add stickers to the top as I did.
Some notes on making Fairy Dust Glitter Gel
- Caution when applying! This is not meant to be used on the face, near the eyes or mouth. Lavender essential oil and the Vaseline Moisture Aloe Fresh will burn the eyes and other delicate areas of a child's face.
- If using aloe vera gel you may not see the cloudiness that I did.
- If you want to omit the lavender essential oil you can. The Vaseline Moisture Aloe has a slight scent and if you are using it you don't need the lavender.
- Open only one color of glitter at a time and only work with the containers meant for that color to prevent cross contamination of the colors of glitter. Unless you are going for a multi-colored effect.
- I did not use any coloring at all the glitter colors the gel. Doesn't it look awesome!

I added puffy stickers to the top of the containers. It looked cute but the storage box wouldn't close all the way. If using stickers to pretty the fairy dust glitter gel containers up I suggest using flat stickers.

The Fairy Dust Glitter Gel is so easy to make and the girls really loved rubbing it all over their arms and shoulders as they flew around the party with their fairy wings and wands. The party was a hit. My granddaughter loved it and so did the rest of the kids.
If you are not planning a fairy party this is a perfect summer project for the kids. They can help you make it and then they too can glow and glitter like the little fairies at our party.
DIY Fairy Dust Glitter Gel
Materials
- 1 tablespoon Glycerin
- 1 cup Aloe Vera Gel or a 6.8 fluid ounce bottle of Vaseline Total Moisture Aloe Fresh
- Fine Glitter in as many colors as you would like bought at Joann's
- Small screw top Jewelry Designer Bead Storage System bought at Joann's in the jewelry making department
- Lavender essential oil optional
- Stickers optional
- wooden skewer
Instructions
- In a glass jar or bowl add 1 cup of aloe vera gel or the entire container of Vaseline Total Moisture Aloe Fresh.
- Add 1 tablespoon of glycerin and mix well.
- Add a few drops of Lavender essential oil and stir.
- Set aside overnight if cloudy. If you used aloe gel and it did not cloud up continue to the next step.
- Take the lids off all the bead storage containers but leave the individual containers in the plastic case they came in.
- Using a small spoon fill each tiny container with the gel. Do not fill them to the brim or they will overflow when you are mixing the glitter in. Just below the lip of the container is good.
- Snip a corner a bag of glitter.
- Work with one color of glitter at a time so they don't get mixed together.Remove the number of containers for the color you are working with from the case and tap a pile of glitter on top of each one. Stir well with a wooden skewer. Add more glitter if it looks pale in color. The more glitter the bolder the color of glitter gel you will get.
- Twist the lid on each container as you're done adding the glitter and replace it in the storage container.
- Repeat with whatever other colors you plan to make until all containers of Fairy Dust Glitter Gel are made. Snap the lid on the container to store or add stickers to the top as I did.
Your little fairy is going to need a crown. Here are the instructions to make DIY Woodland Fairy Crowns for your fairy themed birthday party.
Angela
Would it still work to replace the aloe with fractionated coconut oil? The only aloe I have is the natural aloe which is green. I'd love to use coconut oil to also help with sun protection.
Arlene Mobley
Hi Angela
I have never tries using coconut oil instead of the aloe gel. You could make a small test batch to try it out. Let me know how it works out if you do!
Lauren
Hi! We are making this for my daughters birthday party! It doesn't seem to be thickening and I was wondering if you had any tips? We ordered exactly what you suggested.
Thanks!
Lauren
Arlene Mobley
Hi Lauren
It should be thick within 24 hours. How long had it been?
Lauren
It has been 24 hours and it is not thick. It is still a similar consistency to the aloe Vera gel. Should I add more glycerin? Will that thicken it?
Thank you!
Arlene Mobley
Lauren
Yes I would try adding a small amount of glycerin. Did you measure the ingredients correctly. When I made it I saw it firm up immediately when I added the glycerin. I let it sit overnight because it was a bit cloudy. Did you use pure aloe vera gel? If not there could be an additive that is keeping it from firming up. You could try a different brand of Aloe Vera gel.
Chrystal M.
Stopping by from the Tip Junkie link up. I loooooooove your blog header. So cute!
Kiddo is almost 9 and we are mad into faeries in this house. I've enjoyed them since I was a kid and now that I am older can pass these things on to her. I have a ton of Irish lore about faeries and have been telling her tales since I met her at 3 (shes my step daughter.) I have a hutch in the living room that the top is nothing but our fairy garden.
This is something she is going to LOVE! I can't wait to do this as a craft.
Flour On My Face
Crystal
Thanks for stopping by and thank you so much! We love fairies! I have 3 granddaughters who love dressing up. Did you see the Woodland Fairy Crowns that I made for the birthday party?
Last Spring I added a little Fairy house to the garden bed by the front door so the fairies could visit. The kids loved it!
Dacia
Love this idea! Visiting from tip junkie. 🙂
Flour On My Face
Dacia
Thank you and thanks for stopping by!
Jill @ Called To Be A Mom
This would make a great gift idea for some girls that have birthdays coming up! So fun!
Flour On My Face
We had so much fun at our party!
Kate
Can you tell me what the point of the Glyerine is? Can I omit it? Thanks!
Flour On My Face
Hi Kate
The glycerin helps in thickening the gel. You can actually see it thickening as you mix it into the aloe vera. I'm not sure if it would work very well without it. If you are having trouble finding the glycerin they carry it in Walmart, Target and most drug stores.
Kate
Ah! OK, thank you very much!
Yaumara
Oh My Goodness! I LOVE this! Thank you so much for posting this. It will come in handy for a few years to come. My daughter is 2.5 and this will be a hit at all the birthday parties!
I found you on Bloggy Moms VIP Blog Roll. If you'd like to return the love, my blog link is: https://ylindo01.blogspot.com
Thanks so much and have a great weekend! 🙂
Linda
These are DARLING. Pinned! Thanks for sharing this. I have those same puffy (can you call them stickers?). Thanks again. Linda
BeBetsy
Oh my gosh! I want to have a fairy party-how much fun would that be!! Love the tutorial.
Glad you linked up with us at the BeBetsy BRAG ABOUT IT Link and Hop.
Sharon and Denise ♥
Fashion | Food | Beauty | Antiques | DIY | and much more
Flour On My Face
Thank you! The fairy party and favors were a big hit with the kids but the moms had fun with it also.
Angie | Big Bear's Wife
Now those are super cute!
Flour On My Face
Angie
Thank you so much!