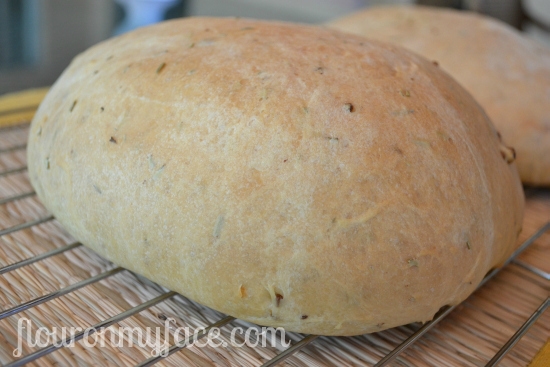
update: Wow this recipe has gotten lots of attention I'm happy to say. It was featured on the Foodbuzz Top 9 on June 13,2012. Thank you so much to the other foodies who buzzed it up!
If you'd like to see more yummy bread recipes hop over to GirliChef and check out the BYOB linky.
This recipe is one of my favorite bread recipes.
After buying a very expensive loaf of artisan rosemary bread from the grocery store I decided I could make my own and it would be 1 cheaper 2 healthier and 3 taste better then the store bought loaf. I was right on all three counts.
I posted this recipe here the first time I made it. A few weeks ago I decided to make it again but this time replace some of the all purpose flour with bread flour. I wanted to see if the bread flour could make this loaf even better then it already was.
Oh Yes it did!
The bread flour made the loaf denser.
With the addition of bread flour it turned out even more like that expensive loaf of artisan bread.
Try both recipes or just try this one. I promise you won't be sorry.
I make this loaf of bread to eat with a baked ham and heirloom tomato sandwich and I love it.
It is one of the best sandwiches I make. I'm drooling just thinking about it.
I may have to make it this week since I have an heirloom tomato sitting on my counter! A quick trip to the grocery store and the ham will be here also.
You may use fresh rosemary or dried rosemary in this recipe. I have done both. Nothing beat fresh rosemary but not everyone has a rosemary plant in their yard. The first time I made this recipe I didn't either but have since planted one.
Soaking the dried rosemary in the olive oil before adding it to the dough helps keep the rosemary from getting too dry during the baking process.
You can shape this loaf into two rounds or bake it in a loaf pan if you want.
I like the rustic look of a hand formed loaf myself so that is how I make it.
Be sure to brush the loaves with plenty of olive oil before baking. The olive oil does something wonderful to the crust as it bakes. The crust will be flaky and so much more buttery then if you actually used butter.
You can of course make this recipe without a stand mixer. Simply mix and knead by hand. Be sure to knead by hand the proper amount of time to make sure the gluten has a chance to form.
One of the biggest mistakes you can make when making homemade bread is to not knead the dough properly. This is the most important step in the bread making process.
Happy baking!
Email questions or recipe requests to flouronmyface@gmail.com. Follow me on Pinterest, YouTube, Instagram and Facebook.
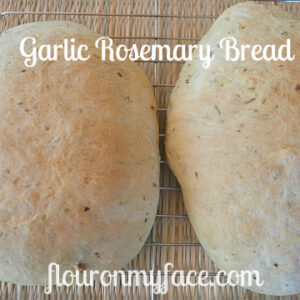
Rosemary and Garlic Bread II
Ingredients
- 2 cups unbleached all-purpose flour
- 2 cups bread flour
- 1 ¼ cup warm water (divided)
- 3 to 5 tablespoons olive oil
- 2 ½ tablespoons dry or fresh rosemary (crushed)
- 5 cloves garlic (minced)
- 1 tablespoons active dry yeast
- 2 ½ teaspoons salt
- 2 ½ teaspoons sugar
Instructions
- Mince the garlic and crush the dry rosemary or mince the fresh and place into a small bowl.
- Pour about a teaspoon of olive oil over the garlic and rosemary. Stir to moisten the dry rosemary (if using dry) or to coat the fresh rosemary and garlic. Set aside.
- Put ½ cup of water into a small bowl and warm to body temperature in the microwave. Sprinkle the yeast over the water and stir. Set aside.
- In the bowl of a stand mixer fitted with a dough hook put the flour, salt and sugar. Turn the mixer on low and mix for about 1 minute.
- Measure ¾ cup of water into another bowl and add 3 tablespoons of olive oil. Warm in the microwave to body temperature.
- Turn the mixer on low and add yeast and water. Mix for one minute.
- Pour the warm water and olive oil into the mixer and mix for about 2 minutes on low. Pour in the olive oil and herbs.
- Turn the mixer on medium low and knead with the dough hook for about 5 minutes.
- If the dough seems too wet add about a tablespoon of flour at a time to the bowl and continue to knead. If the dough seems too dry dribble about a teaspoon of olive oil into the bowl.
- Knead until smooth or about 8 to 10 minutes in total.
- Place the ball of dough into a greased bowl and set in a warm spot till it doubles in size, about 1 hour. I put the bowl in my oven with the light turned on.
- After the dough has risen punch down and divide in half.
- You can form the dough into two rounds or two small French bread loaves on a greased cookie sheet or a pizza stone sprinkled with cornmeal.
- Let loaves rise until doubled. About an hour.
- After the loaves have risen if you have been using your oven to keep them warm remove them from the oven and preheat to 350 degrees.
- Carefully brush some olive oil over the tops.
- Bake the loaves for 30 to 40 minutes or until the loaves sound hollow when you knock on the bottom.
- Cool on cooling racks completely before cutting.
Recipe Expert Tips
Nutrition


Michelle
Thank you for this wonderful bread recipe. I actually baked 2 loves of this variety in my bread machine today. I served it with a pasta that I cooked in a marinara sauce. It was such a huge hit. I will have to make more because my sons almost ate an entire loaf between them. it turned out fabulous in the bread machine. At the end of the 2nd rise cycle. I brushed it with olive oil and sprinkled a little bit of parmesan cheese on top. This bread will definitely go into my book of favourites.
Tiffany H.
Has anyone tried this in a bread machine? Would you have to change it any? Sounds yummy
ReallyRosie
Exactly what is the "proper amount of time" to knead the dough by hand?
Arlene Mobley
Rosie
The proper amount of time will vary. You need to knead it until the dough is soft and no longer sticky. It takes practice to figure out when this happens and your environment can make it different each time you make bread. The temperature and humidity of your home can make the dough different each time. If the humidity is high it can make the dough wetter and you will need more flour. You can check out this video I made showing how to knead bread or focaccia dough.
ReallyRosie
Thanks so much! This was my first attempt at a real hands on bread recipe (usually I just make skillet soda bread) so I think I need more kneading practice but the bread turned out delicious! I brought a loaf to a picnic with friends yesterday and ti was gone in minutes.
Arlene Mobley
Rosie
I am so happy to hear that! Once you start making bread regularly you will be able to tell when the bread is kneaded enough. Practice makes perfect when it comes to homemade bread. This Garlic Rosemary Bread recipe is my favorite homemade bread.
Jennifer
Can this recipe sit over night before cooking? I want to make it at my house and bring it my friends and cook it. It looks wonderful, I can't wait to try it!
Arlene Mobley
Jennifer
I have never tried doing this with this recipe myself but you could refrigerate the dough overnight. It may change the taste a bit leaning towards a light sourdough flavor but that could be a good thing. Let the dough rise for the first rise as in step 15. Punch the dough down, cover with plastic wrap and place in the refrigerator. Then when you get to your friends house punch the dough down and follow step 16 for the next rise and baking. Good luck and let me know how it turns out.
Jennifer
The rosemary garlic bread turned out amazing, it was a big hit! It did taste somewhat like sourdough bread. Thanks so much for the recipe.
Arlene Mobley
Jennifer
I am so happy to hear the bread turned out amazing for you. It is one of my favorite bread recipes. You're welcome!
BeBetsy
So happy to see this recipe! This is on my list to make very soon. Love the addition of rosemary. I can almost smell that bread baking right now! Thanks for the inspiration ~ denise @BeBetsy
Arlene Mobley
Denise thank you. This bread smells and tastes heavenly. I hope you enjoy the recipe!
Winnie
It sounds like a wonderful bread!
I'd love to try it
Terry
I made this twice. Once 2 round loaves and once long French bread style loves. Both times, the results were excellent. I would give it a 5 star rating.
Flour On My Face
Terry
Thank you so much!
Terry
I'm looking for a good rye bread recipe. Any suggestions?
Flour On My Face
Terri I have always wanted to make homemade rye bread but never have. I will keep a look out for a recipe for you.
CJ
I make this one all the time ... https://foodstoriesblog.com/2012/11/09/rye-bread-from-the-bread-machine/
Paula
Can this recipe be converted to use in a bread machine??
Anna
Can't wait to make this! I'm thinking of substituting the all purpose flour with wholewheat flour to make it a bit healthier... what do you think?? Also can bake them in a loaf tin? Thanks heaps 🙂
Flour On My Face
Anna
I have not tried this recipe with wholewheat so I can't say for sure how it will turn out. You might want to try half all-purpose and half wholewheat to test it out. The loaf is pretty dense with all-purpose but that is the fun of trying new recipes and making them your own. Let me know how it turns out with your changes. A loaf pan will work also depending on the size pan used. You may be able to get three loaves instead of two if you use the loaf pan.
Rachel
Just made the Garlic Rosemary Bread II...it was sooooo yummy. Thanks for the recipe.
Flour On My Face
Rachel
I'm so happy you enjoyed my recipe. Happy baking!
Heather @girlichef
What I wouldn't give to have that sandwich for lunch today! This is a gorgeous loaf of bread. Adding it to my ever-growing list of breads I NEED to make ;). I hope you'll drop by and share it w/ BYOB-Bake Your Own Bread this month (https://www.girlichef.com/2012/06/byob-bake-your-own-bread-june-2012-link.html)!
Flour On My Face
Thank you Heather for the wonderful compliment and invitation. I've added my link to your linky!
Heather @girlichef
So happy you linked up - and big CONGRATS on your Top 9 feature!
DB-The Foodie Stuntman
It looks delicious and congratulations on making the foodbuzz Top 9!
Suzi
This looks wonderful, I love bread. Buzzed you. I thought we were friends on Foodbuzz by I guess not so sent a request. Hope you have a greatday. Congrats on the Top 9.
CJ at Food Stories
Congratulations on your foodbuzz top 9, today!
Flour On My Face
Thank you so much!