

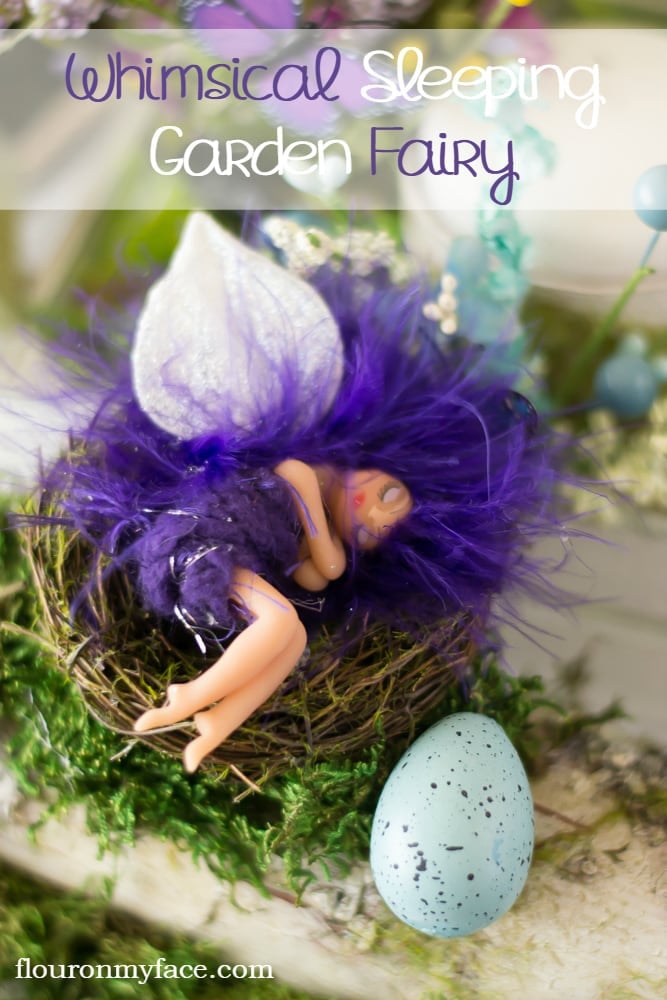
Whimsical Sleeping Garden Fairy
Step into the magical world of fairies with this Whimsical Sleeping Garden Fairy. Imagine coming upon this sleeping garden fairy as she rests her weary head in a bird's nest on a log.
I am in love with this little tabletop decoration I made. As I was working on my DIY Spring Birch Bark candles the magic of this handmade sleeping fairy came over me.
I've been holding on to this sleeping fairy and her sister for a couple of years now.
Waiting for just the right moment when I could find the perfect home for her. I think I found the perfect spot for her.
I purchased a bundle of birch logs at Joann's over the Christmas holidays. I saw them when I was shopping for the supplies to make these Festive Christmas Candles.
I cut the bundle apart and used pieces of that bundle for the log the fairy is sleeping on.
If you are lucky enough to have a birch tree growing in your yard you could harvest your own birch logs to make this Whimsical Sleeping Garden Fairy.
Or you could use another type of tree branch. Just make sure the wood is completely dry and free of insects.
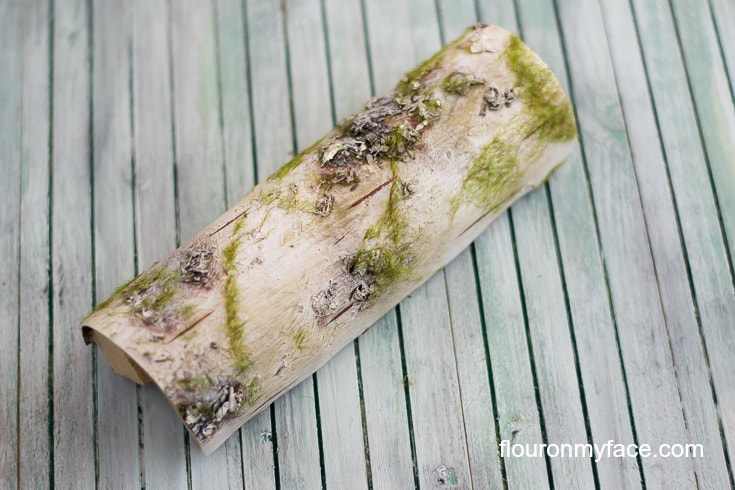
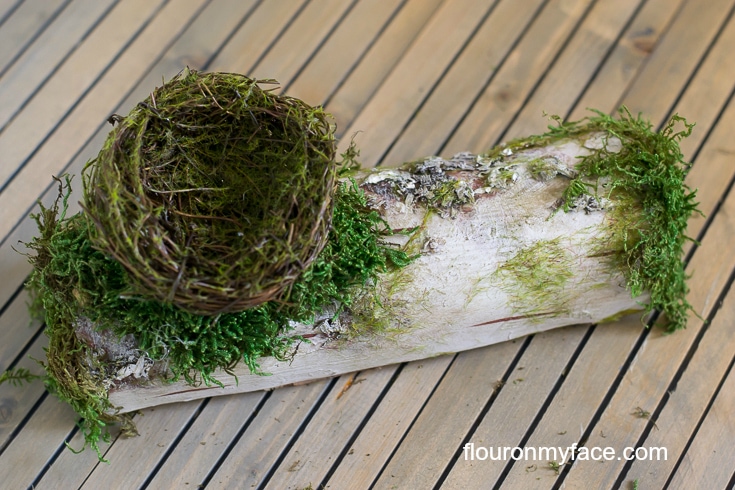
Since I was using pieces of a birch log I glued two together so it would sit flat on a surface.
If you are using whole logs you will have to play around with them to make sure they don't roll around.
You can do this by hot gluing the logs together and gluing moss to the bottom so the logs lay flat.
Attach the nest to the prepared log with hot glue.
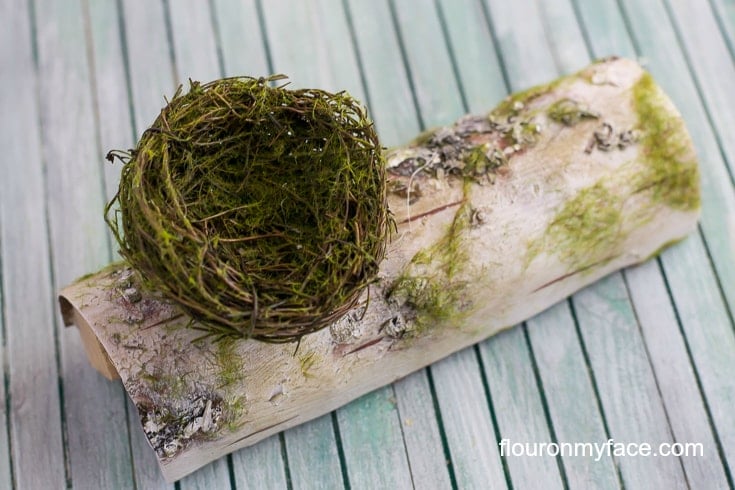
Glue moss around the twig birds nest and on the ends of the birch log to cover the raw ends of the log and birch bark ribbon.
Secure the Sleeping Garden Fairy to the nest with a couple of dots of hot glue. Glue the eggs so they appear to have been pushed from the bird's nest by the garden fairy.
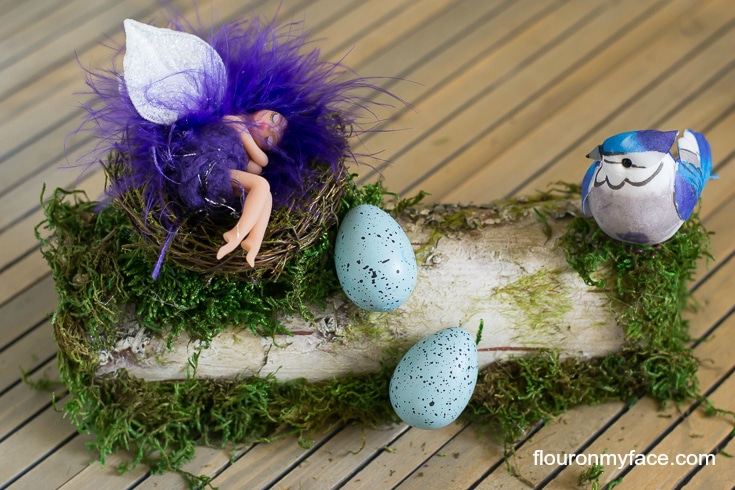
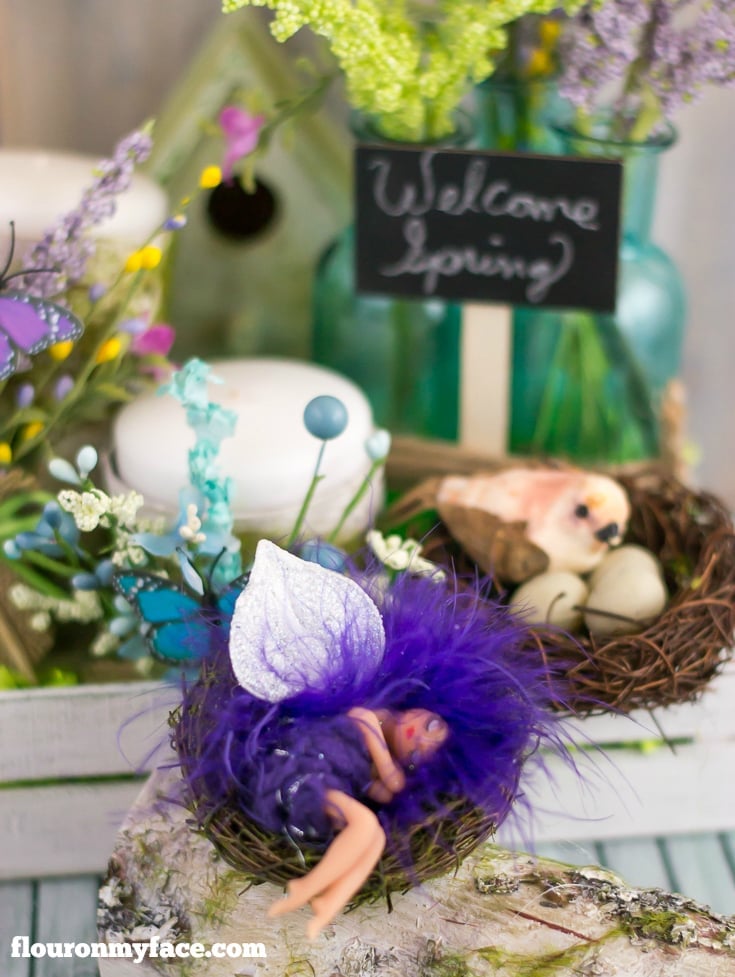
Attach the bird to the opposite end of the log and position it so it is staring right at the sleeping garden fairy.
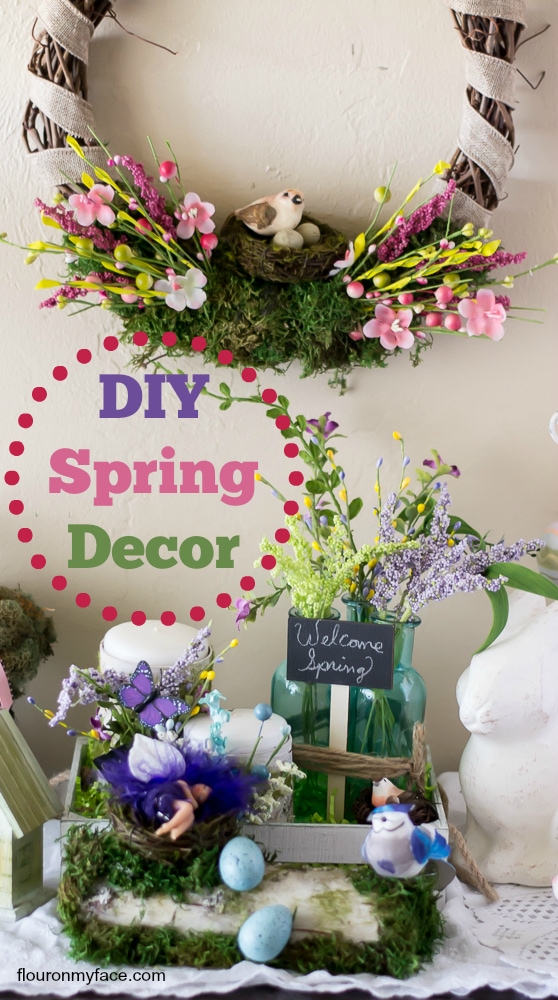
I decorated a tabletop with the DIY Whimsical Sleeping Garden Fairy, a DIY Distressed Crate filled with my DIY Spring Birch Bark Candles, and pretty aqua colored bottles filled with left over floral picks.
The Birds Nest Wreath is another DIY project that will be coming soon.
Disclosure: Affiliate links ahead. Should you make a purchase after clicking on one of these links I will earn a small commission at no cost to you. Thank you for your support.
The commissions earned go towards the cost of running this website and help ensure that I can continue to bring you delicious recipes and fun DIY projects like this DIY Whimsical Sleeping Garden Fairy.
How to Make a Whimsical Sleeping Garden Fairy
Supplies
- Birch Logs cut into 8-inch pieces like these at Joann's
- Birch Bark Wrap or Joann's has similar one that I used
- Sheet Moss
- 3-inch twig bird nest
- mini blue jay bird
- 2 mini plastic eggs
- low temp hot glue gun
- low temp hot glue sticks
- Mini Fairy that will fit in the nest
Instructions
- Glue the pieces of birch logs together (if needed) so that they are stable when placed on a flat surface.
- You can glue some moss to the bottom to create a flat bottom if needed.
- Cut a piece of the birch bark ribbon so it will wrap around from the front to the back of the log.
- Glue the birch bark to the log with hot glue.
- Glue the twig birds nest to one end of the log.
- Break off small pieces of the moss and glue around the bottom of the bird nest, on the ends of the logs and along the front bottom edge of the birch log.
- Place the bird at the opposite end of the log from the nest.
- Position the bird so it is looking at the next.
- Secure the fairy to the bird nest with a few dots of glue.
- Glue one egg near the bottom of the nest.
- Glue the other egg so it appears to have rolled out of the nest below the first egg.
- Glue the bird to the opposite end of the log and position it so it is staring right at the sleeping garden fairy.
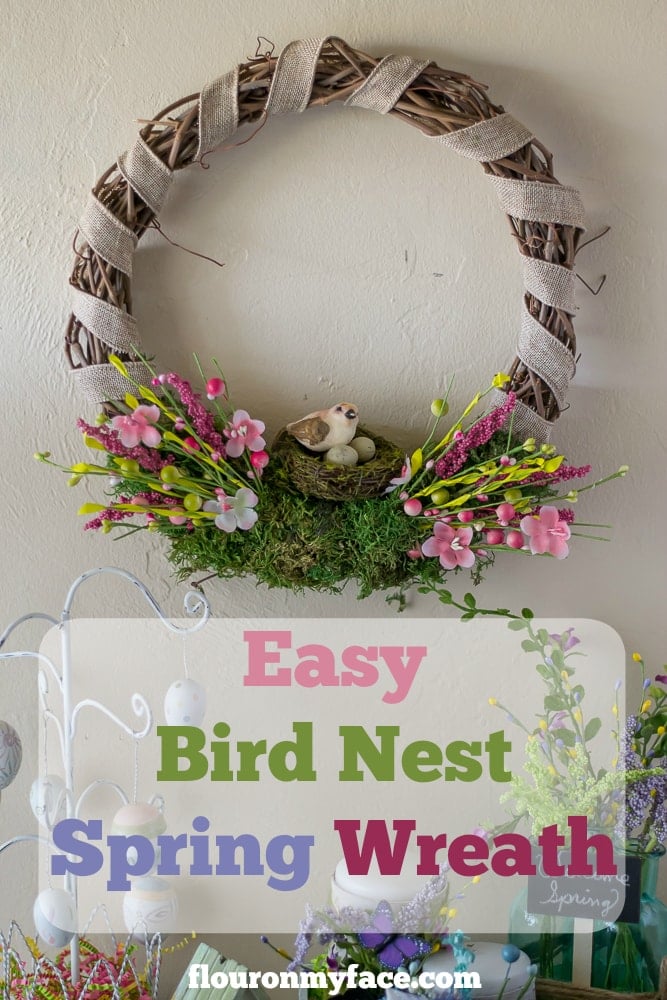
DIY Bird Nest Spring Door Wreath

Whimsical Sleeping Garden Fairy
Equipment
- 1 low temp hot glue gun
- 4 low temp hot glue sticks
Materials
- 1 Package Birch Logs cut into 8-inch pieces like these at Joann's
- 1 Roll Birch Bark Wrap or Joann's has similar one that I used
- 1 Sheet Sheet Moss
- 3 inch twig bird nest
- 1 Mini mini blue jay bird
- 2 Small mini plastic eggs
- 1 Glass Mini Fairy that will fit in the nest
Instructions
- Glue the pieces of birch logs together (if needed) so that they are stable when placed on a flat surface.
- You can glue some moss to the bottom to create a flat bottom if needed.
- Cut a piece of the birch bark ribbon so it will wrap around from the front to the back of the log.
- Glue the birch bark to the log with hot glue. Glue the twig birds nest to one end of the log.
- Break off small pieces of the moss and glue around the bottom of the bird nest, on the ends of the logs and along the front bottom edge of the birch log.
- Place the bird at the opposite end of the log from the nest. Position the bird so it is looking at the nest.
- Secure the fairy to the bird nest with a few dots of glue.
- Glue one egg near the bottom of the nest. Glue the other egg so it appears to have rolled out of the nest below the first egg.
- Glue the bird to the opposite end of the log and postition it so it is staring right at the sleeping garden fairy.


Sherry
Where did you get the fairy?
Arlene Mobley
Hi Sherry
Isn't she pretty.. I bought her from a local artist who had an Etsy shop. Unfortunately I don't remember her name. You might be able to search Etsy for miniature fairies and find her.