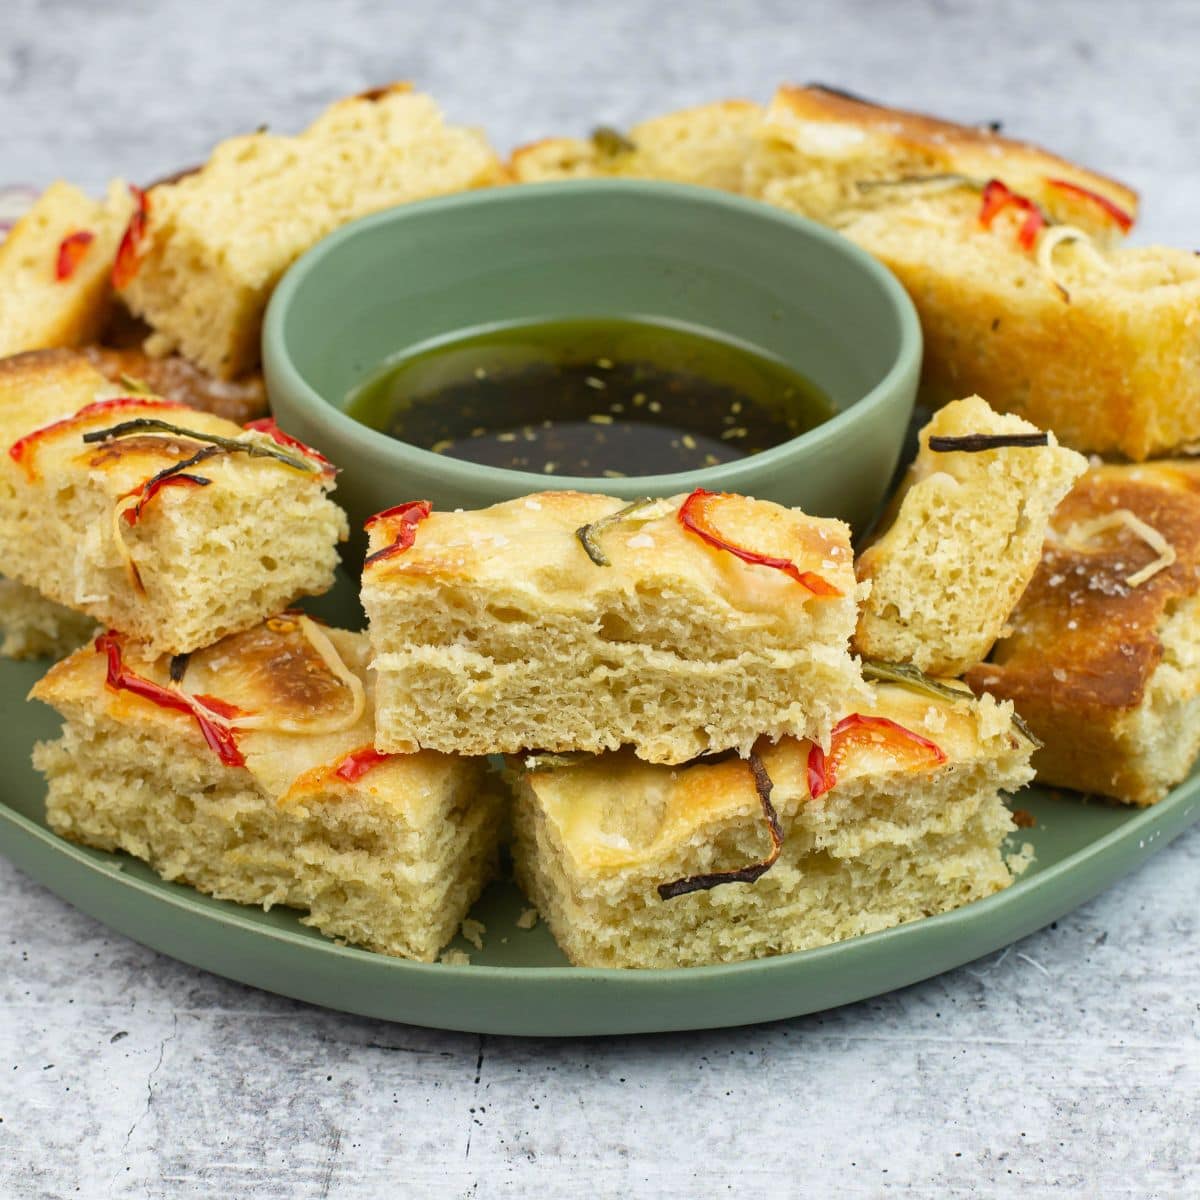
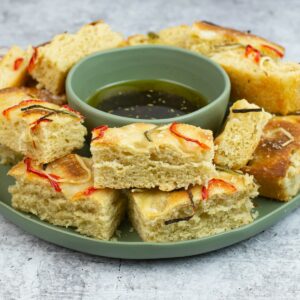
How to make Sourdough Focaccia with a healthy active homemade sourdough starter.
Crispy focaccia is a delicious appetizer you can serve to guests at a dinner party or to serve along with your favorite Italian meal.
The most important part of making any type of homemade bread is kneading the dough properly.
This recipe was originally shared on Jan 6, 2014 and has been updated on August 25th with new images and recipe details.
It doesn't matter if you are making focaccia or a loaf of white bread the dough will need to be kneaded.
If you are newly embarking on making homemade bread at home it can be a little confusing figuring out the correct amount of time kneading the dough.
You can read a hundred recipes giving you the amount of time to knead the dough but a recipe can not show you or teach you how a properly kneaded batch of dough should look or feel.
The only way to learn is to make homemade bread and knead the dough correctly is to get your hands into a batch of dough and knead it yourself.
Kneading Focaccia
Almost all homemade bread recipes will give you an estimated amount of time to knead the dough.
That kneading time is an estimate only because there are many factors that come into play when you are making homemade bread.
The type of flour used, the amount of humidity in the air and the temperature in your kitchen will affect the dough.
Recipe Prep: Sourdough Starter
Obviously you are going to need an active sourdough starter to make this recipe.
For those of you who do not have a active sourdough starter on hand you can find my very easy instructions on How To Make a Sourdough Starter.
A starter is very easy to make but you will need to start making the starter at least 3 to 5 days before using it to bake with it.
If your house is cold it may take longer to get a starter going. You will need to keep your starter in a very warm place like on top of the refrigerator or in the kitchen on the top of your stove when you are first making it.
The natural sourdough yeast needs warmth and time to develop.
If you already have a live, healthy and active starter in the refrigerator you should take it out at least 24 hours before starting this recipe and feed it at least 3 times to get it active and bubbly.
Ingredients
To make this sourdough recipe you will only need a few ingredients.
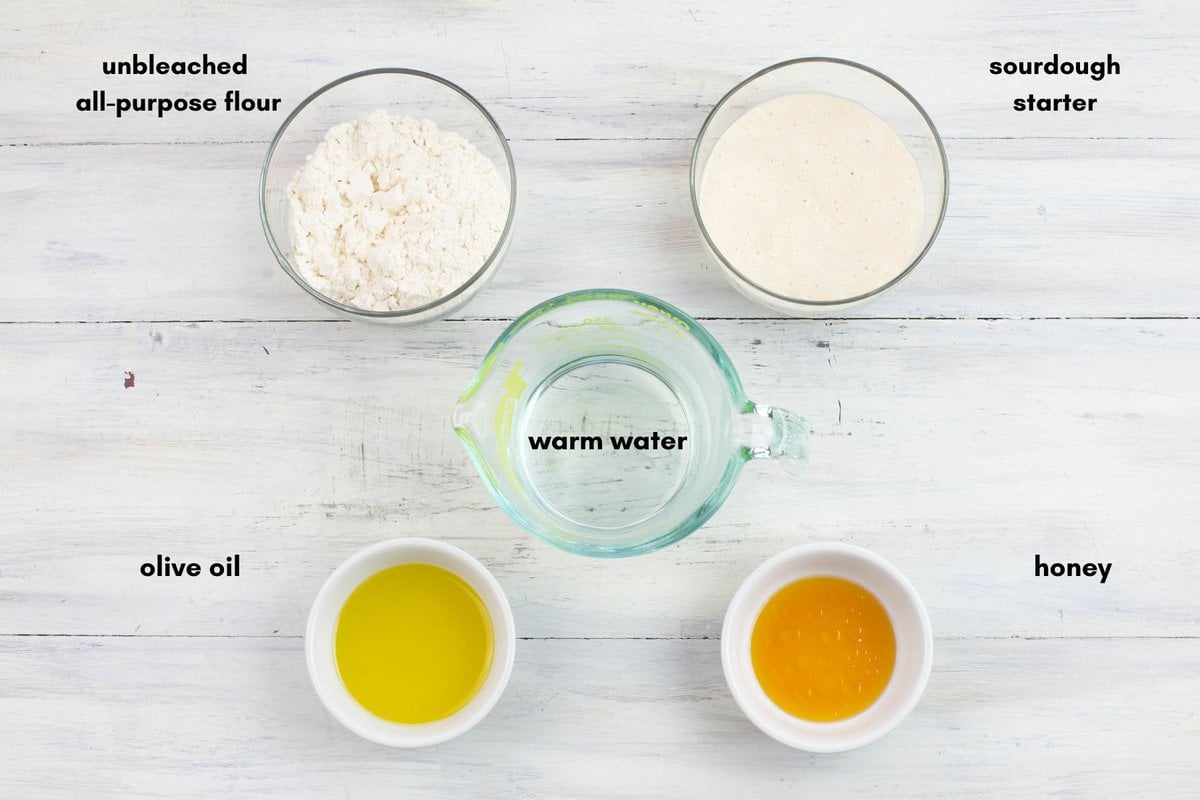
- an active and bubbly sourdough starter
- all-purpose unbleached flour
- warm water
- olive oil
- honey
- sea salt
- toppings
Recipe Tip
This recipe can be doubled to make one large rimmed 11 x 17-inch baking sheet or two 9 x 13-inch baking sheets of focaccia.
Directions
- Step 1: The first thing you will need to do is make a sponge with sourdough starter, warm water, olive oil, honey, and flour.
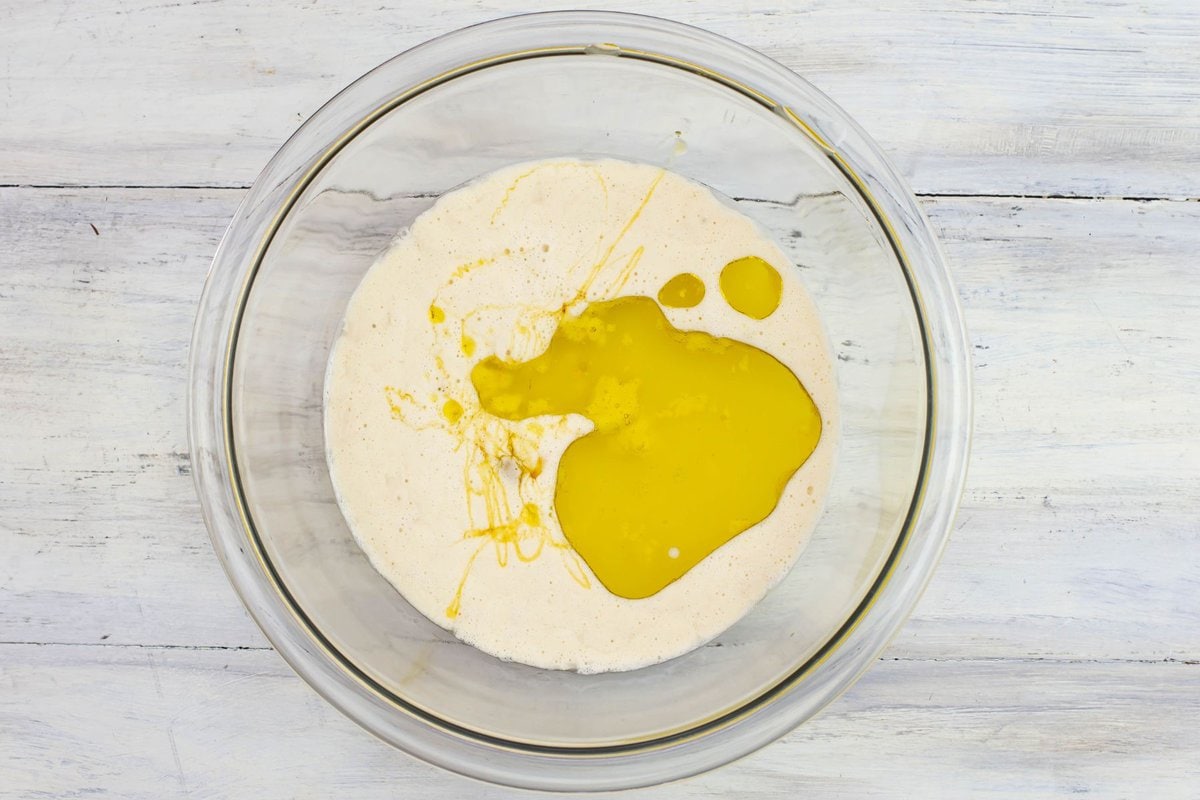
Do not skip the honey or substitute another sweetener like sugar. The very small amount of honey is needed to feed the sourdough sponge.
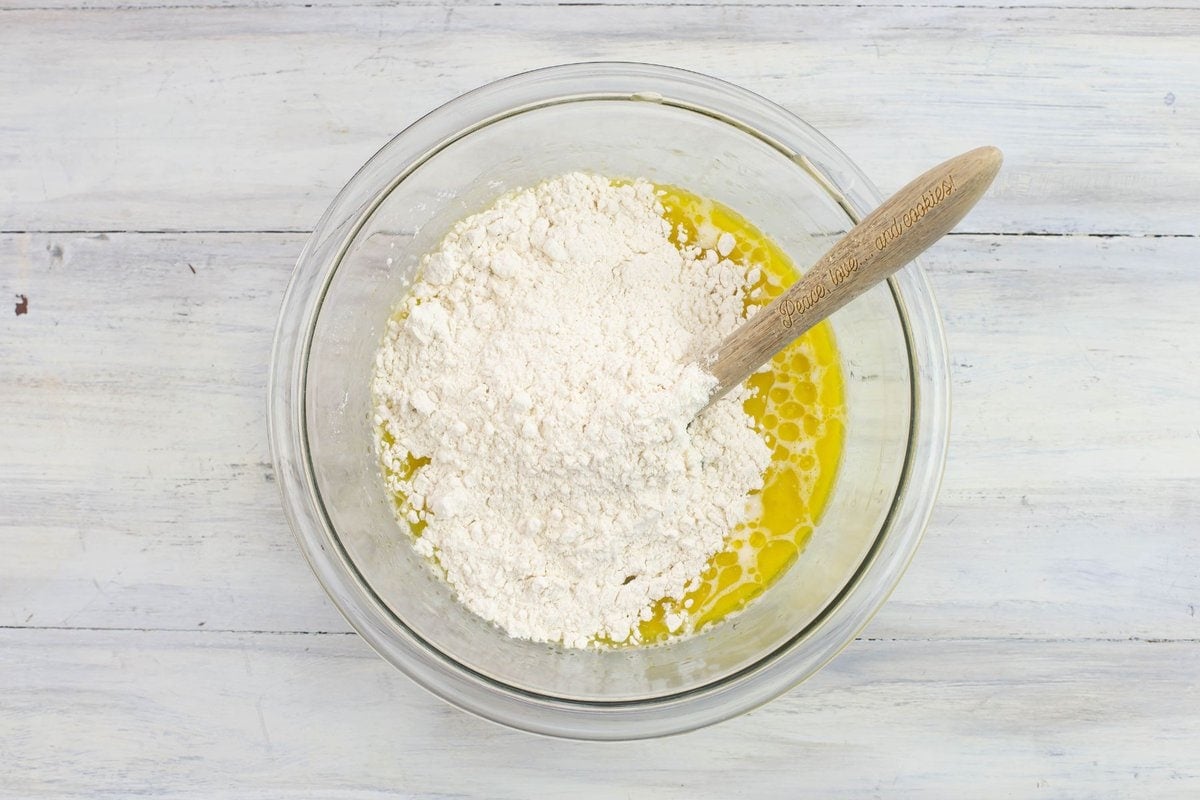
It will make a huge difference in the amount of rise and softness the final baked bread will have.
- Step 2: Add the flour to the bowl and mix well to combine. Cover the bowl and place the bowl in a warm spot in your kitchen - like inside a cold oven with the light turned on.
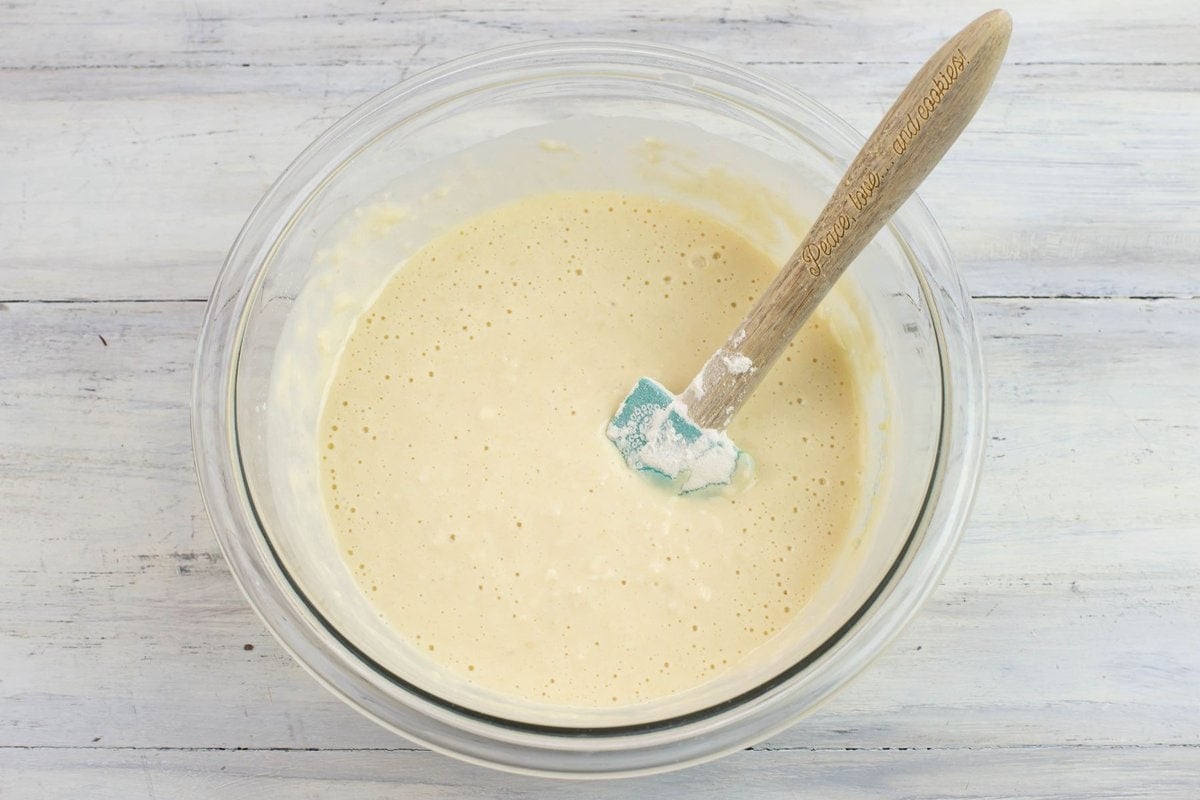
Allow the sponge to get bubbly. This could take anywhere from one to two hours depending on how warm the area is where you place the bowl of sponge and how active your starter is.
Pro Tip
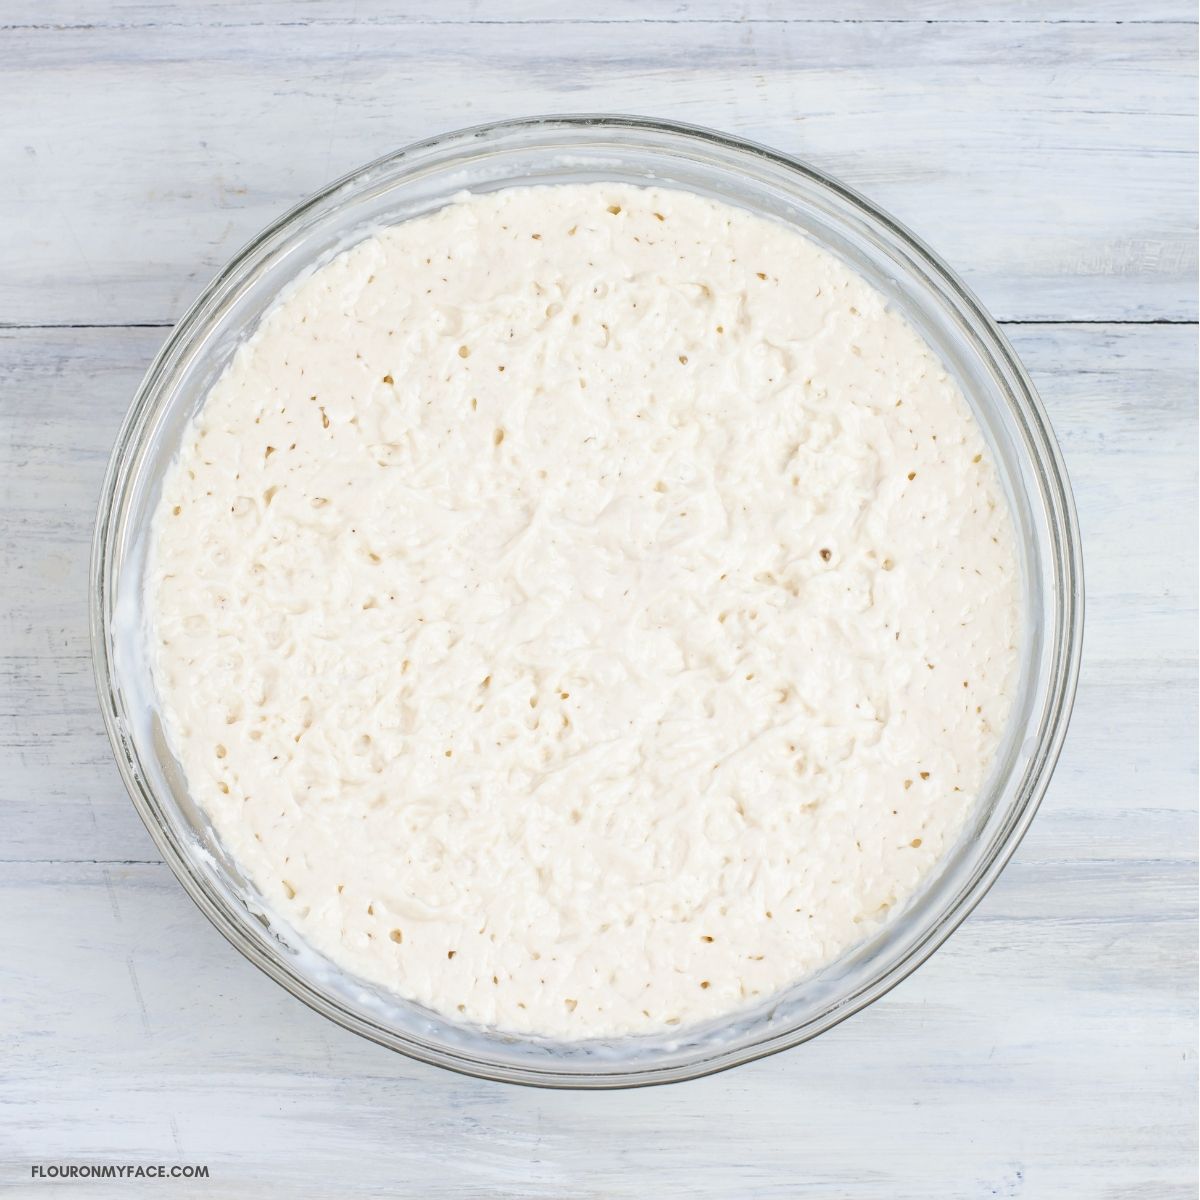
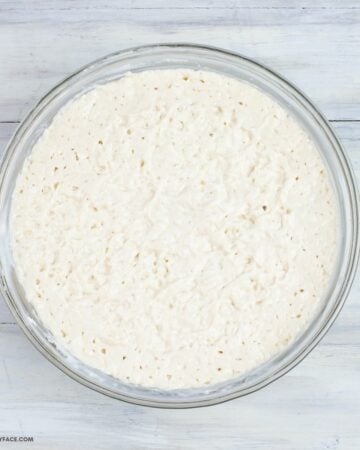
Notice the small popped bubbles on top of the sponge. This is how the sponge should look. The sponge will have risen slightly and bubbles will be all over the surface.
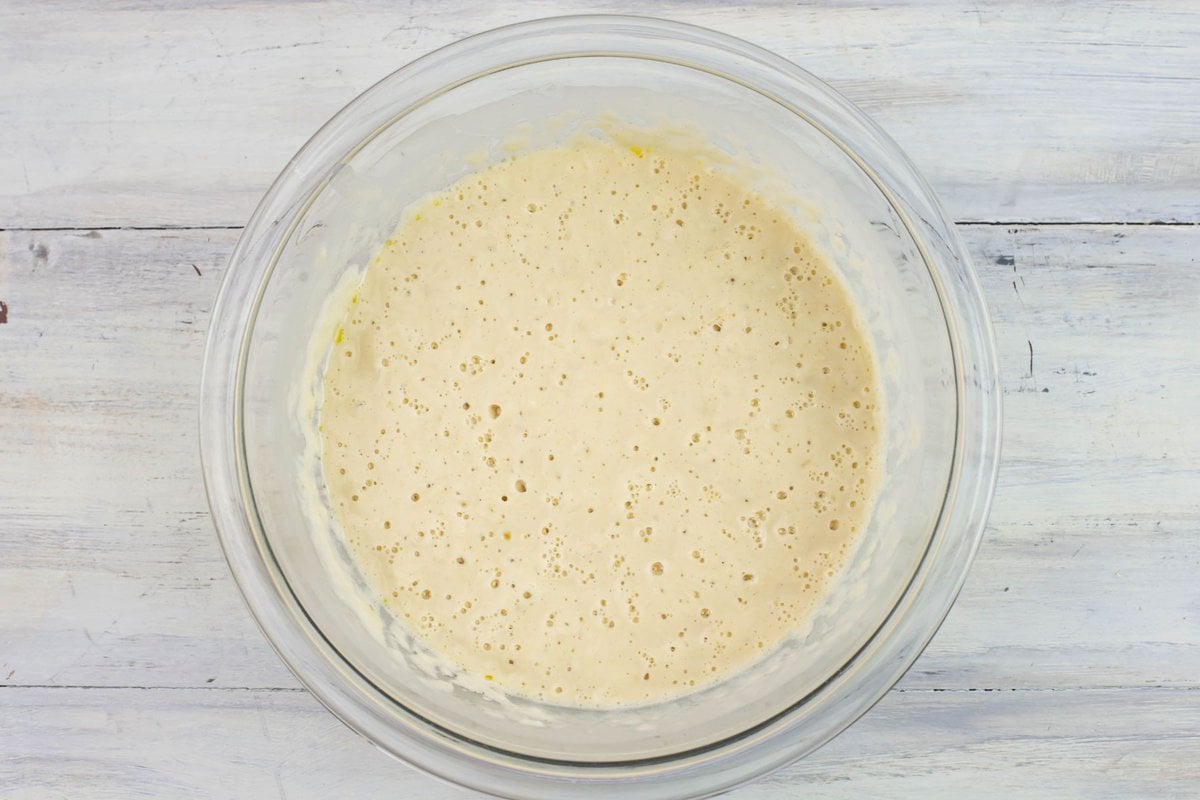
This is how the sponge will look when it is ready to use. When it looks like this you are going to add the next ingredients.
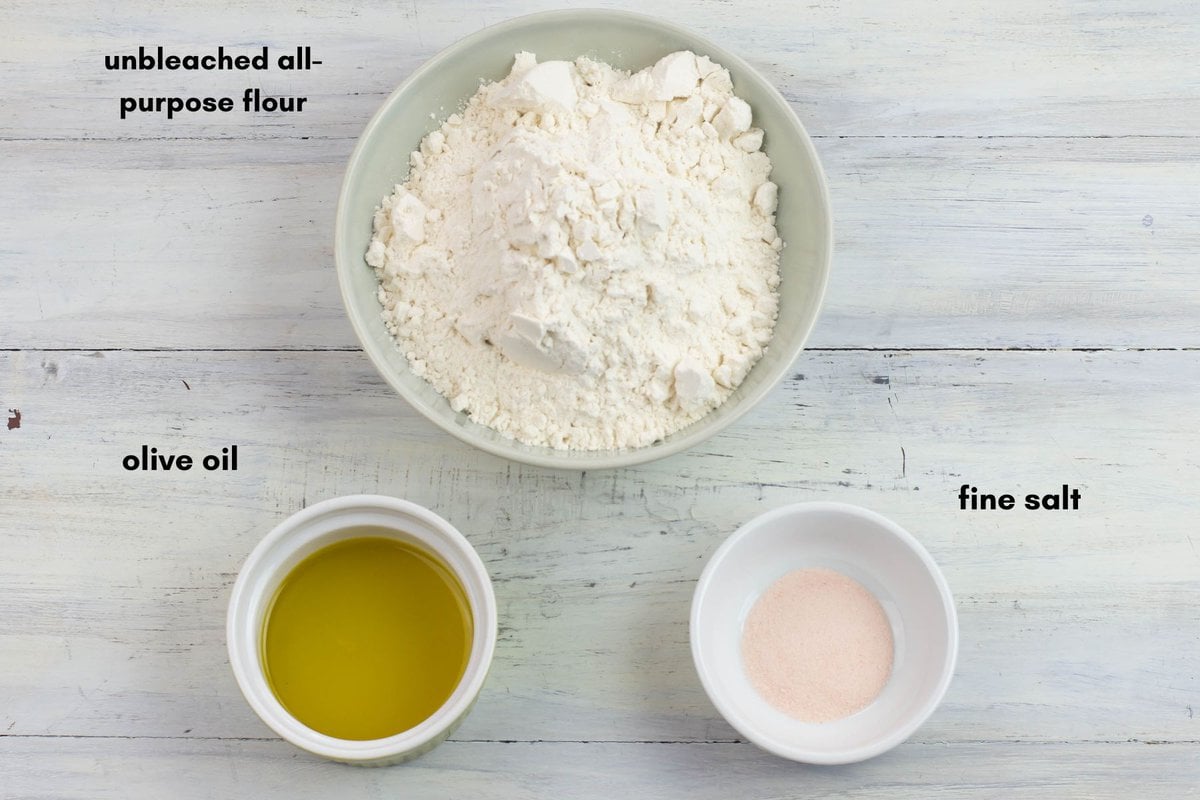
- Step 3: Add1 ½ cups of the all-purpose flour, the olive oil and salt to the bowl with the sponge. You will use the remaining ½ cup of flour to knead the dough.
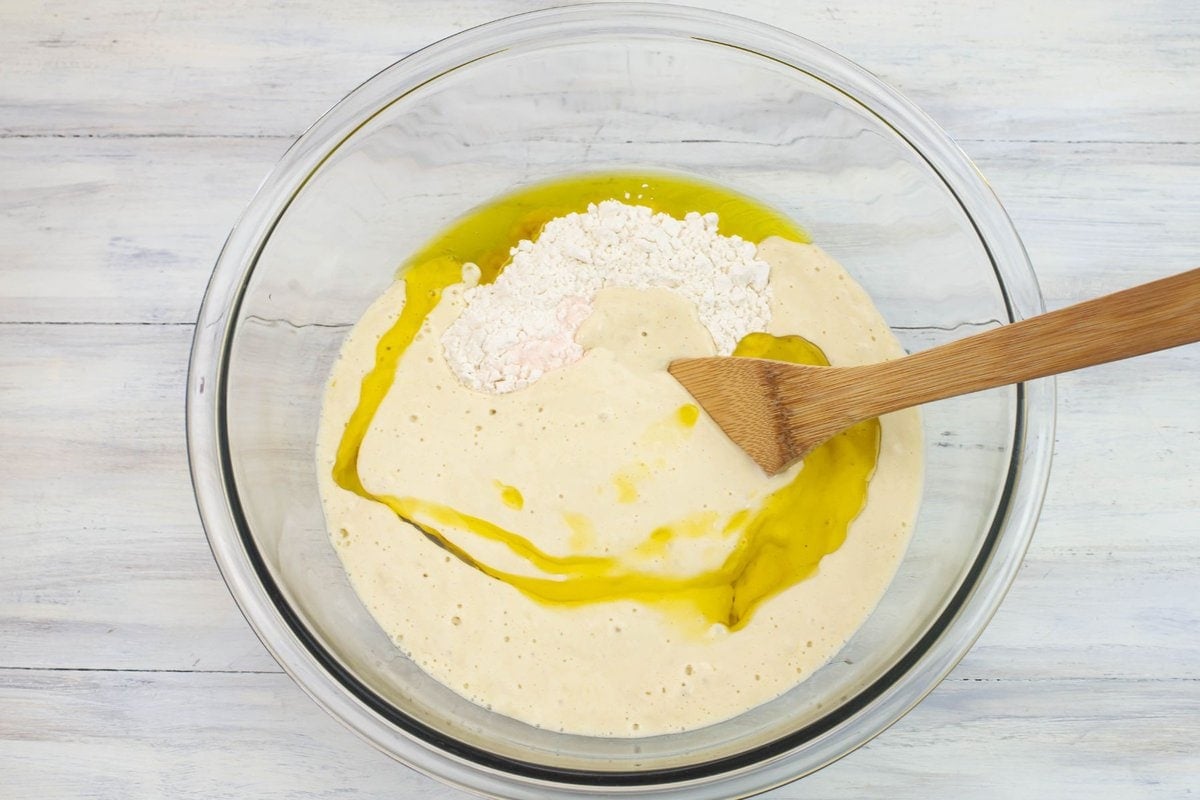
- Step 4: Mix the dough until it comes together into a somewhat shaggy ball of dough that is too stiff to mix with a wooden spoon.
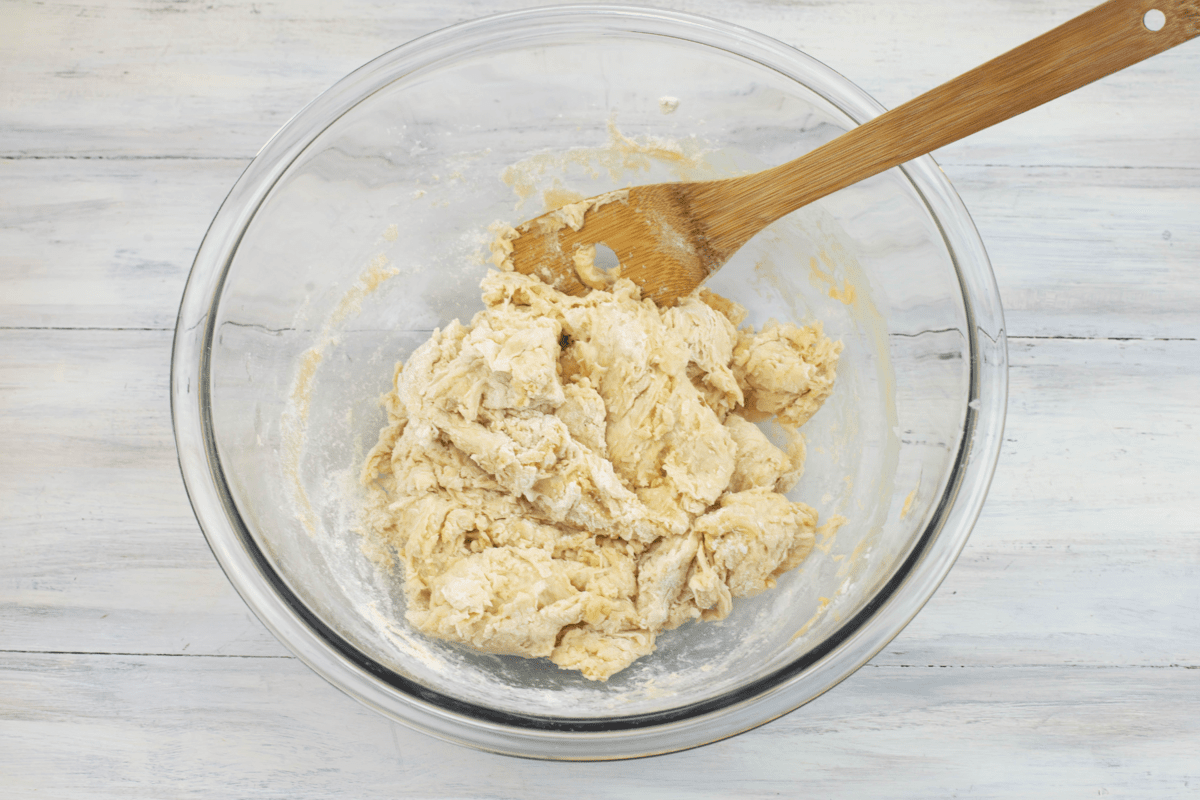
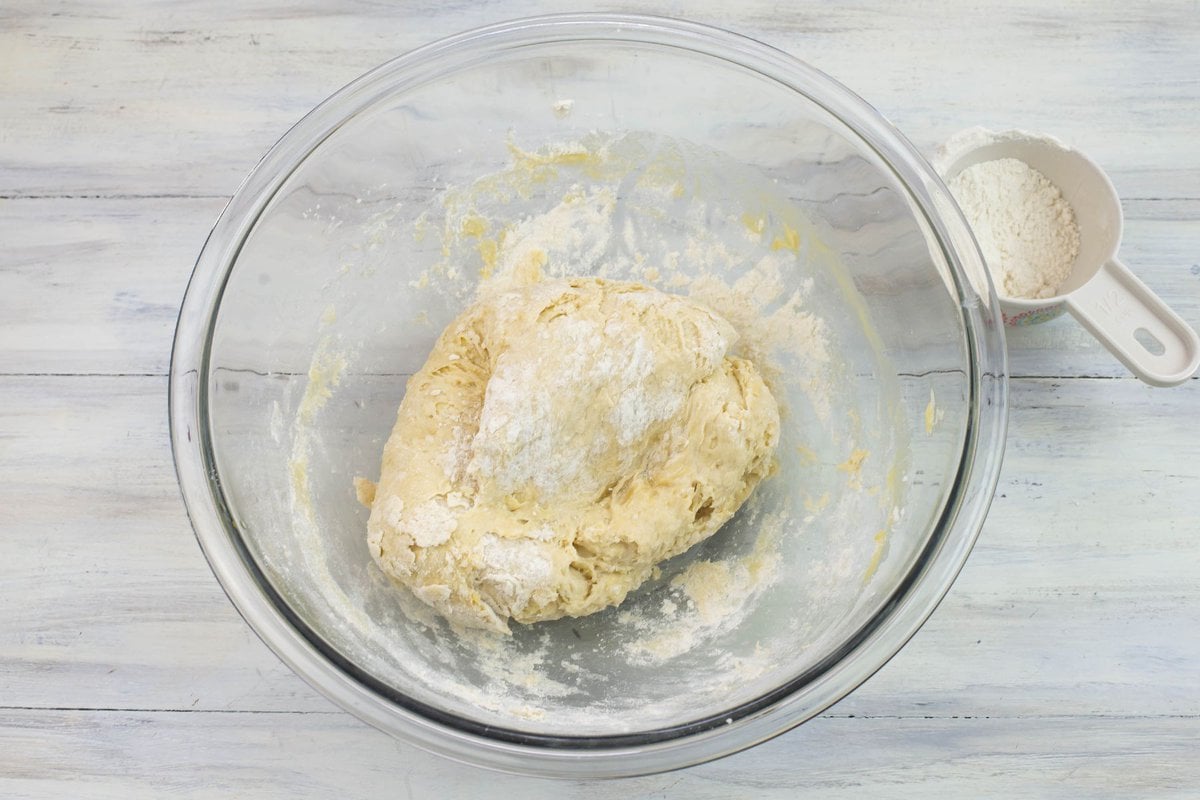
- Step 5: You can turn the dough out onto a flour dusted counter top or leave the dough in the bowl to knead. Dust the top of the dough with some of the remaining ½ cup of flour and start kneading the flour into the dough.
Add more flour as needed until the dough is soft and somewhat smooth and elastic.
- Step 6: Form the dough into a tight ball, drizzle with olive oil to coat the surface. Cover the bowl and place in a warm area to allow the dough to rise.
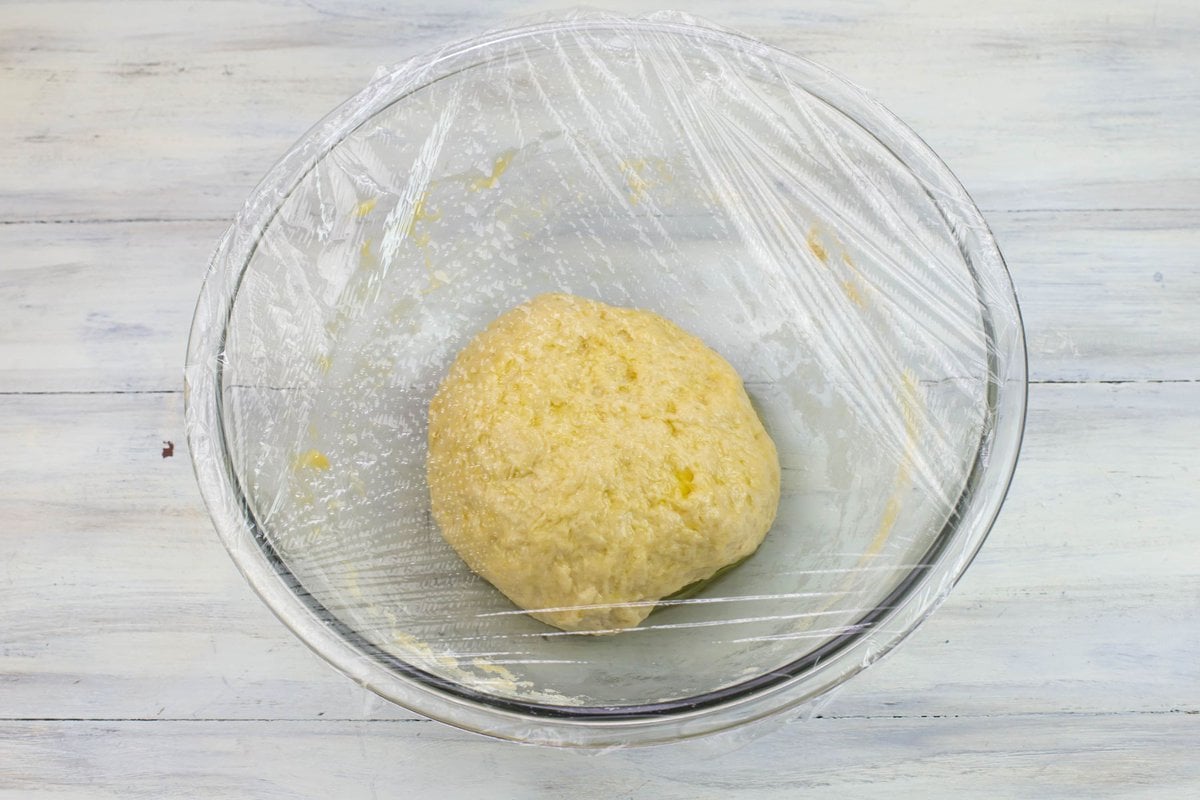
Allow to dough to rise until doubled in size, about 1-2 hours.
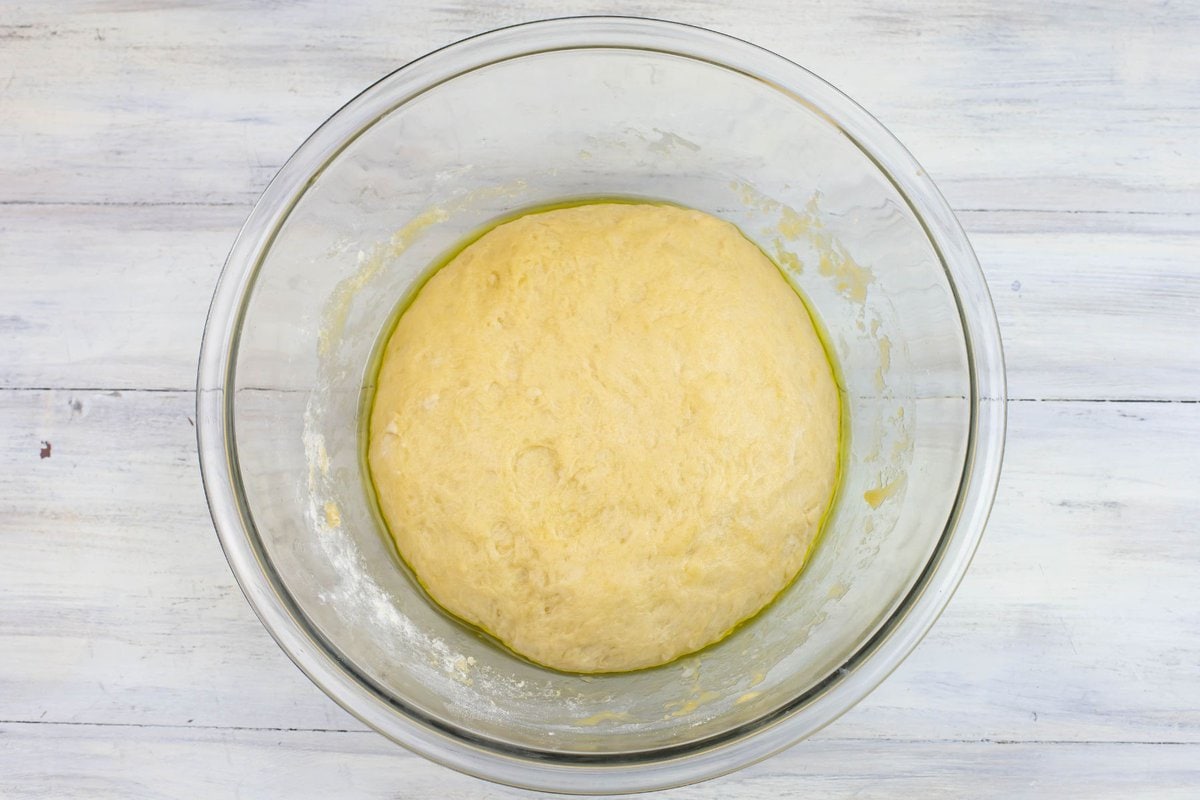
- Step 7: Drizzle about a ¼th cup of olive oil into the bottom of a 9x13 inch rimmed baking pan.
Uncover the bowl of dough and punch the dough down. Place the ball of dough into the center of the baking pan.
Begin working the dough out from the center of the pan into the corners using the heal of your hand. Some of the olive oil should seep over the dough.
PRO TIP: If the dough seems too elastic and will not move into the corners of the baking pan allow the dough to rest for 5 minutes then continue to work the dough into the corners.
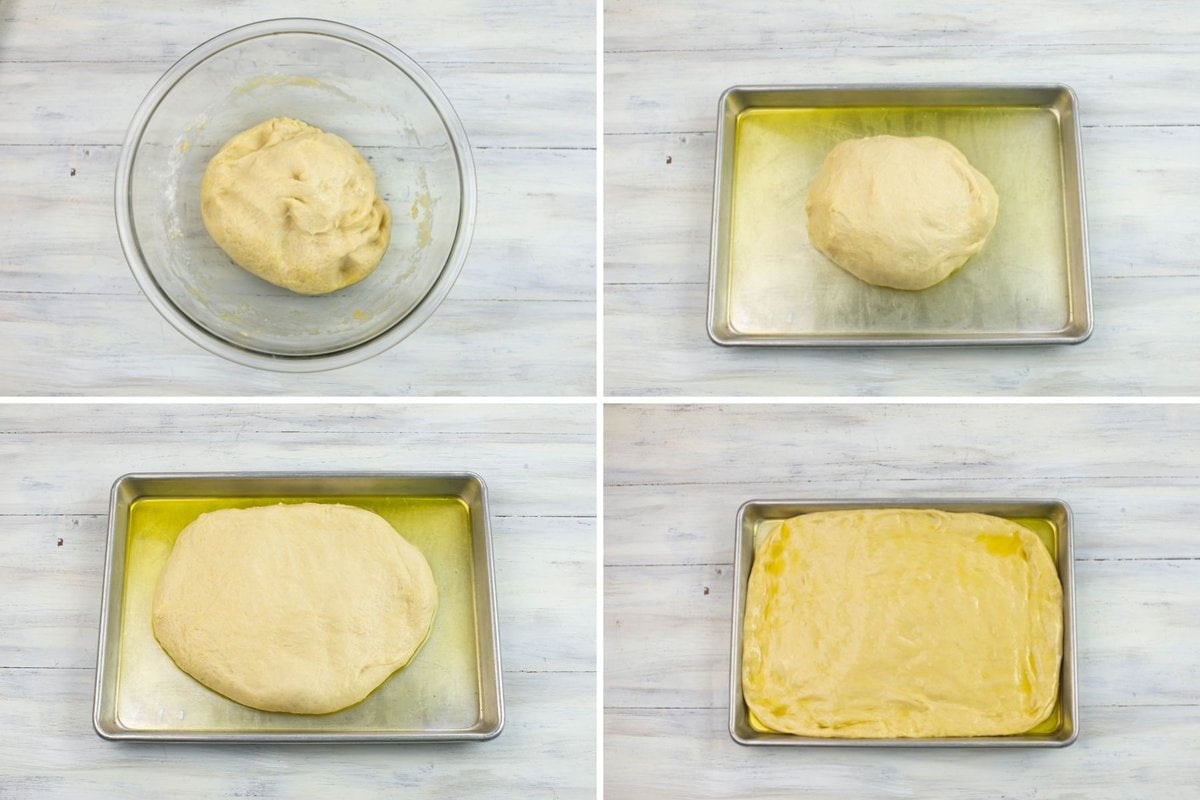
Cover the dough with a lint free dish towel and allow to rise until the dough rises up to the edges of the pan.
This could take 1 to 2 hours. In a warm kitchen, it takes around an hour.
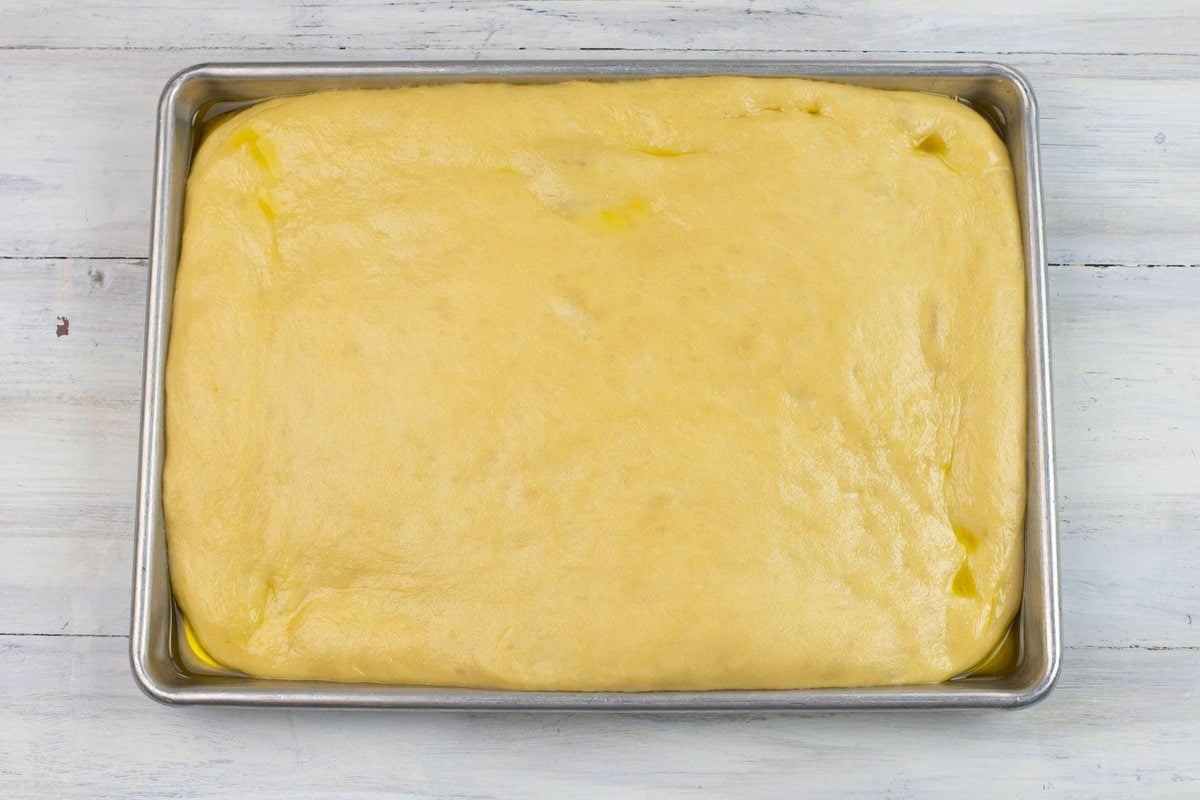
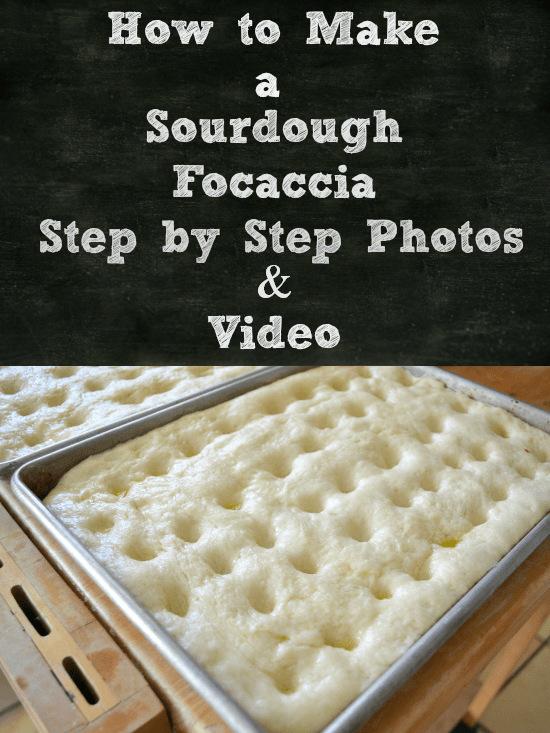
- Step 8: Once the dough has doubled use your finger tips to dock or dimple the dough. (Preheat the oven to 450 F. degrees at this point)
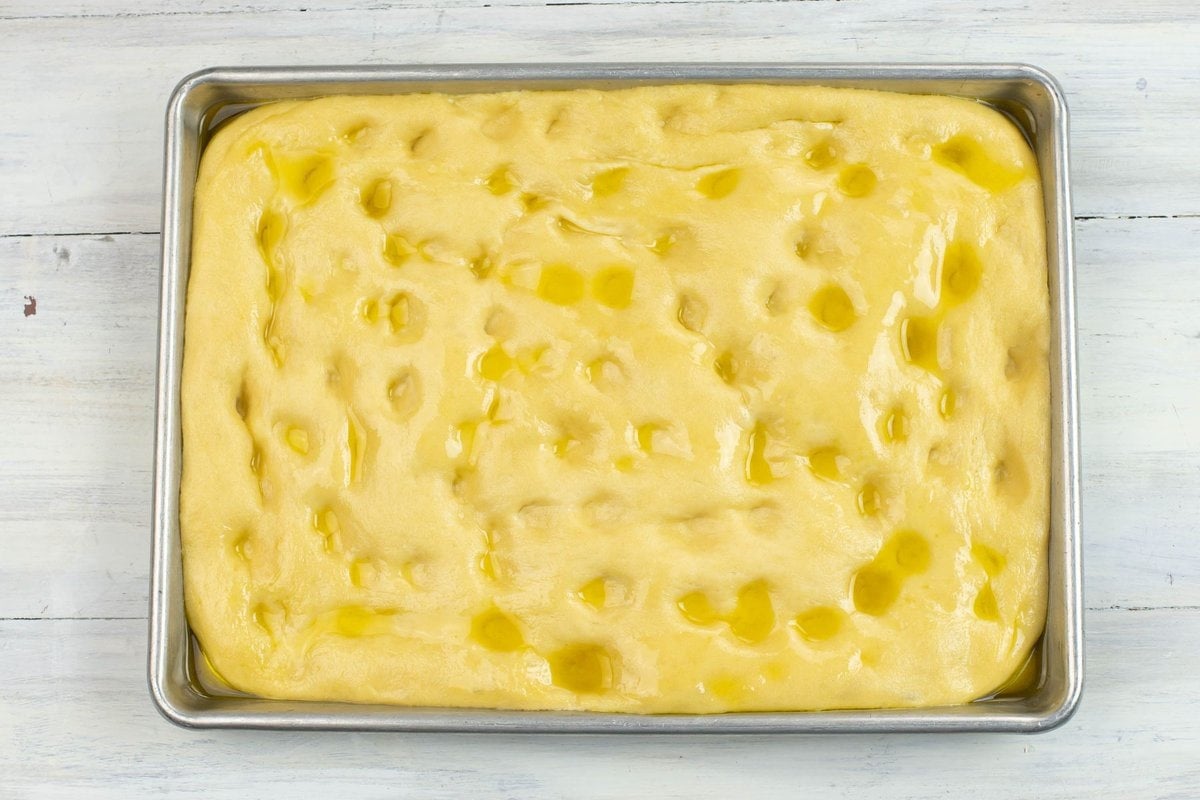
If you don't see olive oil pooling in the dimpled dough drizzle more oil over the dough until it starts to slightly pool in most of the docked areas.
At this point the Focaccia is now ready to be baked. You may add any toppings you would like.
You can drizzle with extra olive oil (if needed) and sprinkle it with coarse sea salt before popping it in the oven.
This recipe is perfect because you can top it with whatever you want or eat it plain. Both ways will taste exceptional.
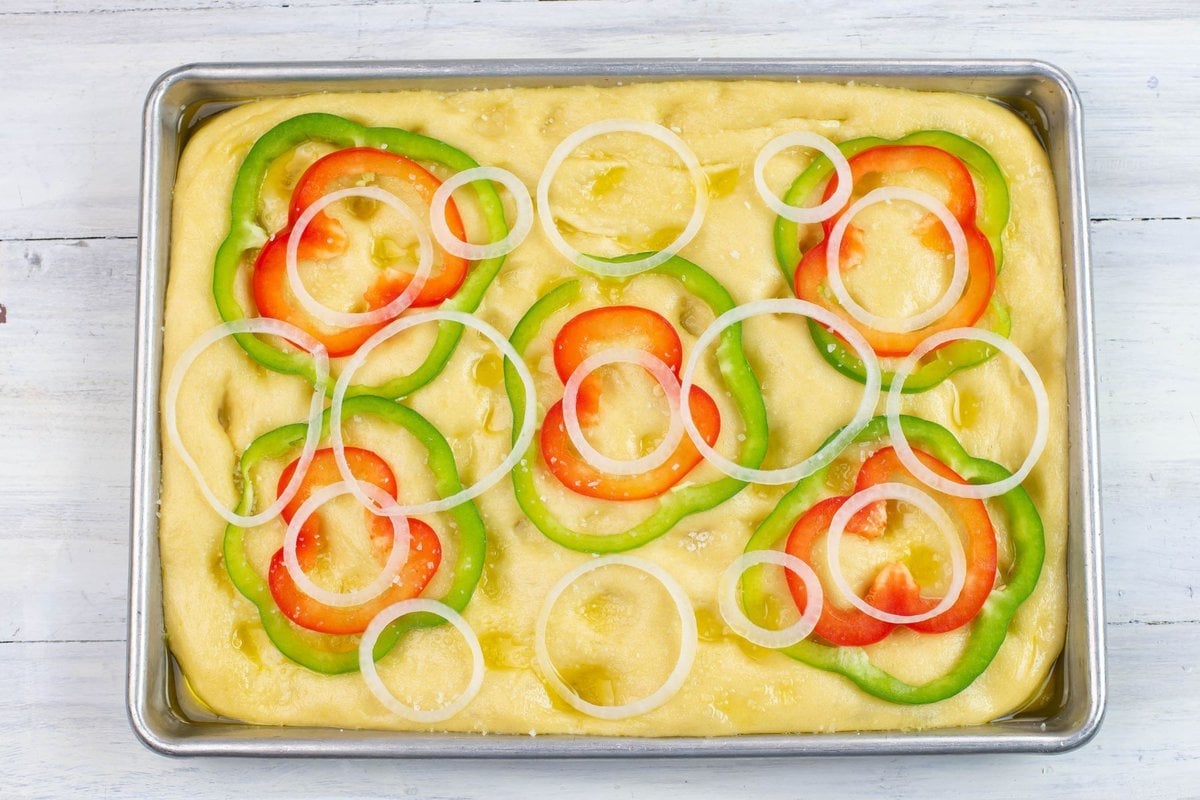
- Step 9: Bake in a 450 F, degrees oven for about 20 minutes or until the top is golden brown.
Remove the pan from the oven and cool on a wire rack for five minutes. Carefully remove the flat bread from the pan using a wide spatula.
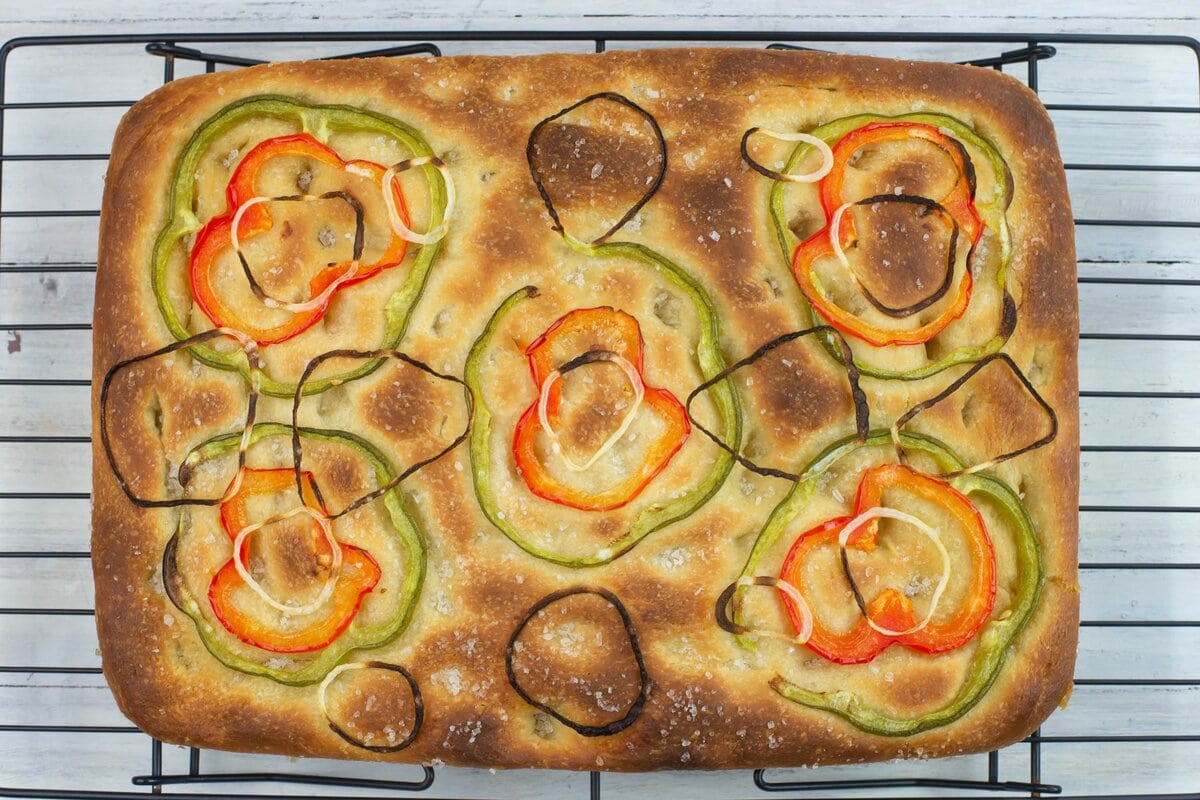
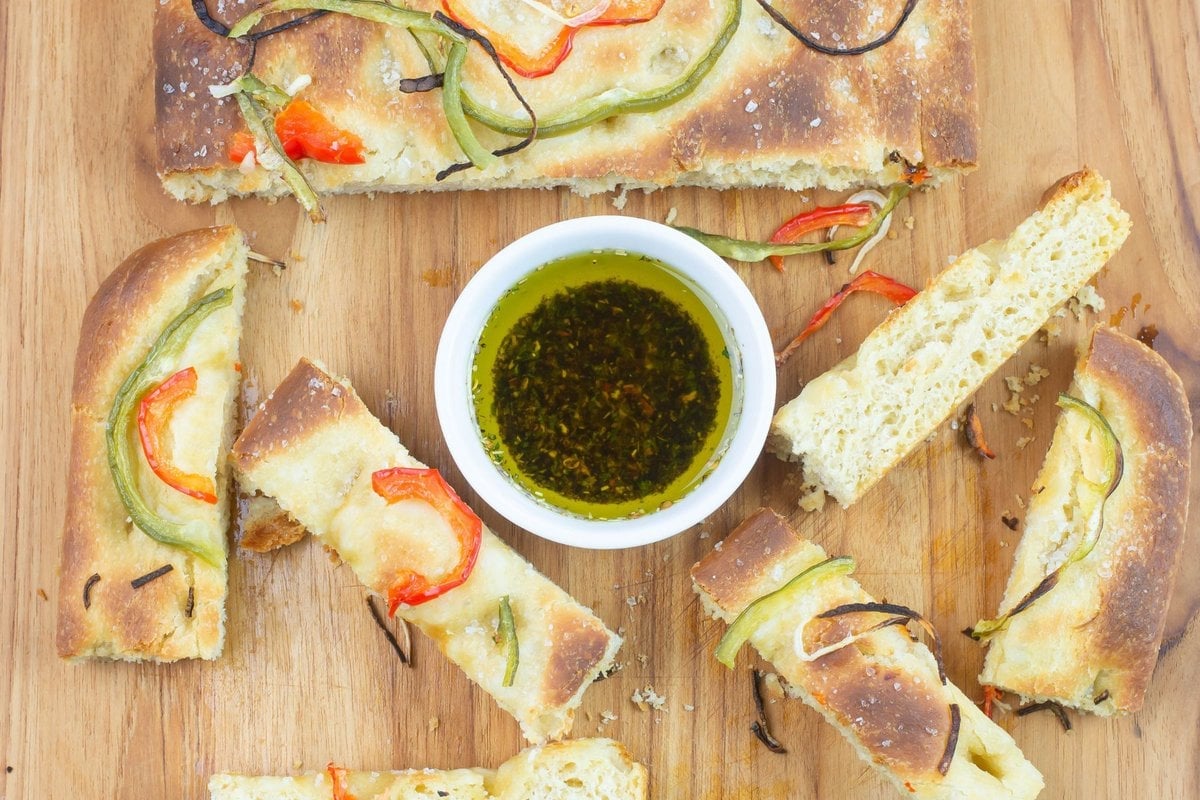
Place the bread on the wire rack and cool to room temperature before cutting into bread sticks.
Recipe FAQs
Homemade focaccia will last two to three days stored in an airtight containers. It will last up to 5 days if refrigerated.
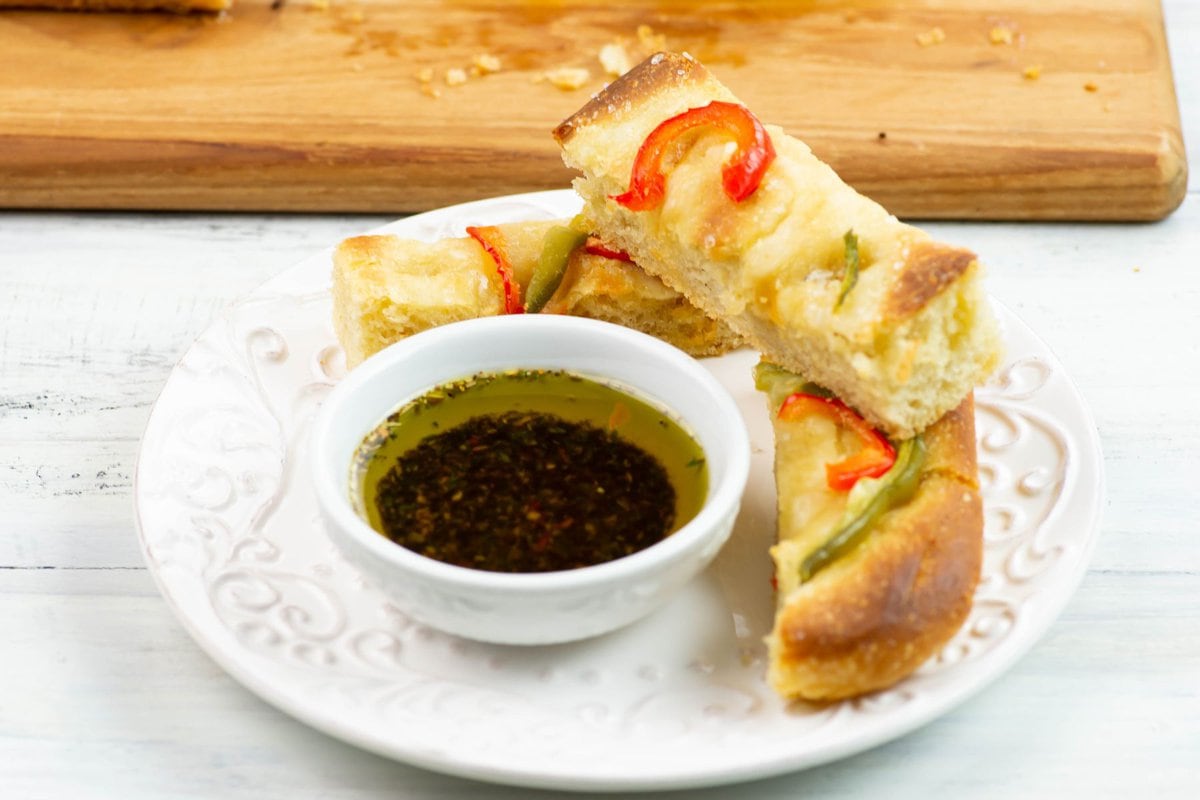
Focaccia goes well with any Italian meal. But it can also be served as an appetizer before the main course and with any favorite soup or stew.
To best way to reheat and retain the buttery crispy texture of focaccia you should reheat it in the oven at 375 F. degrees for 5 to 8 minutes. You can also use a toaster oven or the air fryer at the same temperature and time.
Focaccia Toppings
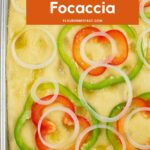
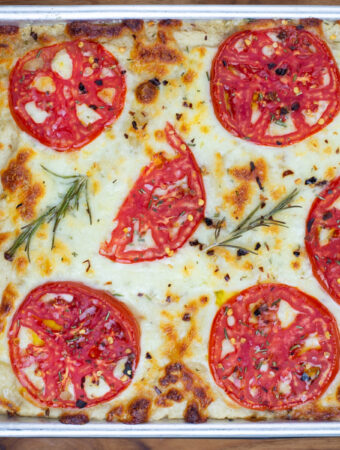
I like to add toppings to focaccia like I did with this White Cheddar Cheese and Onion Sourdough Focaccia.
There are many topping options you can use. Or you can simply sprinkle the top of the focaccia with sea salt and bake it.
- Sea salt
- Thinly sliced red and green peppers
- Tomato
- Thinly sliced onion
- Green or black olives
- Chopped garlic
- Cheese
Helpful Tools
Using the right tools is just as important as using the right ingredients. Make sure your recipes turn out perfect every time.
Recipe Expert Tips
- Water: always use untreated water when baking with sourdough starter or yeast.
- Sourdough Starter: You will need a fed and active sourdough starter to make this recipe. Feed your starter for at least 24 hours before starting.
- Times: The time listed here for the Sourdough Sponge and Focaccia rising times are an estimated time based on my experience. You may find that these steps take longer or less time based on the environment you are cooking in. The temperature and humidity will effect the times.
- Focaccia Baking Pans: If doubled this recipe will make one large rimmed 11 x 17-inch baking sheet or two 9 x 13-inch baking sheets.
Check out this Onion Cheddar Cheese Focaccia Appetizer recipe I made using this Sourdough Focaccia recipe.

More sourdough recipes
Check out these other sourdough recipes you can make with sourdough discard or a well fed sourdough starter.
Email questions or recipe requests to flouronmyface@gmail.com. Follow me on Pinterest, YouTube, Instagram and Facebook.
How to Make Sourdough Focaccia
Ingredients
Sourdough Sponge Ingredients
- ¾ cups active sourdough starter (always feed your starter the day before you are going to bake and stir before measuring. The sourdough starter needs to be active)
- ½ cup warm water (untreated)
- 2 tablespoons extra virgin olive oil
- 1 tablespoon honey
- ½ cup all-purpose unbleached flour
Focaccia Ingredients To Add to the sponge
- 2 cups unbleached all-purpose flour
- ¼ cup extra virgin olive oil (plus more for the pan)
- 1 teaspoon fine sea salt
- 1 tablespoon coarse sea salt
Optional Focaccia Toppings
- 1 small onion (thinly sliced)
- ½ med green sweet bell pepper (thinly sliced)
- ½ med sweet red bell pepper (thinly sliced)
Instructions
Instructions to Make Sourdough Sponge
- Make a sponge by mixing ¾ cup of sourdough starter, ½ cup of warm water, 2 tablespoons of olive oil, 1 tablespoon of honey, and ½ cup of unbleached all-purpose flour in a bowl.
- Cover the bowl with plastic wrap and place the bowl in a warm spot away from drafts.
- Allow the sourdough sponge to ferment and bubble for one to two hours or until bubbles of differing sizes are covering the surface.
Mix The Sourdough Focaccia Dough
- Uncover the bowl of sponge. Add1 ½ cups all-purpose flour, ¼ cup of olive oil and 1 teaspoon of fine sea salt to the bowl with the sponge. You will use the remaining ½ cup of flour to knead the dough.
- Mix the dough ingredients with the sourdough sponge until the dough is too stiff to mix with the spoon and most of the flour is mixed into the sponge.
- Kneading the dough in the bowl, dusting with the reserved half cup of flour for about 5 minutes. The focaccia dough should feel soft and mostly smooth.
- Form the kneaded dough into a tight ball and place the ball into the bowl. Drizzle with olive oil to cover the dough.
- Cover with plastic wrap or a lint free towel and allow to rise until doubled, about 1-½ to 2 hours.
- Prepare the baking sheet pouring ¼ of olive oil into the center of the pan, swirling to cover the bottom and sides.. (see notes)
- Once the dough has risen until doubled in size gently punch dough down.
- Place the ball of dough into the center of the oiled baking sheet.
- With the heal of your hand your work the dough out from the center of the pan into the corners until it fills the pan and is pushed up onto the sides of the pan forming a lip. If the dough is very elastic and pulling away, allow the dough to rest about five minutes and then continue.
- Cover with the pan with a lint free kitchen towel and allow the focaccia dough to rise in a warm area until roughly doubled in size, about an hour.
- Preheat oven to 450 degrees Fahrenheit.
- Once dough has risen, gently dock the dough with your finger tips all over the top, leaving little impressions in the soft dough. If the dough is a little dry on top, drizzle a bit more extra virgin olive oil over the top.
- Sprinkle the top with coarse sea salt and any other toppings you are using before baking.
- Bake for 20 minutes in the preheated oven or until the top is golden brown.
- Remove from the oven and allow to cool in the pan on a wire rack for five minutes. After 5 minutes remove the flat bread from the pan using a wide spatula and transfer to the wire rack to cool completely before cuttings.
- Cut into squares or bread sticks and serve warm.
Video
Recipe Expert Tips
- Water: always use untreated water when baking with sourdough starter or yeast.
- Sourdough Starter: You will need a fed and active sourdough starter to make this recipe. Feed your starter for at least 24 hours before starting.
- Times: The time listed here for the Sourdough Sponge and Focaccia rising times are an estimated time based on my experience. You may find that these steps take longer or less time based on the environment you are cooking in. The temperature and humidity will effect the times.
- Focaccia Baking Pans: This recipe will make one 9 x 13-inch baking sheet or when doubled a large 11 x 17-inch baking sheet.







Candy
Have used this recipe multiple times and it consistently comes out delicious!
Thank you for sharing!
Arlene Mobley
Candy thank you! I keep a sour dough starter going just so I can make this focaccia recipe any time I have a craving.
Christine Arendas
Excellent results. I have wanted to make focaccia bread for years.
Finally did it last night. I made sure my starter was VERY well fed for two days before I attempted this venture. Glad I did, even with
100% sprouted spelt flour the bread was light and airy. Didn’t finish baking until midnight and I just had to sample just a tiny piece before bed, it smelled so good! Well, my tiny piece turned into a pretty good size piece. Used green onions, kalamata olives and fresh cilantro as a topping with a little sprinkling of salt and a little extra olive oil. Soooo goood! Better than the focaccia bread sandwich I had in San Francisco years ago. Followed your recipe to the letter. Perfect! My husband is Italian and he loved it.
Jen
Hi. Just starting out on the sourdough journey - when making a starter and feeding it, do you take any out when adding fresh flour and water?
Arlene Mobley
Hi Jen
I do not pour off any discard when I am making a starter unless the container I am using is getting full.
Bill T
I am sorry but your video does not work at all. Very frustrating!
Arlene Mobley
Bill not sure what the problem is but the video is working fine for me. Try clearing your browser history.
Marvin HeartofGold
Having recently become absolutely obsessed with sourdough I've been looking for great recipes to bake with it. I tried this one out and...omg! I don't have a digital scale yet so I just adjusted the flour/water ratio a little at a time until the dough seemed right. Then I added in some rosemary and topped with shredded parm before baking. My husband declared it the best bread he's ever had and the first batch is nearly gone after less than a day. I have a feeling this focaccia with various flavor combos will become a regular in my kitchen. Thank you so much for your recipe and vid!!!
Arlene Mobley
Marvin
I love this recipe! And I do change up the toppings and no matter what toppings I use the bread is always amazing. Thanks for stopping by and letting me know how much you and your husband loved the recipe!
BIANCA GIUDICI
Hi Arlene,
This was the first sourdough focaccia I have made and i was great!
I would like just to share two comments about that (considering that i have made half recipe:
First, I only used almost 1 1/2 of flour ( the dough was good enough the same as shown in your video).
Second, It took more hours for rising (i started doing in mourning and ended up eating 10 pm.... it means a long rest). And notice that i am from São Paulo, Brasil (not a cold weather, yesterday was around 22 C).
On the other hand, I love it! Thanks for sharing!
Bianca
Arlene Mobley
Bianca
Glad to hear you enjoyed the recipe. It sounds like your sourdough starter might not have been very active. Sourdough start can take awhile to get going. If you plan on making the Sourdough Focaccia again start feeding your starter a few extra days ahead of time to get it going really good. When I am feeding my sourdough starter I will feed it about 4 times a day for 2 or 3 days to make sure it is active. Lots of bubbles should be in the starter. It should almost be bubbling over. Thanks for stopping by!
Ozan Benlioglu
Your recipe does not work unfortunately. There is too much sourdough starter in it and little time to proof adequately. Please kindly consider revising. 3-4 hours of warm bulk followed by 12 to 18 hours of retarding in the fridge works much better with sourdough focaccios. Also max 20% leaven. Thanks
Arlene Mobley
Hi Ozan
Thanks for stopping by. All sourdough starters are not grown equally. What works for me in my kitchen may not work in your kitchen. That is the fun part of baking with a live sourdough starter. You have to figure out how it works for you and make adjustments.
Jennifer Jacobs
I love this recipe. I've made it a couple of times and it's delicious! Do you think it would work to shape into rolls for sandwiches? I'm making pulled pork tomorrow and I'd like to have soft rolls to put it on. But I'd rather not use any yeast.
Arlene Mobley
Jennifer
That is a good question. It would probably work very well. Let me know how it turns out if you try it.
Jennifer Jacobs
Hi! I'm new to bread making and sourdough and found your recipe and video super-helpful. Thanks so much! I'm finding that the hardest thing about baking bread for me is the timing. I never can time it right so that I have fresh bread for dinner. It seems like it's always ready at midnight! But, today I'm starting early.... I'm making this focaccia now and I have a question.... It says to leave the sponge for an hour or so. If I get distracted and have to leave it for more than that, is it okay? How long can I leave it? What about the other rise times? Can I leave it for longer on those if I want to? Thanks for your help!!
Arlene Mobley
Jennifer
Thank you so much for trying the recipe. It is a very good one.
Leaving the sponge for a longer period of time is no problem. It will develop a tangier sourdough flavor the longer you leave it.
For the next rise, it is best to bake it as soon as possible but a half hour or hour longer won't hurt it.
If you need to when you press the dough into the pan you could wrap it in plastic wrap at this point and refrigerate it to bake at a later time that day or the next day.
If you do this you also need to factor in the time to allow it to warm to room temperature and rise before baking it.
I'll be sharing a very easy to make no-knead (no second rise needed) Rosemary and Garlic bread recipe later this week.
Jennifer Jacobs
Thanks for replying! I did let that sponge sit for about 6 hours ultimately. After that, followed the recipe almost exactly and it came out FANTASTIC! After the first rise I put half of the dough in the refrigerator and only made one 9x13 pan of focaccia. I plan to make the other half tomorrow.Thanks for the tip about letting it come to room temp first.
I look forward to seeing/trying your Rosemary Garlic bread recipe! Thanks for making this blog!
Arlene Mobley
Jennifer
Thank you for being a reader! I'm glad you loved the recipe. This dough would also make a lovely pizza crust.
Crystal
Hi there thank u for sharing this wonderful recipe. I used to work at a bakery and every once in awhile my boss would make all of us focaccia bread pizza and it was the best ever. I'm wondering if you think I should bake the focaccia bread plain first and then add pizza toppings and put back in the oven or add all topping while the dough is still raw then bake it all at once?
Arlene Mobley
Hi Crystal
I've never made pizza with my Focaccia recipe. What a great idea. If I was going to try this, I would bake it for half the time plain. Then add the toppings and bake it again. Keep an eye on it the first time you try it so the bottom doesn't burn.
Farrugia
Hi Arlene, greetings from the UK!
Dropping by to say thanks for the recipe and video - followed it to the dot and the focaccia turned out great. I did use wholemeal flour instead since only had that at the time, but starter was still raised on strong white, so turned out quite good!
Definitely a keeper, and that video was also very helpful 🙂
Keep rockin'!
Arlene Mobley
Farrigia
So glad to hear you enjoyed the recipe and video!
Jennifer
Hi did you use American cup or UK cup size please?
Arlene Mobley
Hi, Jennifer, I am in the US so it was the American cup.
rachna
Hi....I tried this recipe today and saw your video too, but my dough is much harder than what yours is seen in the video & is much different from regular almost runny focaccia dough. please advice.
Arlene Mobley
Hi Rancha
Sorry to hear the recipe didn't turn out for you. Did you level off the top of each cup of flour? It sounds like you may have used more flour then the recipe calls for.
Evan
Its always the better option to weigh your flour or any ingredients for that matter on a scale. I hate using cup measuring for dry ingredients because theres way too many times that the flour is much more airy or more dense resulting in different overall weights, hense why one persons dough is dryer than the next using the same recipe where cup measurements are involved.
Arlene Mobley
Evan
Weighing flour for a recipe is, of course, more accurate but the average home baker measures by the cup. Thanks for stopping by!
Jeannine
I'm sure there's a way for you to measure the weight of your flour, and give that as an option on your recipe? King Arthur Flour gives that option, and while I like King Arthur Flour, I also like to venture out and visit food bloggers to fine unique recipes as well. Bread flour and all purpose flour will absorb humidity differently in each environment, and giving what preference is for your recipe would be much appreciated. Bake the world a better place. 🙂
Arlene Mobley
Hi Jeannine
I don't have a proper scale to use. I'll keep your suggestions in mind. Thanks for visiting!
Joe
Jeannine : 1 cup of flour is 125 grams. 1 cupof water is 227 grams and starter is assumed a density of 1 so a cup ITV starter is also 227 grams.
Scaling ingredients is the preferred way of baking!
Bea
Thank you for the great recipe!
Arlene Mobley
Your welcome Bea