

I've mentioned a few times in the past that Cake Pops are served at all our baby showers and pretty much every birthday party we throw. These pink and grey cake pops were served as party favors for a friends baby shower.
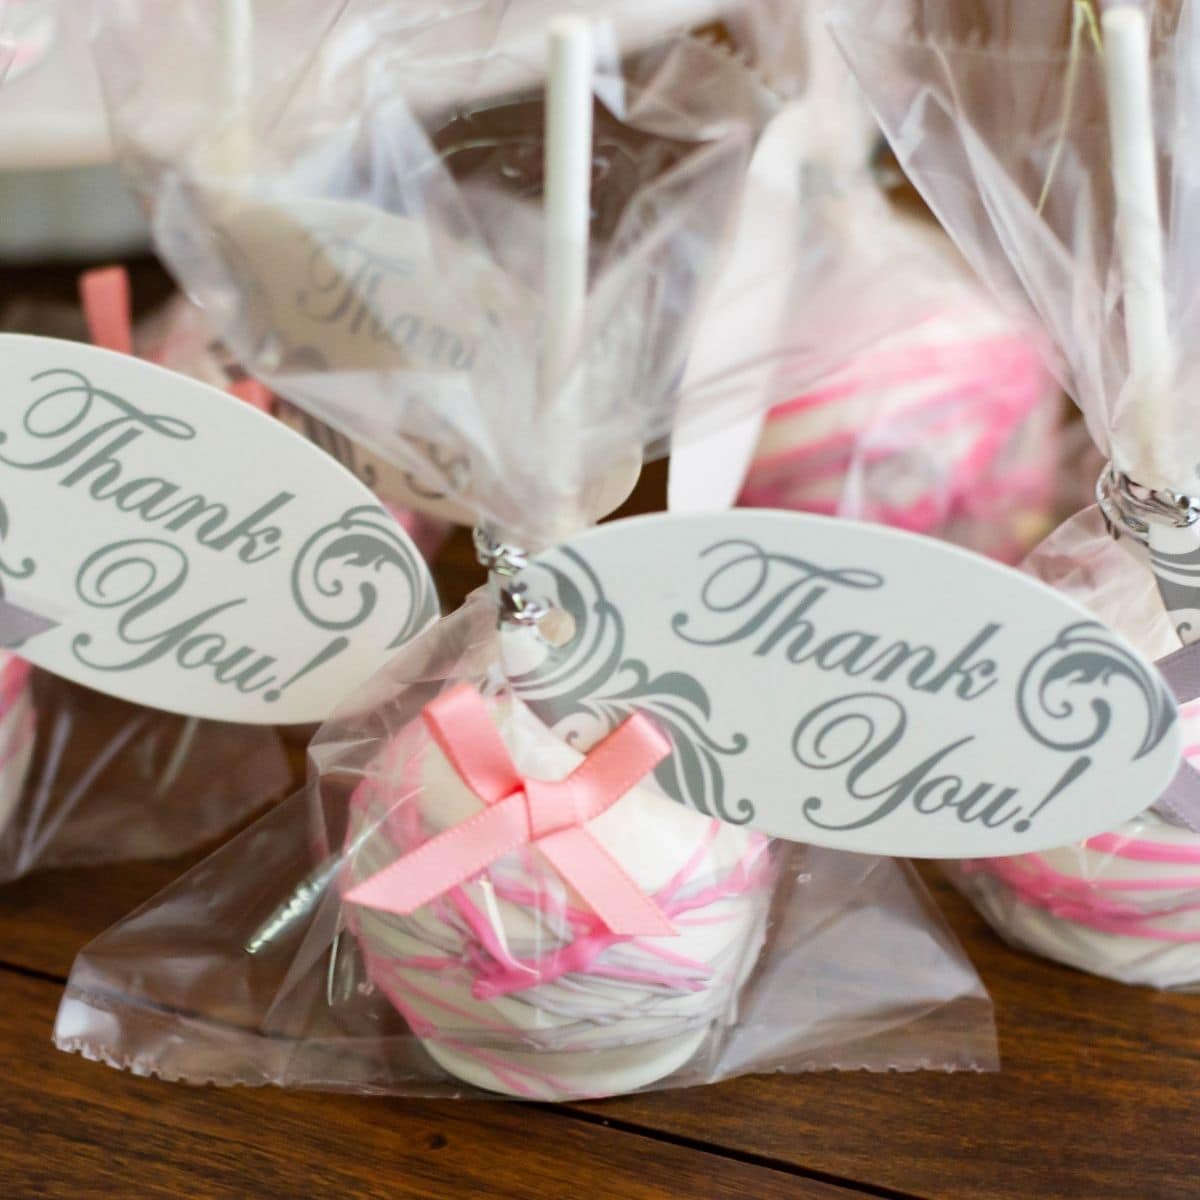
Last week I made these pink and grey themed cake pops for a Girl Baby Shower my daughter Megan co-hosted for one of her friends.
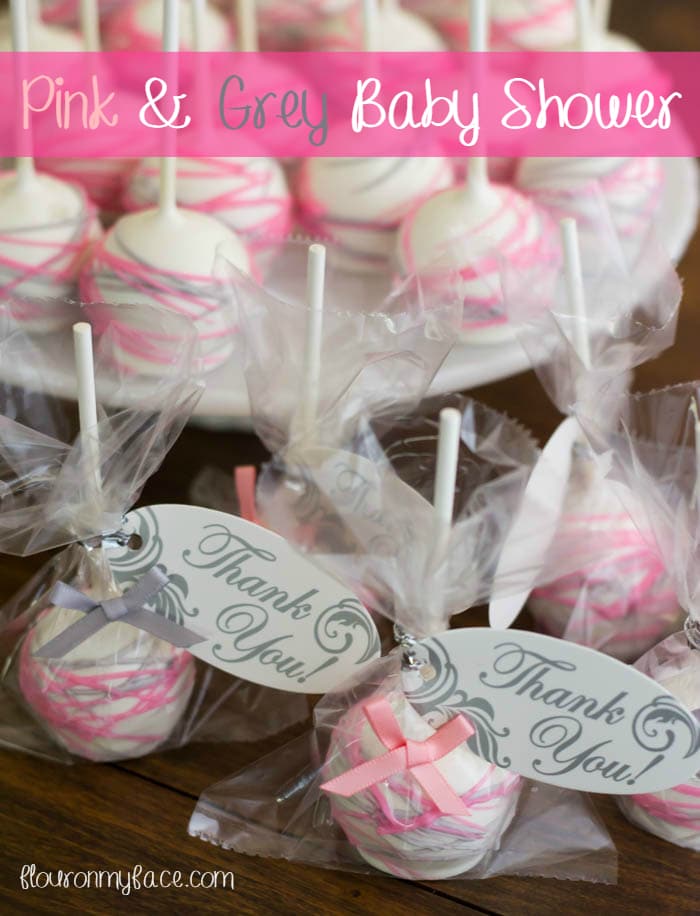
Easy Baby Shower Cake Pops
We have thrown so many girl baby showers that we are running out of girl baby shower theme ideas.
This girl baby shower theme was a Grey and Pink Girl Baby Shower Theme.
As I've mentioned in a few of my other cake pop recipes that I like to decorate my cake pops pretty simply.
It takes a little bit of time to make the cake pops. I'm usually in a hurry to get finished so I need to get the decorating and packaging done quickly.
The easiest way I have found to decorate Cake Pops is to do a drizzle in contrasting colors.
The cake pops look beautiful and the color options are endless.
I colored the cake mix pink. I didn't think to take a picture of the inside of the Pink and Grey Cake Pops and I didn't go to the baby shower so I could get a picture there. To color the cake I used Americolor Bright Pink.
How to make Girl Baby Shower Theme Pink and Grey Cake Pops
- 1 boxed white cake mix plus ingredients to make
- 7-10 drops Americolor Bright Pink food dye
- 1 can cream cheese frosting
- 2 bags Wilton Bright White Candy Melts
- 1 bag Wilton Black Candy Melts
- 1 bag Wilton Pink Candy Melts
- 36-48 Wilton lollipop sticks
- 36-48 Wilton cellophane treat bags and ties
- Crisco solid shortening
- Thank you tags (Party City)
Directions
- Bake the cake as directed on the package and cool completely.
- Crumble cooled cake into fine crumbs.
- Mix ¼ of the can of frosting into the crumbs to start.
- Add more frosting a teaspoon at a time until all dry crumbs are moistened and a teaspoon of the dough holds together when rolled into a ball.
- Using a small cookie dough scoop form 36-48 cake balls.
- Place the cake balls on a cookie sheet in a single layer as you form them.
- Chill in the refrigerator until firm (about 15 minutes) or until you are ready to dip them.
- Melt half a bag of Wilton Bright White candy melts at 10-20-second intervals in a narrow and deep container adding 1 tablespoon of solid shortening to the container to help thin the candy coating for 20 seconds.
- After 20-seconds stir and return to the microwave for 10 seconds and stir again. Repeat until the candy coating is thin enough to slowly run off a spoon.
- Add more shortening in small amounts as needed.
- Dip the tip of a lollipop stick ¼ inch into the melted candy melts. Insert the stick into the cake pop ball and return to the cookie sheet cake ball down. Gently tap the cake pop on the cookie sheet to form a slight base for the cake pop to stand upright. Repeat with all cake pops. Return the cookie tray to the refrigerator so they can firm up.
- When ready to dip the cake pops remove the cookie tray from the refrigerator and reheat the candy melts until they are thin again. No need to add any more shortening at this point.
- Grasp one cake pop by the end of the stick and dip it down into the melted candy melts to the stick, covering the entire cake pop ball.
- Gently tap and twirl the cake pop over the container allowing the excess to drip back into the container.
- Place the cake pop down on a cookie sheet covered with parchment paper centering it and standing it straight up.
- Repeat with remaining cake pops, melting more candy melts as needed.
- Allow candy coating to harden completely 30-60 minutes.
- Decorate the cake pops with a drizzle of melted candy melts in pink and grey.

Note: There are no grey Wilton Candy Melts so I had to mix a couple of black candy melts into the white candy melts.
The ratio I used is 2 Black candy melts plus 20 Bright White Candy Melts, plus 1 teaspoon Crisco.
Email questions or recipe requests to flouronmyface@gmail.com. Follow me on Pinterest, YouTube, Instagram and Facebook.

Girl Baby Shower Cake Pops
Equipment
- 48 Thank you tags
Ingredients
- 1 box white cake mix, prepared
- 10 drops Americolor Bright Pink food dye ((7-10 until you like the color))
- 1 tub cream cheese frosting
- 2 bags Wilton Bright White Candy Melts
- 1 bag Wilton Black Candy Melts
- 1 bag Wilton Pink Candy Melts
- 2 tablespoons Crisco solid shortening
Instructions
- Bake the cake as directed on the package and cool completely.
- Crumble cooled cake into fine crumbs.
- Mix ¼ of the can of frosting into the crumbs to start.
- Add more frosting a teaspoon at a time until all dry crumbs are moistened and a teaspoon of the dough holds together when rolled into a ball.
- Using a small cookie dough scoop form 36-48 cake balls.
- Place the cake balls on a cookie sheet in a single layer as you form them.
- Chill in the refrigerator until firm (about 15 minutes) or until you are ready to dip them.
- Melt half a bag of Wilton Bright White candy melts at 10-20-second intervals in a narrow and deep container adding 1 tablespoon of a solid shortening to the container to help thin the candy coating for 20 seconds.
- After 20-seconds stir and return to the microwave for 10 seconds and stir again. Repeat until the candy coating is thin enough to slowly run off a spoon.
- Add more shortening in small amounts as needed.
- Dip the tip of a lollipop stick ¼ inch into the melted candy melts. Insert the stick into the cake pop ball and return to the cookie sheet cake ball down. Gently tap the cake pop on the cookie sheet to form a slight base for the cake pop to stand upright. Repeat with all cake pops. Return the cookie tray to the refridgerator so they can firm up.
- When ready to dip the cake pops remove the cookie tray from the refrigerator and reheat the candy melts until they are thin again. No need to add any more shortening at this point.
- Grasp one cake pop by the end of the stick and dip it down into the melted candy melts to the stick, covering the entire cake pop ball.
- Gently tap and twirl the cake pop over the container allowing the excess to drip back into the container.
- Place the cake pop down on a cookie sheet covered with parchment paper centering it and standing it straight up.
- Repeat with remaining cake pops, melting more candy melts as needed.
- Allow candy coating to harden completely 30-60 minutes.
- Decorate the cake pops with a drizzle of melted candy melts in pink and grey.
Nutrition
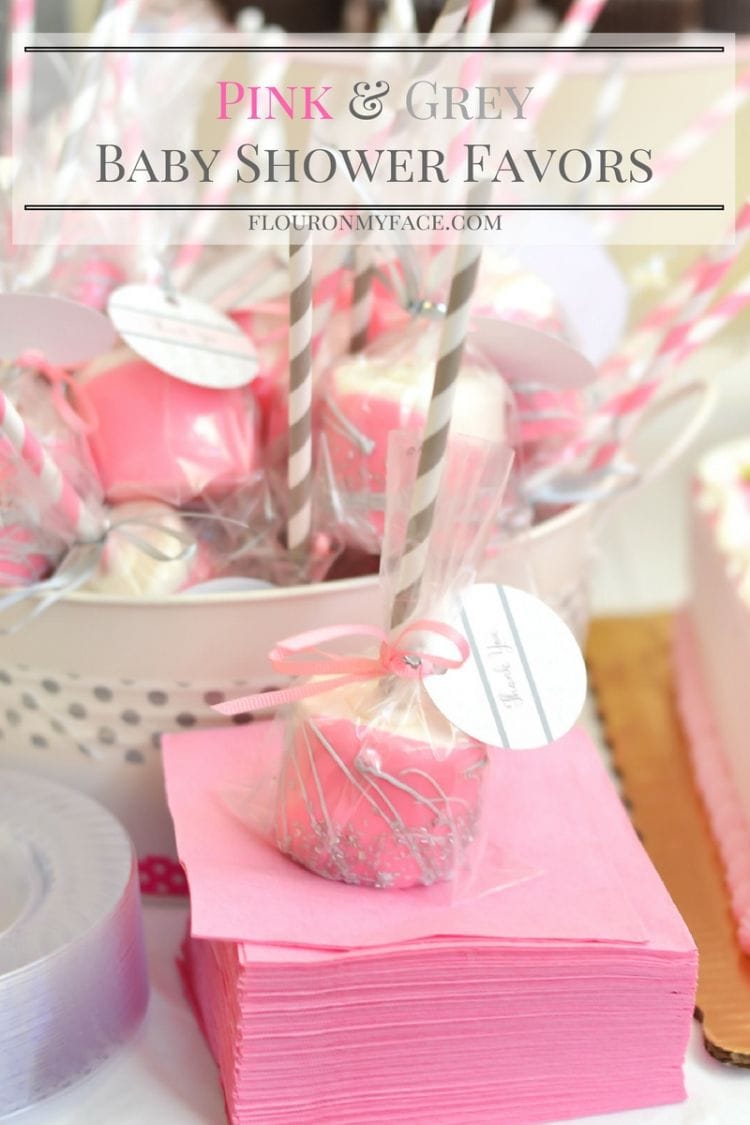
More Easy Pink and Grey Baby Shower Party Favor Ideas
Here is another easy pink and grey baby shower favor that is easy to make and very inexpensive.
Planning a baby shower can be very expensive and these candy-coated giant marshmallows can be made quickly and look beautiful on a dessert table.
Chocolate dipped marshmallows are one of the easiest party favors you can make. Another versatile diy party favor that can be customized for any type of birthday party theme, baby show theme or holiday.
Check out my in-depth How to Make Cake Pops post for step by step directions along with tips on how to make perfect Cake Pops.

Need a Boy Baby Shower Cake Pop theme?
Check out the Lion King Baby Shower I threw for my daughter-in-law last year.


Leave a Reply